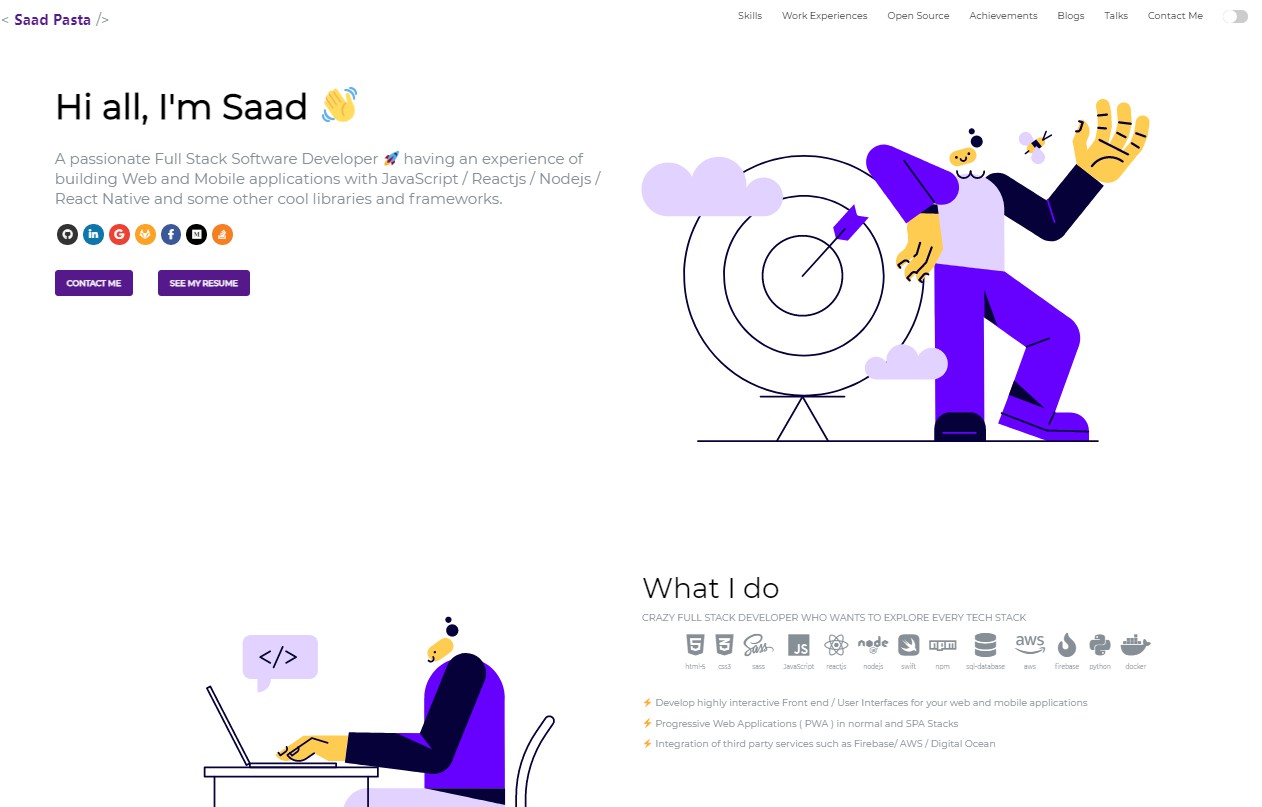
Software Developer Folio
A clean, beautiful and responsive portfolio template for Developers!
Just change src/portfolio.js to get your personal portfolio. Customize portfolio theme by using your own color scheme globally in the src/_globalColor.scss file. Feel free to use it as-is or personalize it as much as you want.
If you'd like to contribute and make this much better for other users, have a look at Issues.
Created something awesome for your fork of the portfolio and want to share it? Feel free to open a pull request.
Portfolio Sections
✔️ Summary and About me
✔️ Skills
✔️ Education
✔️ Work Experience
✔️ Open Source Projects Connected with Github
✔️ Big Projects
✔️ Achievements And Certifications ?
✔️ Blogs
✔️ Talks
✔️ Podcast
✔️ Contact me
✔️ Twitter Timeline
✔️ Github Profile
Getting Started
These instructions will get you a copy of the project up and running on your local machine for development and testing purposes.
You'll need Git and Node.js (which comes with npm) installed on your computer or use Docker.
[email protected] or higher
[email protected] or higher
[email protected] or higher
Docker Commands
1) BUILD IMAGE : docker build -t developerfolio:latest .
2) RUN IMAGE: docker run -t -p 3000:3000 developerfolio:latest
How To Use
From your command line, clone and run developerFolio:
# Clone this repository
git clone https://github.com/saadpasta/developerFolio.git

# Go into the repository
cd developerFolio

# Setup default environment variables

# For Linux
cp env.example .env
# For Windows
copy env.example .env

# Install dependencies
npm install

# Start a local dev server
npm start
Linking Portfolio to Github
Generate a Github personal access token following these instructions (make sure you don't select any scope just generate a simple token). If you are using Github Actions to deploy your portfolio you can skip this section.
- Create a file called .env in the root directory of your project (if not done already in section: How To Use
Note: Configuring environment variables before deploying your portfolio is highly recommended as some components depend on API data.
- DeveloperFolio
  - node_modules
  - public
  - src
  - .env         <-- create it here
  - env.example  <-- this is the base file
  - .gitignore
  - package-lock.json
  - package.json
- Inside the .env file, add key
REACT_APP_GITHUB_TOKENand assign your github token like this, also add your username asGITHUB_USERNAME
// .env
REACT_APP_GITHUB_TOKEN = "YOUR GITHUB TOKEN HERE"
GITHUB_USERNAME = "YOUR GITHUB USERNAME"
Set showGithubProfile to true or false to show Contact Profile using Github, defaults to false.
Warning: Treat your tokens like passwords and keep them secret. When working with the API, use tokens as environment variables instead of hardcoding them into your programs.
Note: Open Source Projects section only show pinned items of your Github.
If you are seeing something as shown below, follow these instructions.

If the above solution still doesn't work, visit the wiki page.
Change and customize every section according to your need.
Personalize page content in /src/portfolio.js & modify it as per your need. You will also need to modify index.html to change the metadata to reflect the title you want for your personal portfolio.
/* Change this file to get your Personal Porfolio */

const greeting = {
  /* Your Summary And Greeting Section */
  title: "Hi all I'm Saad",
  subTitle: emoji("A passionate Full Stack Software Developer ?"),
  resumeLink: "https://drive.google.com/file/d/1ofFdKF_mqscH8WvXkSObnVvC9kK7Ldlu/view?usp=sharing"
};

const socialMediaLinks = {
  /* Your Social Media Link */
  github: "https://github.com/saadpasta",
  linkedin: "https://www.linkedin.com/in/saadpasta/",
  gmail: "[email protected]",
  gitlab: "https://gitlab.com/saadpasta",
  facebook: "https://www.facebook.com/saad.pasta7"
};


const skillsSection = { .... }

const techStack = { .... }

const workExperience = { .... }

const openSource = { .... }

const bigProjects = { .... }

const achievementSection = { .... }

const blogSection = { .... }

const contactInfo = { .... }

const twitterDetails = { ... }
Using Emojis
For adding emoji ? into the texts in Portfolio.js, use the emoji() function and pass the text you need as an argument. This would help in keeping emojis compatible across different browsers and platforms.
Adding Twitter Time line to your Page
Insert your Twitter username in portfolio.js to show your recent activity on your page.
const twitterDetails = {
  userName : "Your Twitter Username"
};
Note: Don't use @ symbol when adding username.
Deployment
When you are done with the setup, you should host your website online.
We highly recommend to read through the Deploying on Github Pages docs for React.
Configuring GitHub Actions (Recommended)
First you should enable, Github Actions for the repository you use.
The Profile and the Repository information from Github is only created at the time of deploy and the site needs to be redeployed if those information needs to be updated. So, a configurable CRON Job is setup which deploys your site every week, so that once you update your profile on Github it is shown on your portfolio. You can also trigger it manually using workflow_dispatch event, see this guide on how to do that.
- When you are done with the configuration, we highly recommend to read through the Github Actions Configuring a workflow docs.
Deploying to Github Pages
This section guides you to deploy your portfolio on Github pages.
-
Navigate to
package.jsonand enter your domain name instead ofhttps://developerfolio.js.org/inhomepagevariable. For example, if you want your site to behttps://<your-username>.github.io/developerFolio, add the same to the homepage section ofpackage.json. -
In short you can also add
/devloperFoliotopackage.jsonas both are exactly same. Upon doing so, you tellcreate-react-appto add the path assets accordingly. -
Optionally, configure the domain. You can configure a custom domain with GitHub Pages by adding a
CNAMEfile to thepublic/folder. -
Follow through the guide to setup GitHub pages from the official CRA docs here.
Deploying to Netlify
You could also host directly with Netlify by linking your own repository.

For more information, read hosting on Netlify.