Life-Folio
A clean, cool yet quirky portfolio template for Developers

To view the above gif, click here
Getting Started with Life-Folio
Following these instructions will help you set up and run a copy of the project in your local system.
Prerequisites
You’ll need Git, Node.js and Yarn installed on your computer.
[email protected] or higher
[email protected] or higher
[email protected] or higher
Also, you can use NPM instead of yarn ☝️
[email protected] or higher
How To Use ?
From your command line, first clone Life-Folio:
# Clone this repository
$ git clone https://github.com/harini24/Life-folio.git

# Go into the repository
$ cd Life-folio

# Remove current origin repository
$ git remote remove origin
Then you can install the dependencies either using NPM or Yarn:
Using Yarn:
# Install dependencies
$ yarn

# Start development server
$ yarn start
Using NPM:
# Install dependencies
$ npm install

# Start development server
$ npm start
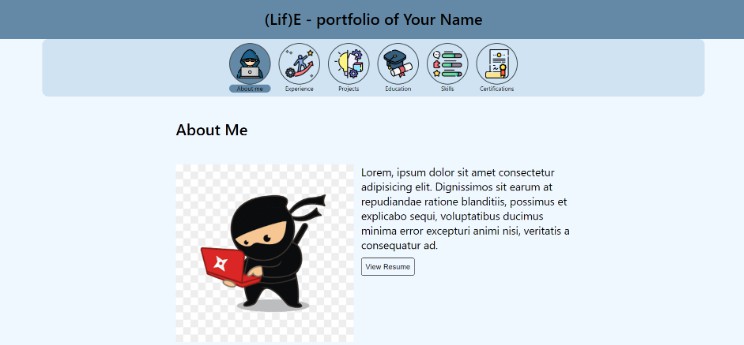
Once your server has started, go to this url http://localhost:3000/ and you will see the website running on a Development Server:

Instructions:
Step 1 – Setting up Header
By befault the header element would be displaying “(Lif)E – portfolio of Your Name”.
To replace “your Name” with expected text, Go to src\data\constants.tsx and under the Constants change value of USERNAME with expected text.
export enum Constants {
  USERNAME = "Your Name",
}
Step 2 – Setting up Footer
Go to src\data\Contact.json and provide the required contact infomation data in the respective fields
{
  "emailId": "[email protected]",
  "linkedIn": "https://www.linkedin.com/",
  "twitter": "https://twitter.com/home",
  "github": "https://github.com/"
}
Step 3 – Setting up sections
Go to src\data\sections.json, this file contains list of the Life-folio sections for which the informations can be set.
To Disable any section as per requirement, the hide property have be set to true.
For example if, Projects sections is to be disabled
{
  "name": "Projects",
  "key": "projects",
  "hide": true
}
Step 4 – Setting up the data of sections
Under src\data, you will find multiple json files named AboutMe.json, Experience.json, Education.json, Projects.json, Skills.json and Certifications.json.
Each respective to About Me, Experience, Education, Projects, Skills and Certification sections of the Life-folio.
AboutMe.json
Fill in the json with your date.
{
  "aboutMe": ""
}
Note: To replace the image and resume in About me section with your image own image and resume, under src\assets replace the pic.png and resume.pdf file.
Experience.json
Fill in the json with your date.
[
  {
    span: "Year Month -  current",
    company: "",
    linkedIn: "",
    twitter: "",
    location: "City, State",
    progress: [
      {
        role: "Role Name",
        span: "Year Month - Current",
        descriptions: [
          "Lorem ipsum dolor sit amet consectetur adipisicing elit. ",
          "In commodi consequatur quidem? Nemo officiis inventore praesentium hic saepe ut delectus",
        ],
      },
    ],
  },
];
Note: To add the image of companies you have been employed with in the Employment section, place those files under src\assets folder, following the naming convenstion such that <company-name>.<format>. Then in the src\data\constants.tsx file, import the added files and map them accordingly with company name.
Example, if company name is Google
import Google from "../assets/google.jpg";

// google : Google
// google - company name mentioned in Experience.json (lower cased)
// Google - imported name
export const logo: Map = {
  google: Google,
  verizon: Verizon,
};
Education.json
Fill in the json with your date.
[
  {
    name: "Institute name",
    location: "City, State",
    course: "Course Name",
    span: "year - year",
    specialization: "major name",
    score: "",
  },
];
Projects.json
Fill in the json with your date.
[
  {
    name: "Project name 1",
    description: "Lorem ipsum dolor sit, amet consectetur adipisicing elit.",
    sourceCode: "",
    demoLink: "",
  },
];
Note: To add the image or gifs of your projects in the Project section, place the files under src\assets following the naming convenstion such that <project-name>.<format>. Then in the src\data\constants.tsx file, import the added files and map them accordingly with project name.
import ProjectImg from "../assets/project.jpg";
// "project name 1": ProjectImg
// "project name 1" - project name mentioned in Projects.json (lower cased)
// ProjectImg - imported name
export const projectImage: Map = {
  "project name 1": ProjectImg,
};
Skills.json
Fill in the json with your date.
{
  softSkills: [
    "Skill name",
    "Skill name",
    "Skill name",
  ],
  hardSkills: [
    "Skill name",
    "Skill name",
    "Skill name",
  ]
}
Certifications.json
Fill in the json with your date.
[
  {
    name: "Certificate Name 1",
    org: "Issued Org name",
    issued: "month year",
    expiry: "",
    credentialId: "",
    credentialUrl: "",
    url: "",
  },
];
Deployment
Once you have done with your setup. You need to put your website online!
I have used Netlify to achieve this on the EASIEST WAY
Technologies used
- React – Front-End JavaScript library
- Typescript – Super set of JavaScript.
- Mui – Intuitive React UI tools
- Redux – State Container for JS Apps
Authors
- Harini Sivakumar – https://github.com/harini24
Status
License
This project is licensed under the MIT License – see the LICENSE.md file for details