Reactochart
Reactochart is a library of React components for creating data visualization charts and graphs. Components include line chart, bar chart, area chart, heat maps, scatterplot, histogram, pie chart, sankey diagram, and tree map.
Getting started
- Install reactochart using npm.
npm i reactochart --save
- Then you can import an individual Reactochart component:
import LineChart from 'reactochart/LineChart';
- If you prefer, you can import all of Reactochart at once, though this may hinder some optimizations, such as webpack tree-shaking:
import { XYPlot, XAxis, YAxis, LineChart } from 'reactochart';
or
import * as Reactochart from 'reactochart';
- Import reactochart's base styles
import 'reactochart/styles.css';
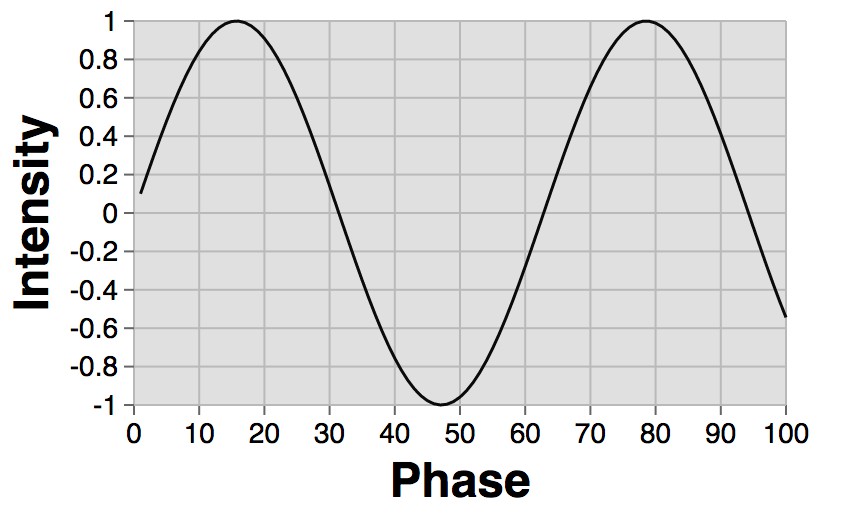
- Build your first chart and see it rendered! For example, the following code snippet:
import XYPlot from 'reactochart/XYPlot';
import XAxis from 'reactochart/XAxis';
import YAxis from 'reactochart/YAxis';
import LineChart from 'reactochart/LineChart';
import 'reactochart/styles.css';

const MyFirstLineChart = props => (
  <XYPlot>
    <XAxis title="Phase" />
    <YAxis title="Intensity" />
    <LineChart
      data={Array(100)
        .fill()
        .map((e, i) => i + 1)}
      x={d => d}
      y={d => Math.sin(d * 0.1)}
    />
  </XYPlot>
);
results in this:

Live Examples
The examples contain more details about each component and the prop-types it accepts. To run the examples locally and play with the different types of charts in a live code editor:
- Clone this repo and
cdto the newly-created directory - Run
npm run servein your terminal (note: if you're running Python in v3 or higher you'll need to runpython -m http.server) - Go to http://localhost:8000
Reactochart Components
Chart Foundations
XY Plot
XY Axis Components
Chart Types
Non-XY charts
XY charts
- AreaBarChart
- AreaChart
- AreaHeatmap
- BarChart
- ColorHeatmap
- FunnelChart
- Histogram
- LineChart
- MarkerLineChart
- RangeBarChart
- ScatterPlot
XY datum components (used by charts/axes)
Other
Development
If you'd like to contribute to the development this project, first fork & clone this repo, and then follow these steps:
Global dependencies
- This project uses NPM to manage dependencies and run scripts. Run
npm -vto check if you already have it installed.
If you don't have it, NPM is packaged with Node.js - download and run the
install package located on nodejs.org to install. - Babel is used to transpile ES6+ code to ES5 syntax. Install by running
npm install --global babel - Webpack is used to bundle the JS & styles for the examples. Install by running
npm install --global webpack
Project dependencies
- Run
npm installin the project root directory. This will install all of the project dependencies into the
node_modulesdirectory.
Development process
- Run
npm run devto run the development server (webpack-dev-server), which will serve a live development version of the examples at localhost:9876. - Make changes to the library code in the
srcdirectory, and/or changes to the examples in theexamples/srcdirectory. - If you'd like to make changes or add further component documentation, follow the example on
react-docgen. - Once you're happy with your library and/or documentation changes, run
npm run docs. This allows the documentation build to run with your updatedsrccode.git addandgit committhe updated build. git pushto your forked version of the repo.- Open a Github pull request with your changes against
master. ?
Notes
- Do not make any changes in the
liborexamples/builddirectories, as these directories are destroyed and
regenerated on each build. - The development server uses react-hot-loader to automatically
"hot reload" changes to React components, so refreshing your web browser is not necessary.