preducks
preducks is a visual prototyping tool for developers employing React component architecture and Redux state management, alongside the comprehensive type checking of TypeScript. In other words, you can create prototypes and export React / Typescript code!
preducks allows the user to visualize their application architecture dynamically, employing an application tree and a real-time component code preview. The user can create components and load instances of these components, as well as nested HTML elements, onto the tree. The user can also specify the desired shape of their Redux store and reducers, as well as interfaces to describe the desired shape of their data, and connections between their components and the store using Redux hooks. This architecture can then be exported as TypeScript application files to be used as a starter template for any repository.
how to use:
creating React components:
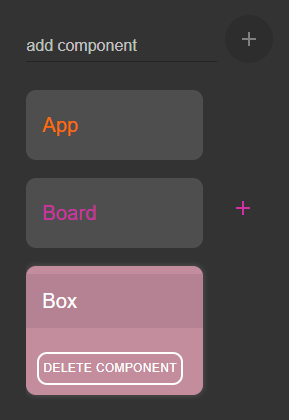
To create a new React component, type the name of your component into the add component box and click the + button next to it.

To add a component as a child of another component, click on the parent component in the list of components, and press the + button next to the component you wish to add as a child. To remove a child from a parent, click on the parent in the list, and press the - button which appears next to the component you wish to remove.
You will not be able to add a component's parents or
grandparents as its children.

To completely delete a component, click on it in the list of components and click the DELETE COMPONENT button.
creating interfaces for the Redux store:
Since our app uses TypeScript, we give you the opportunity to create TypeScript interfaces to describe the shapes of the data you wish to use in your Redux store. By default, we allow you to choose from the types number, string, boolean, and any. You can specify whether you want a value to be a single value of this type, or an array of these types. Once you define an interface, you will be able to use it as the data type of later values you define along with the default ones we provide. All of your interfaces will be exported in a TypeScript file, and they will be imported in components that need them.
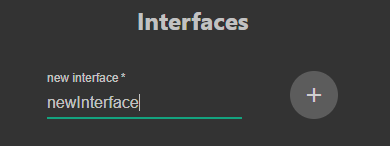
To create an interface, type in the name of the interface in the new interface field and press the + button next to it.
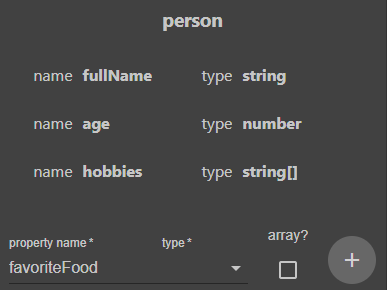
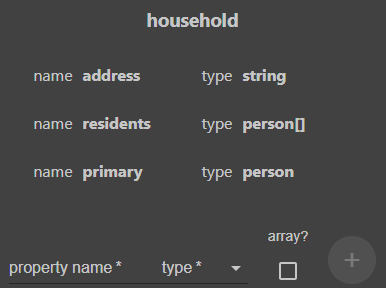
You can add fields to an interface by entering a name and type for a field, and can also specify if you want that field to be an array, then clicking the plus button next to the form fields. Here we create an interface to describe a person data type. We also create a household interface that uses the person interface we just made in a few of its fields.
To delete a field, click the trashcan icon that appears next to the field when you hover over it.
To delete the entire interface, click on the trashcan icon that appears next to the interface's name.
creating reducers for the Redux store
The form to create reducers appears below the form to create interfaces. You create one the same way as interfaces. Just type the name of the reducer into the field and click the + button. You can make multiple reducers. We combine them for you into one Redux store.
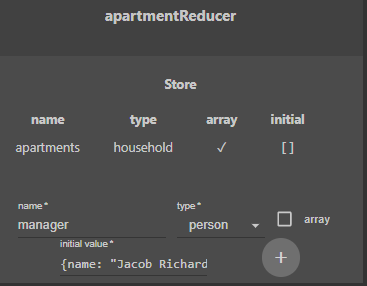
Once you create a reducer, you can start adding properties to its store. Specify a name for the propety, its type, whether or not it's an array, and an initial value. This will be used as the initial state for your Redux store, and we also generate a TypeScript interface to describe the shape of your store.
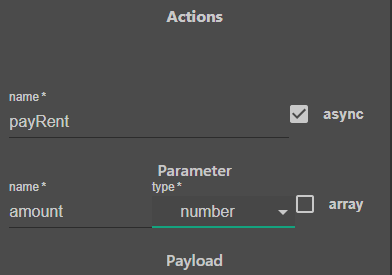
Under the store configuration options, you can also define action creators. This is mainly just to create the boilerplate and type definitions; you'll have to add the logic for the action creators yourself once you export your project. You can provide a name for your action creator, specify whether or not it's asynchronous, give a name and type to the parameters expected by the action creator, and specify the type of its payload.
As before, you can delete individual store properties or actions by clicking on the trashcan icon that appears when you hover over them, and you can delete the entire reducer by clicking on the trashcan icon that appears next to the reducer name.
connecting React components to the Redux store:
You can connect a component to the Redux store (and also add local state to a component if necessary) using the local state & redux connection tab at the bottom of the app.
We use Redux hooks (useSelector()) to connect components to the Redux store rather than using a mapStateToProps() function and wrapping the exported component in connect().
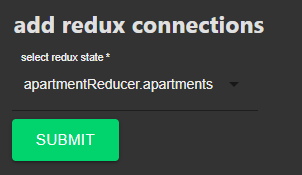
You can use the dropdowns to select which store properties you want your component to connect to, and to import actions you want your component to be able to dispatch. (Again, we use the useDispatch() hook to give you access to dispatch() rather than using a mapDispatchToProps() function).
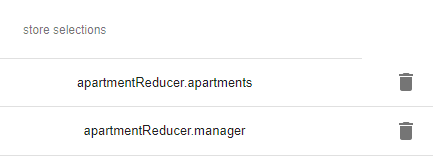
When you add store selections or actions to a component, they will show up on a list near the dropdowns. Here, you can remove anything you added from the component.
You can also add pieces of local state to your component (we use only functional components in our app, so we use the useState() hook instead of creating this.state in a constructor). As usual, you supply the name, type, and value of the state you want to add. You can delete pieces of state with the trashcan icon next to the specific piece in the list of local state, and edit information about state using the pencil icon.
exporting your project:
In the bottom left corner, there will be two buttons:
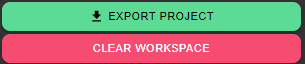
A red button to clear your workspace (this will clear any changes you've made) and a green button to export your project. The export button will download a zip file which will contain the full boilerplate code for your app, based on all the information you've entered. Obviously, you'll have to add most of the application logic yourself, but using our tool should greatly reduce the time you have to spend setting up and organizing the hierarchy of your components and application state.
running your own version
- Fork and Clone repository.
- open project directory
- install dependencies
npm install
- run application
npm start
- for development experience
npm run dev