react-alerts-plus
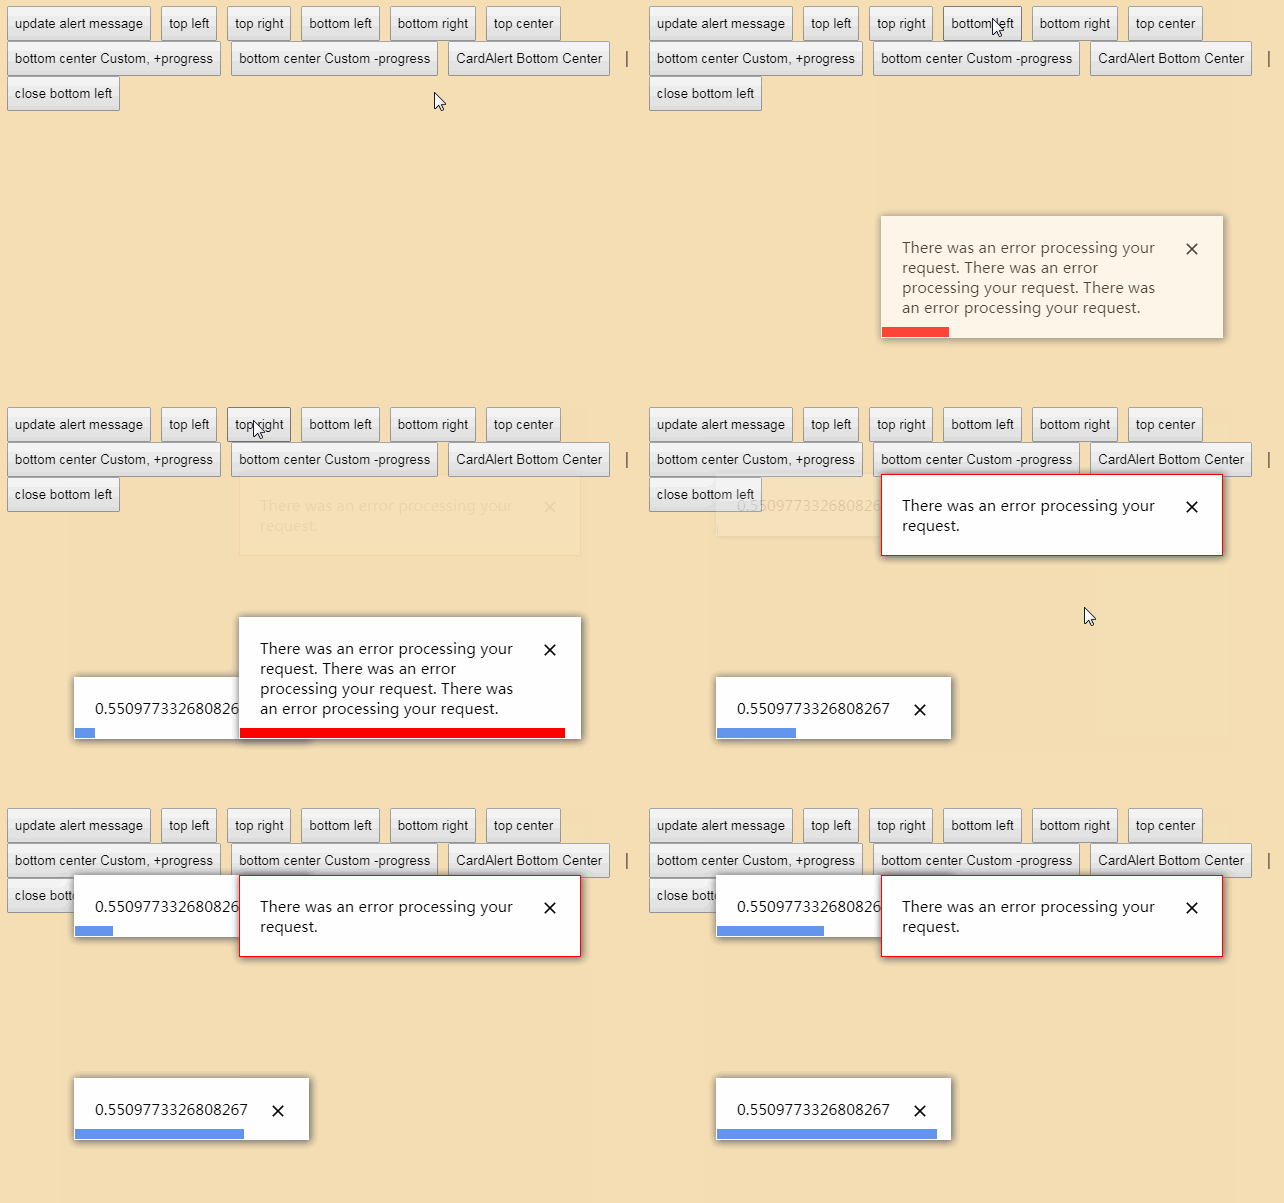
Shows an alert in the position and for the duration specified. You will most likely want to pass your own custom alert component to use with the library, see below.
Installation:
yarn add react-alerts-plus
or
npm install react-alerts-plus
Usage: Wrap your app in the provider:
import { AlertProvider } from 'react-alerts-plus';

class MyApp extends React.Component {
  render() {
    return (
      <AlertProvider>
        <App />
      </AlertProvider>
    );
  }
}
In your app where you would like to show alerts
import { AlertWrapper } from 'react-alerts-plus';
...
...
render() {
  const options = {
        message: 'My alert message',
        style: {
          backgroundColor: 'cornflowerblue',
          borderRadius: 0,
        },
        offset: '50px',
        position: 'top right',
        duration: 0,
      }
  }

  return (
    <div>
      <button>
        <AlertWrapper>
          {({show, close}) => {
            <button type="button" onClick={() => const alertId = show(options)}>Show Alert</button>
          }}
          <button type="button" onClick={() => close(alertId)}>
        </AlertWrapper>
    </div>
  )
}
The AlertWrapper returns a show and close function.
show(options, AlertComponent): The show function will display the alert using
the options object passed. Returns the ID of the alert.
close(alertId): The close function will close the alert with the corresponding
ID.
Alert Options:
All three methods of using react-alerts-plus accept the same options, though
some maybe ignored with different alerts.
Options are passed as an object, as the first argument to the show function.
While z-index is not an option, you can pass a custom z-index in your styles and
it will be applied. See below.
| Option | Type | Description |
|---|---|---|
| message | String / Number | message displayed in the alert |
| id | String / Number | id for the alert |
| style | Object | defining javascript styles |
| offset | String | defining the offset of the alert from position |
| duration | Number | time in milliseconds for the alert to be shown |
| position | String | placement of the alert |
| theme | String | default alert theme colors |
| showProgessBar | Bool | show auto close progress bar |
| progressBarColor | String | progress bar color |
| AlertComponent | PureComponent | pure components recommended |
Option Examples:
  message:          'Hi alert here!'
  id:               'my-alert'
  style:            style: {
                      backgroundColor: 'cornflowerblue',
                      borderRadius: 0,
                    }
  offset:           '50px'
  duration:         2000 (use 0 to never auto close the alert)
  position:         'top left'
                    'top center'
                    'top right'
                    'bottom left'
                    'bottom center'
                    'bottom right'
  theme:            'light' or 'dark' (light is default)
  showProgressBar   false
  progressBarColor '#666', 'cornflowerblue', 'red'
  AlertComponent:   Default alert will be totally replaced by your custom alert.
                    Only offset, duration, id, showProgressBar, progressBarColor,
                    and position are used when passing a custom AlertComponent.
                    See below for specifics about using
                    your own custom alert component. **While custom alert
                    components can be functional stateless components, Components,
                    we recommend using PureComponents.**

  const optionsExample = {
        message: 'Hi alert here!',
        id: 'my-alert',
        style: {
          backgroundColor: 'cornflowerblue',
          borderRadius: 0,
          zIndex: 1000,
        },
        offset: '50px',
        duration: 2000,
        position: 'top right',
        theme: 'dark',
        progressBarColor: 'cornflowerblue',
      }
react-alerts-plus provides three different types of alerts.
- Default alerts
- Base alert components
- Custom alerts
Default Alerts
Default alerts are nothing fancy, just basic alerts that display using the
options you pass to the show function. (See AlertWrapper example above).
Base Alert Components
To use the base alert components you still need to wrap your App in our
AlertProvider and AlertWrapper, but you pass our CardAlert component as
the second AlertComponent arguement to show. CardAlert will return any of the
base alert components you wish to use.
- AlertContainer
- AlertHeader
- AlertBody
- AlertImage
- AlertProgressBar
As long as you pass props to this function you can make use of react-alerts-plus
transitions (transitionStyle) and close function (see below).
AlertContainer
A container to wrap your other alert components.
Special props:
- N/A.
- All your props are spread across this component for you to style your alert.
AlertHeader
Alert header.
Special props:
- title: String. Alert title string
- All your props are spread across this component for you to style your alert.
AlertBody
The body of your alert.
Special props:
- message: String. Alert message string
- All your props are spread across this component for you to style your alert.
AlertImage
Displays an image for your Alert.
Special props:
- height: String. Height of image (ex: '200px')
- width: String. Width of image (ex: '200px')
- imageSrc: String. URL to image
- alt: String. alt attribute for image
- All your props are spread across this component for you to style your alert.
AlertProgress
A propress bar showing how long the alert will remain open before the duration
runs out. Will not be shown if:
- duration option is 0 (zero), never auto close
- showProgresBar option is false
Special props: These props can be pulled from the props passed into the
CardAlert (the options you sent to show, see below) or passed manually.
- progressBarColor,
- alertTimeout,
- showProgressBar,
- state,
/** @jsx jsx */
import React from 'react';
import { Icon } from 'react-icons-kit';
import { ic_close as closeIcon } from 'react-icons-kit/md/ic_close';
import { jsx, css } from '@emotion/core';
import { AlertProvider, AlertWrapper, CardAlert } from 'react-alerts-plus';
...
...
render() {
  const options = {
    message: 'My alert message',
    position: 'top left',
    offset: '20px',
    id: 'my-bottom-center-alert',
    duration: 2000,
    progressBarColor: 'linear-gradient(to right, yellow, orange, red)',
  }


  return (
    <div>
      <button>
        <AlertWrapper>
          {({show, close}) => (
            <button
              type="button"
              onClick={() =>
                show(options,
                  props => (
                    <CardAlert
                      render={({
                        AlertContainer,
                        AlertHeader,
                        AlertBody,
                        AlertImage,
                        AlertProgressBar,
                      }) => {
                        const {
                          transitionStyle,
                          close: cardAlertClose,
                        } = props;
                        return (
                          <AlertContainer
                            css={css`
                              display: grid;
                              grid-gap: 10px;
                              grid-template-rows: 40px 1fr 10px;
                              border: 1px solid lavenderblush;
                              justify-content: center;
                              padding: 20px;
                              width: 400px;
                              margin: 15px;
                              background-color: cadetblue;
                              box-shadow: 1px 1px 8px 1px #666;
                            `}
                            style={{ ...transitionStyle }}
                          >
                            <div
                              css={css`
                                display: grid;
                                grid-gap: 20px;
                                grid-template-columns: 1fr 20px;
                              `}
                            >
                              <AlertHeader
                                title="this is a title"
                                style={{ fontSize: '24pt' }}
                              />
                              <Icon
                                size={20}
                                icon={closeIcon}
                                onClick={cardAlertClose}
                              />
                            </div>
                            <div
                              css={css`
                                display: grid;
                                grid-gap: 15px;
                                grid-template-columns: 200px 1fr;
                              `}
                            >
                              <AlertImage
                                height={200}
                                width={200}
                                imageSrc={imageUri}
                                alt="My Alert Image"
                              />
                              <AlertBody message="this is a message to body" />
                            </div>
                            <AlertProgressBar {...props} />
                          </AlertContainer>
                        );
                      }}
                    />
                  ),
                )
              }
            >
              CardAlert Bottom Center
            </button>
          )}
        </AlertWrapper>
    </div>
  )
}
Custom Alert Component:
While custom alert components can be a functional stateless component,
Reac.Component, etc. we recommend using React.PureComponents.
Passing a custom alert component will cause some options to be ignored (see
Option Examples above). The close function will be added as a prop for you to
consume in your custom alert component. If you are going to use the close prop
you will need to supply the custom ID with your options. You can also pass any
other props you might need in your custom alert component. See the codesandbox
demo link at the top of this README.
/* eslint-disable import/no-extraneous-dependencies */
/** @jsx jsx */
import React from 'react';
import PropTypes from 'prop-types';
import { jsx, css } from '@emotion/core';
import { Icon } from 'react-icons-kit';
import { ic_close as closeIcon } from 'react-icons-kit/md/ic_close';

class MyAlert extends React.PureComponent {
  render() {
    const {
      close,
      title,
      message,
      imageUri,
      transitionStyle,
      showProgressBar,
      progressBarColor,
      alertTimeout,
      state,
    } = this.props;

    // console.log('rest = ', props);
    const progressStyle = {
      transition: `width ${alertTimeout}ms ease-in-out`,
      width: '0px',
    };

    const progressTransitionStyles = {
      entering: { width: '0px' },
      entered: { width: '100%' },
    };
    return (
      <div
        key="someRandomKey"
        css={css`
          display: grid;
          grid-gap: 10px;
          grid-template-rows: 40px 1fr 10px;
          border: 1px solid lavenderblush;
          justify-content: center;
          padding: 20px;
          width: 400px;
          margin: 15px;
          background-color: cadetblue;
          box-shadow: 1px 1px 8px 1px #666;
        `}
        style={{
          ...transitionStyle,
        }}
      >
        <div
          css={css`
            display: grid;
            grid-gap: 20px;
            grid-template-columns: 1fr 20px;
          `}
        >
          <header
            css={css`
              font-size: 18pt;
              color: white;
            `}
          >
            {title}
          </header>
          <div>
            <Icon size={20} icon={closeIcon} onClick={close} />
          </div>
        </div>
        <div
          css={css`
            display: grid;
            grid-gap: 15px;
            grid-template-columns: 200px 1fr;
          `}
        >
          <img height="200" width="200" src={imageUri} alt="pic" />
          <article
            css={css`
              color: #141414;
            `}
          >
            {message}
          </article>
        </div>
        {alertTimeout === 0
          ? null
          : showProgressBar && (
              <div
                style={{
                  height: '10px',
                  backgroundColor: `${progressBarColor}`,
                  ...progressStyle,
                  ...progressTransitionStyles[state],
                }}
              />
            )}
      </div>
    );
  }
}

MyAlert.propTypes = {
  close: PropTypes.func,
  title: PropTypes.string,
  message: PropTypes.string,
  imageUri: PropTypes.string,
};

MyAlert.defaultProps = {
  close: () => {},
  title: 'Default Title',
  message: 'Default Message',
  imageUri: '',
};

export default MyAlert;
