Solana Candy Machine V2 + Candy Shop
This repo allows you to sell NFTs through Candy Machine V2 and host your own secondary marketplace with Candy Shop.
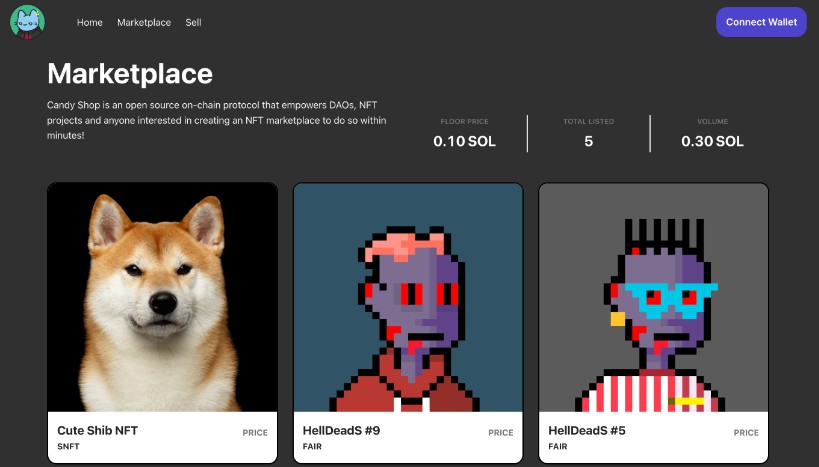
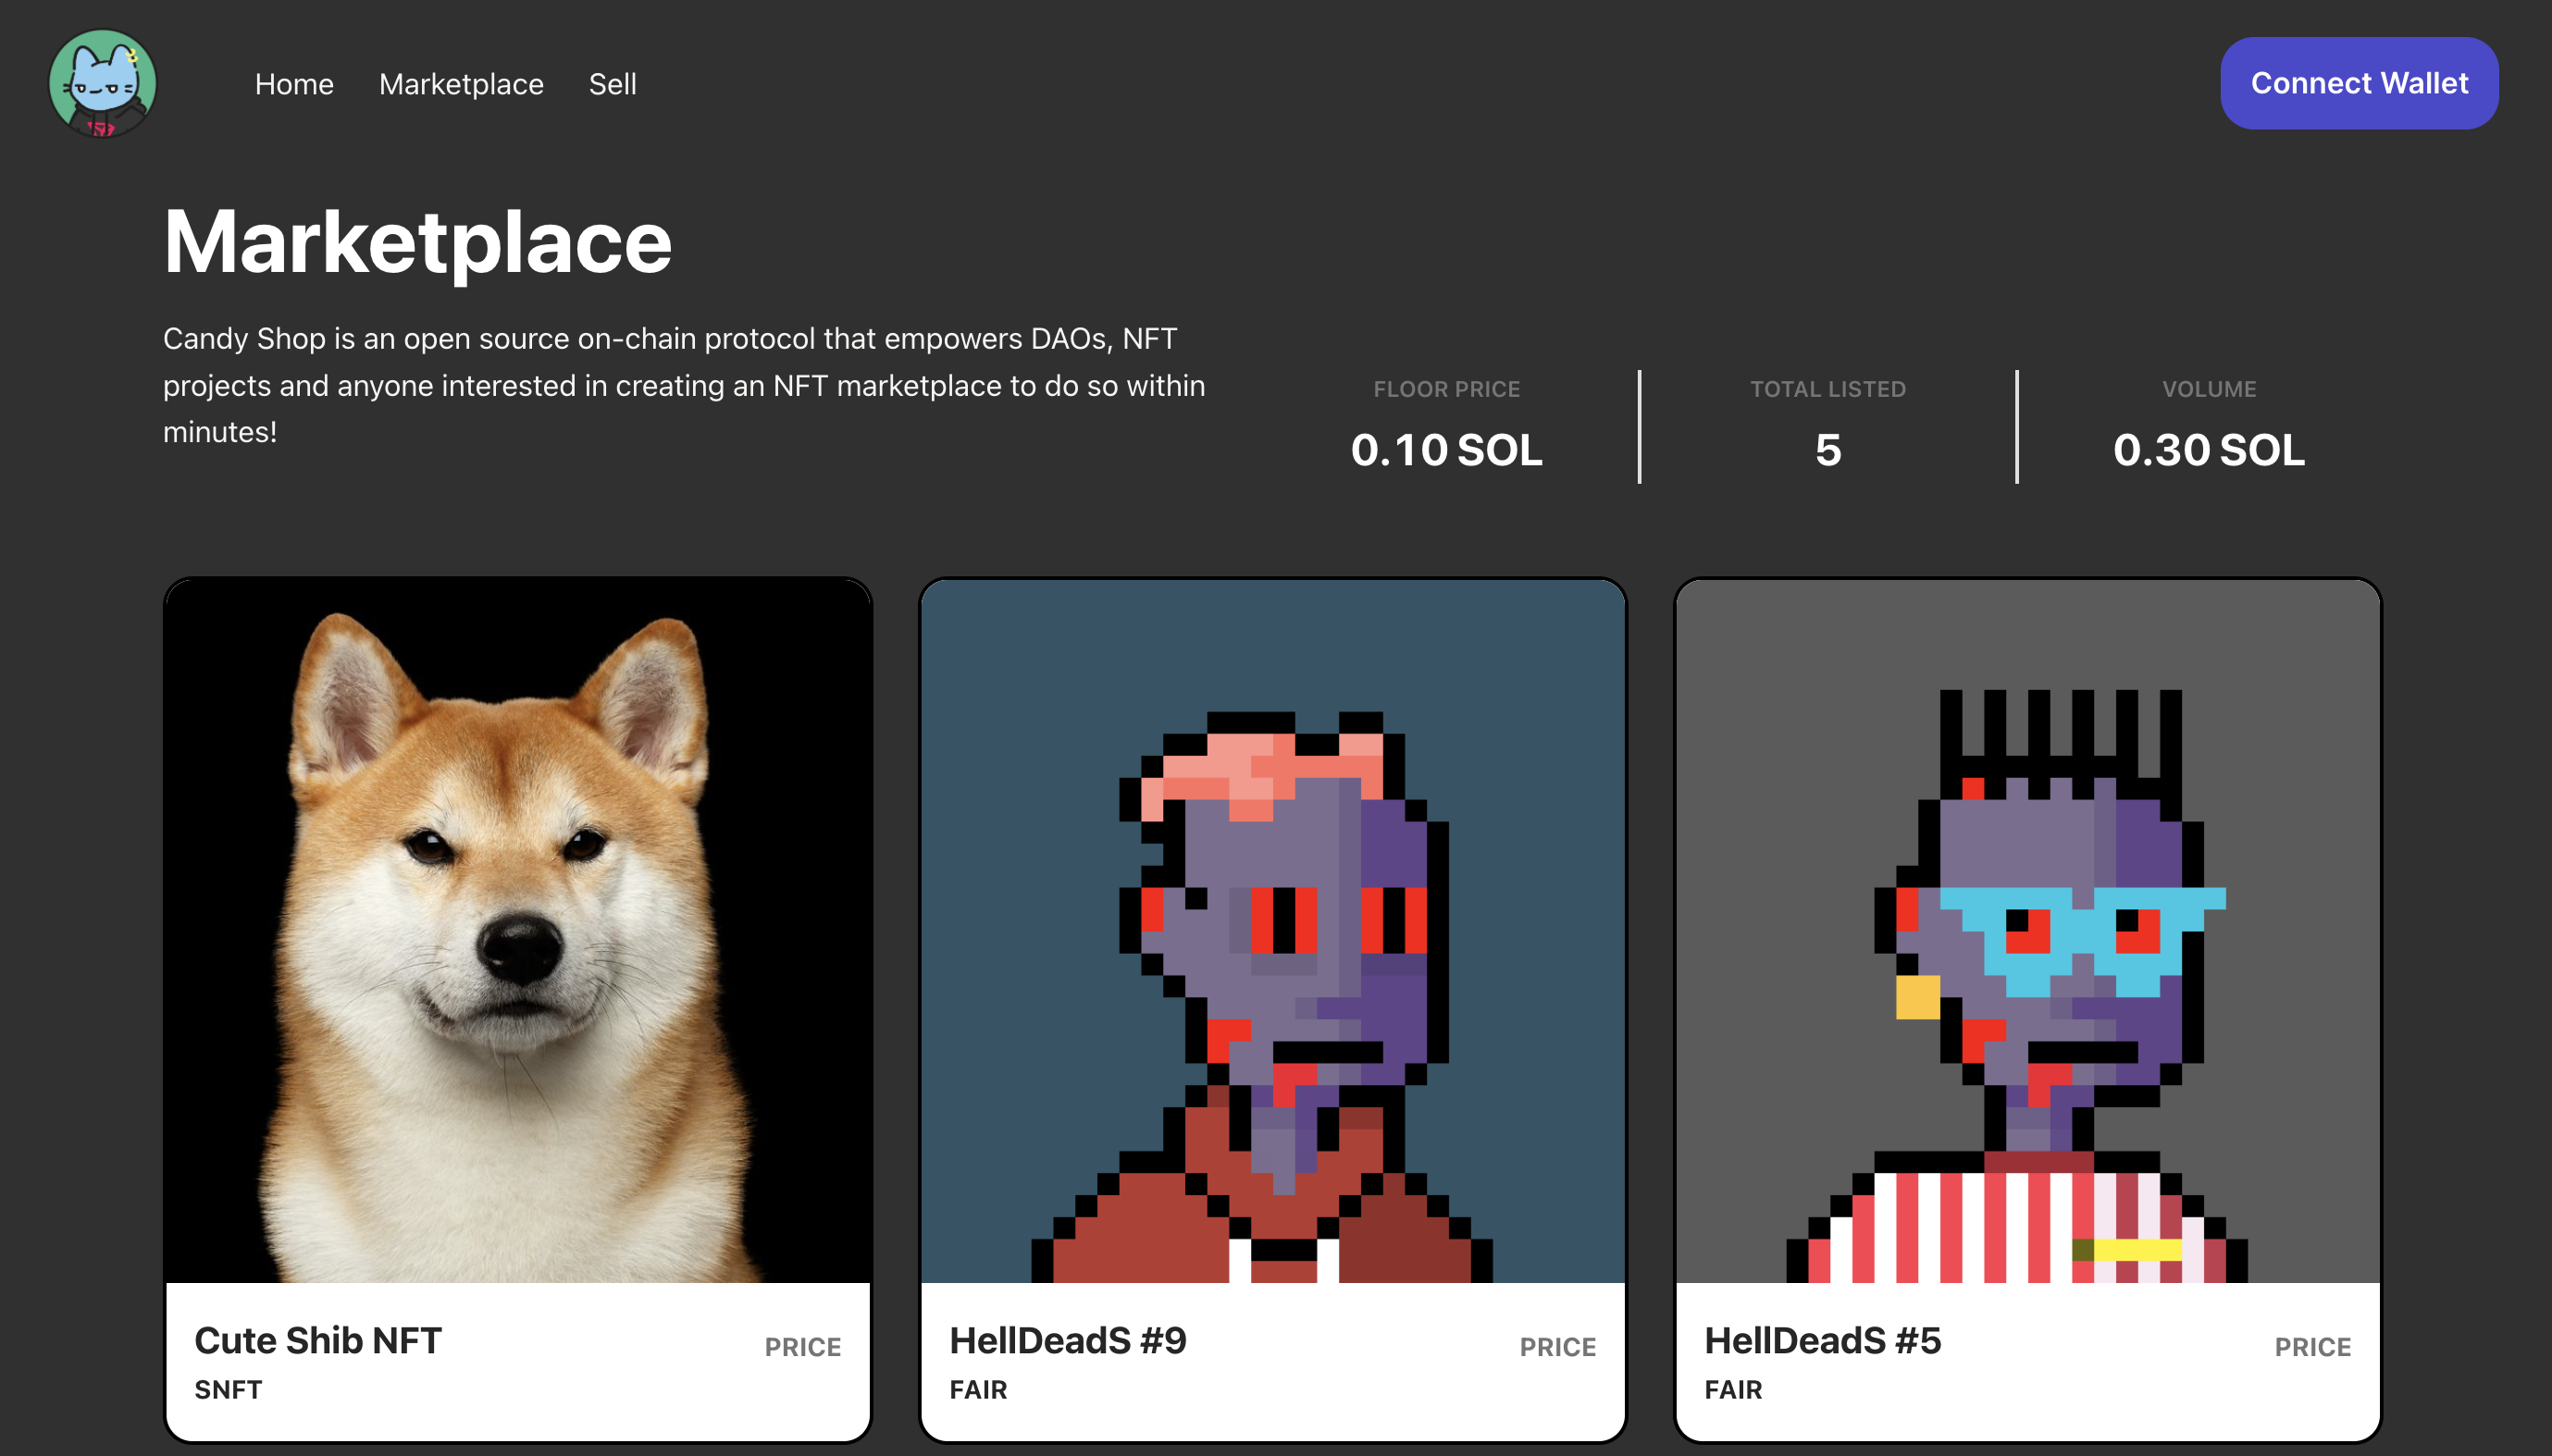
Candy Shop is a marketplace protocol & toolset with a full suite of data endpoints and command APIs to help users deliver a simplistic, seamless and efficient NFT marketplace experience.
Key features:
- Simple Integration. Integrate marketplace features into your website easily with Candy Shop SDK – your marketplace could be fully operational within a few minutes.
- Seamless User Experience. The commands and data endpoints have been designed in a way to simplify user journey and provide a seamless experience for browsing, buying and selling NFTs on your in-house marketplace.
- Give More, Earn More. Users save on transaction fees when they transact on your Candy Shop marketplace, and you will also earn 20% of the 1% transaction fee.
- Candy Shop Network. Standardized implementation allows you to import other Candy Shop NFT listings directly onto your marketplace or vice versa – creating a network effect of listings for maximum traffic flow
- Transparency. Candy Shop is an open source and on-chain protocol, providing your community with full transparency on what is happening behind the scene for your marketplace.
Forked and modified from Candy Machine V2 repo: https://github.com/Fulgurus/candy-machine-v2-responsive-ui
Prod-ready Responsive UI which can be easily customized in 5mn.
All Candy Machine V2 functionalities are implemented, auto detected and maintained up-to-date:
- public mint (with countdown when date in future)
- civic support (gatekeeper)
- whitelist
- presale true / false
- end date / end number (endSettings)
- spl-token to mint

Supported Wallets

For instructions on how to set up a V2 candy machine, please refer to Metaplex’s documentation here
One-Click Vercel Deployment
One-click solution to clone this project to your GitHub and deploy the prod package on a Vercel. Your only task will be to customize your GitHub fork of this project and commit updates. Vercel will automatically deploy new prod packages for each new commit.
%20and%20REACT_APP_SOLANA_RPC_HOST%20with%20the%20RPC%20URL%20(example%20for%20devnet%20%3A%20https%3A%2F%2Fapi.devnet.solana.com)&envLink=https%3A%2F%2Fdocs.solana.com%2Fcluster%2Frpc-endpoints%23mainnet-beta&demo-title=My%20Demo%20Mint%20Page&demo-description=A%20one-click%20generated%20solana%20minting%20responsive%20website.&demo-url=https%3A%2F%2Fwww.mintgatsbyclub.net%2F&demo-image=https%3A%2F%2Fi.imgur.com%2FWWSvkBO.png)
Getting Set Up
Prerequisites
REQUIRE NODEJS VERSION <= 16 (version 17 not supported).
-
Download a Code Editor such as Visual Studio Code.
-
Ensure you have both
nodejsandyarninstalled.nodejsrecommended version is 16. -
Follow the instructions here to install the Solana Command Line Toolkit.
-
Follow the instructions here to install the Metaplex Command Line Utility.
- Installing the Command Line Package is currently an advanced task that will be simplified eventually.
Installation
1. Fork the project & clone it. Example:
git clone https://github.com/Fulgurus/candy-machine-v2-responsive-ui.git
2. Define your environment variables (.env file)
Rename the .env.example file at the root directory to .env and update the following variables in the .env file:
REACT_APP_CANDY_MACHINE_ID=__PLACEHOLDER__
set PLACEHOLDER with the candy machine pubkey you get once you upload & create your candy machine in Metaplex project. You can find back the value from the .cache/temp.json file of your Metaplex project. This file is created when you run the ts-node candy-machine-v2-cli.ts upload ... command.
REACT_APP_SOLANA_NETWORK=devnet
This identifies the Solana network you want to connect to. Options are devnet, testnet, and mainnet.
REACT_APP_SOLANA_RPC_HOST=https://api.devnet.solana.com
This identifies the RPC server your web app will access the Solana network through.
If you are using a custom SPL Token to MINT, you have two additional environment parameters to set :
REACT_APP_SPL_TOKEN_TO_MINT_NAME=
Spl-token name to display next the price.
REACT_APP_SPL_TOKEN_TO_MINT_DECIMALS=9
Spl-token decimals were defined during its creation with –decimals parameter. If you didn’t use that parameter, then by default your SPL Token got 9 decimals.
More info about it there : https://spl.solana.com/token
3. Build the project and test. Go to the root project directory and type the commands :
To install dependencies :
yarn install
To test the app locally in the development mode (localhost:3000) :
yarn start
To build the production package (generated in build folder of the project) :
yarn build
4. Customize the website UI :
4.1 App.css : update 5 main CSS variables with your custom colors :
:root {
  --main-background-color: #343A50;
  --card-background-color: #804980;
  --countdown-background-color: #433765;
  --main-text-color:#F7F6F4;
  --title-text-color:#3CBA8B;
}
Next to that, make sure to update background image by overwriting your own background PNG file in src/img folder.
4.2 public folder :
- Update existing demo cool cats images (cool-cats.gif, logo.png) with your owns images in project
publicfolder. Make sure to name them identically. - Add your custom website title in
index.html:<title>Mint Page</title>
4.3 Home.tsx :
Scroll down down to line 380 (return <main> [...]) and start to update all titles/menu/text/images/text… as wished in the whole React HTML block.
That’s it ! Enjoy your beautiful candy machine ?
Available Commands Recap :
yarn start
Runs the app in the development mode. Open http://localhost:3000 to view it in the browser.
The page will reload if you make edits. You will also see any lint errors in the console.
yarn test
Launches the test runner in the interactive watch mode. See the section about running tests for more information.
yarn build
Builds the app for production to the build folder.
It correctly bundles React in production mode and optimizes the build for the best performance.
The build is minified and the filenames include the hashes. Your app is ready to be deployed!
See the section about deployment for more information.
yarn eject
Note: this is a one-way operation. Once you eject, you can’t go back!
If you aren’t satisfied with the build tool and configuration choices, you can eject at any time. This command will remove the single build dependency from your project.
Instead, it will copy all the configuration files and the transitive dependencies (webpack, Babel, ESLint, etc) right into your project so you have full control over them. All of the commands except eject will still work, but they will point to the copied scripts so you can tweak them. At this point you’re on your own.
You don’t have to ever use eject. The curated feature set is suitable for small and middle deployments, and you shouldn’t feel obligated to use this feature. However we understand that this tool wouldn’t be useful if you couldn’t customize it when you are ready for it.
Need Help ?
You can contact me directly on Discord : BloodSpilll#9625
To thank me with a small SOL tip :]
58SevvhmaN4SfCop2HkepAWyM5zykr7Afiv91PAAfPqR