Reactfolio V1.1 ???
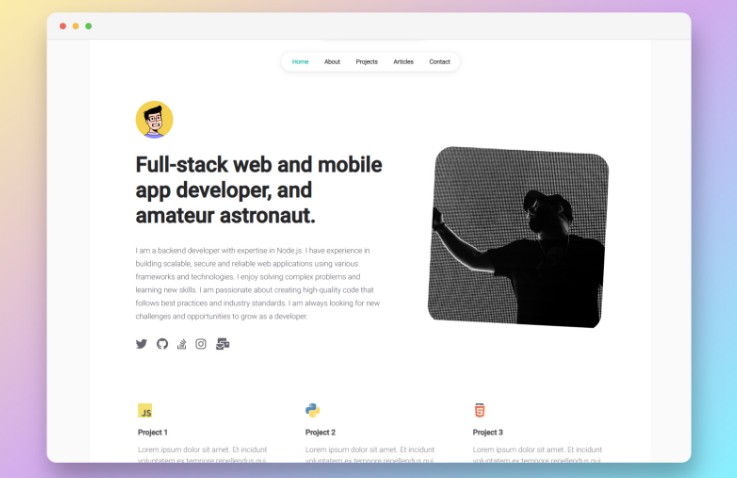
Reactfolio is a modern and customizable personal portfolio web template built using the popular React library. It provides an easy way for developers, designers, and creatives to showcase their work, skills, and achievements in a professiona and visually appealing way. With its responsive design and clean code, Reactfolio can be easily tailored to suit individual needs and preferences, making it an ideal choice for anyone looking to create a stunning online portfolio.

Live demo here: reactfolio.tharindu.dev
? Features
- ? Multi-Page Layout
- Home
- About
- Projects
- Articles
- Contact
- ? Fully Responsive
- ? Easy configurations
? Getting started
Clone down this repository. You will need NodeJS and git installed globally on your machine.
? Installation and Setup Instructions
-
Installation:
npm install -
Run the project:
npm start
Runs the app in the development mode. Open http://localhost:3000 to view it in the browser. The page will reload if you make edits.
? Folder structure
/public: publicly accessible contents (ex: images, media)./src: all the components used in this project./src/components/: each reusable components of each pages./src/data: configurations of the web app./src/pages: pages that include in the web app.
⚙️ Configurations
Since this is a public and open source project, you can make any changes to it. If you are a ReactJS developer you can do it easily. But if you are a beginner, I have extracted the configurable data into a single directory, so you can edit the files in that directory to configure the entire web application.
Directory: /src/data/
-
user.jsFrom this you can change the content of each page of the web application.
-
articles.jsFrom this you can add your articles to the web application.
Instructions:
-
Add new article
-
Create a new function starts with
article_. For example you can add new function namedarticle_3. -
Then add the data accordingly.
- Add
<React.Fragment>tag and it’s closing tags in body. - In React there has no keyword
class, so you should useclassNameto define html classes.
function article_3() {
	return {
		date: "7 May 2023",
		title: "The Benefits of Cloud Computing",
		description: "Why businesses are turning to the cloud.",
		style: `
				.random-image {
					align-self: center;
					outline: 2px solid red;
				}
				`,
		body: (
			<React.Fragment>
				<div className="article-content">
					<div className="paragraph">
						Content of article 1
					</div>
					<img
						src="https://picsum.photos/200/300"
						alt="random"
						className="random-image"
					/>
				</div>
			</React.Fragment>
		),
	};
}
- Add
-
In the last lines you will see an array to which you need to add your new
articlesfunction.const myArticles = [article_1, article_2, article_3];
-
-
-
styles.cssFrom this you can change the font colors and font families of the web application.
```css
:root {
	/* ------- colors ------- */
	--primary-color: #27272a;
	--secondary-color: #65656d;
	--tertiary-color: #acacb4;
	--quaternary-color: #e4e4e7;
	--link-color: #14b8a6;
	/* ---------------------- */

	/* ------- fonts ------- */
	--primary-font: "Heebo", sans-serif;
	--secondary-font: "Roboto", sans-serif;
	/* --------------------- */
}
```
? Building the React App
To build the React app, you can use the npm run build command. This will create a production-ready build of your app in the build/ directory.
Here are the steps to follow:
-
Open a terminal window and navigate to the root directory of your React app.
-
Run the
npm run buildcommand to create a production build of your app. This will generate a static bundle of your app in thebuild/directory. -
Copy the contents of the
build/directory to your server’s public directory. You can do this using an FTP client or by running a command likescpto transfer the files to your server. Make sure to replaceexample.comand/var/www/htmlwith your server’s domain name and public directory, respectively:scp -r build/* [email protected]:/var/www/html
-
Your portfolio app should now be accessible from your server’s domain name. You can verify this by opening a web browser and navigating to http://example.com (replace example.com with your server’s domain name).
That’s it! Your React portfolio app should now be up and running on your server. Note that you may need to configure your server’s web server (e.g., Apache or Nginx) to serve the index.html file in the build/ directory as the default page for your domain.
? Contribution
If you have any suggestions on what to improve in Reactfolio and would like to share them, feel free to leave an issue or fork project to implement your own ideas