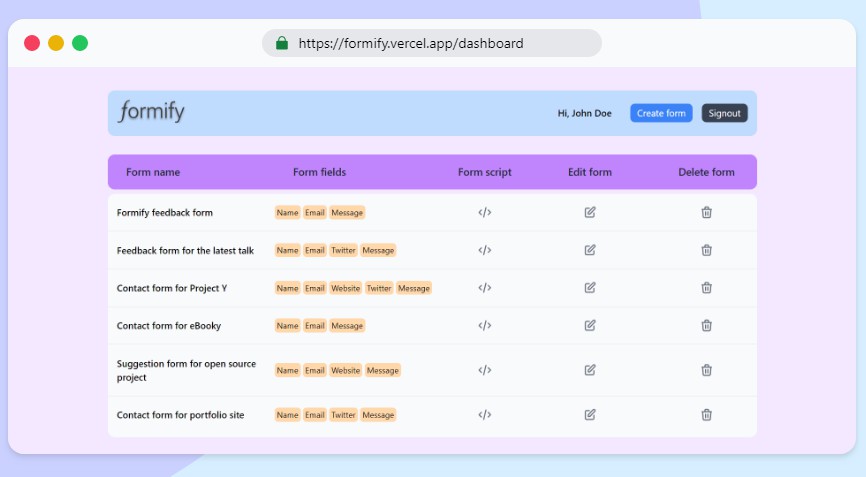
Formify is an open source application that lets you create, manage and embed contact forms on any site without writing code.
How formify works?
- Visit formify.vercel.app
- Create an account by signing up
- Create a form and copy the script
- Embed the script on any site
- Whenever somebody submits the form you can see the data in the submissions of Formify dashboard
Sample script that get’s copied on clicking the code icon
<script src="https://formify.vercel.app/script.min.js"></script>
<script>
  const fields = 'name,email,message'.split(',').filter((f) => f);
  const formURL = 'https://formify.vercel.app/api/forms/submissions?id=<ID-of-the-form>';
  const heading = 'Contact/feedback';
  formifyInit(fields, formURL, heading);
</script>
To embed forms as components on react based sites, use formify-form npm library
import { Form } from 'formify-form';

const App = () => {
  return (
    <div>
      <Form
        formFields={['name', 'email', 'message']}
        formURL="https://formify.vercel.app/api/forms/submissions?id=<ID from formify>"
        formTitle="Share your feedback"
      />
    </div>
  );
};
Video demo
To see all the above instructions lively, check this demo video below.
Tech stack used in formify
- NextJS
- TypeScript
- PlanetScale MySQL database
- Prisma ORM
- Tailwind CSS
To get started with formify setup locally
- Clone the repo
git clone https://github.com/Basharath/Formify.git
- Install the dependencies
cd Formify
npm install
- Set the environment variables as given in
.env.exampleand rename the file to.env
PLANETSCALE_PRISMA_DATABASE_URL=mysql://<USERNAME>:<PLAIN_TEXT_PASSWORD>@<ACCESS_HOST_URL>/<DATABASE_NAME>?sslaccept=strict
JWT_PRIVATE=<Secret key>
SERVER=<URL of the site>
EMAIL_ID=<Email ID for sending notifications>
EMAIL_PASS=<Passsword for the above Email>

# Firebase config variables
NEXT_PUBLIC_APIKEY=
NEXT_PUBLIC_AUTHDOMAIN=
NEXT_PUBLIC_PROJECTID=
NEXT_PUBLIC_STORAGEBUCKET=
NEXT_PUBLIC_MESSAGINGSENDERID=
NEXT_PUBLIC_APPID=
FIREBASE_SERVICE_ACCOUNT_KEY=<Account key as a string>
- To get
PLANETSCALE_PRISMA_DATABASE_URLsign up and create a database on planetscale.com and get the connection URL for Prisma. - Put any secret text for
JWT_PRIVATEwhich is used to sign JWT tokens SERVERis the URL of the site you will be creating. This is used to give the location for the script source.EMAIL_IDis the email using which the notification emails will be sentEMAIL_PASSis the password for the above email- For social logins create a firebase project and get the config details
- After all the above environment variables are set, run the below command(s).
npx prisma db push
npx prisma generate # This runs automatically in the previous command
This pushes the Prisma schema to the database and generates schema types to use with the Prisma client
- Once all the above steps are done, start the dev server by running the following command
npm run dev
Formify app starts running locally with your set database and other details
License
Formify is distributed using the MIT License. Check the License details.
