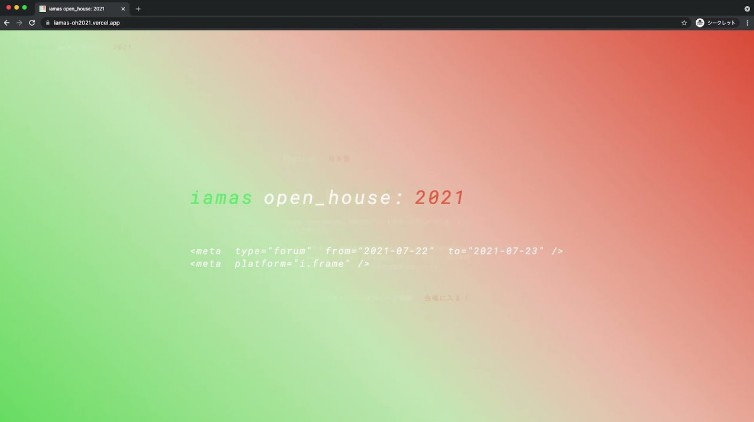
i.frame
日本語 | English
What is i.frame?
i.frame is a platform for events in the information space developed for "iamas open_house: 2021", an online event held by the Institute of Advanced Media Arts and Sciences [IAMAS]. We derived the name i.frame from "iframe" (inline frame), which is one of the basic HTML elements in web technology and is used to embed another page on a page. Using this technology, instead of gathering all the various installations and sessions distributed on the Internet in one place, you can provide cohesion and coherence for a limited period during an event. In addition, by providing chat using two media, voice and text, we aimed to make people from different places feel as if all participants gathered in the same place.
Features of i.frame
The key things you can do with i.frame:
- Provide cohesion and coherence temporarily to a group of Web sites distributed across the Internet and compose an event
- Provide voice and text chat for participants to talk to each other
- Mix different forms of programs such as installation and session
- Provide ways for both anonymous and registered users to participate
- Provide both the website URL and the individual event URLs as participation routes
- Send notifications to all participants
- Support both desktops and smartphones
- Provide UI and various information in both English and Japanese
- Easily update with Google Sheets as a database front end
Terminology
Key terms
- Event: a whole consisting of a group of programs (e.g., iamas open_house: 2021)
- Program: the unit that composes an event
- Installation: a program that participants can view at any time during the event
- Session: a program that participants can join only during a specific period
- Chat: a function that allows communication by voice or text; the unit is a channel
- Initially set to mute when a participant joins a chat, the participant can unmute
- Participants who do not wish to or cannot speak by voice can also participate by text chat
- Notification: messages from the operator that appear at the top of the website
- Tag: text strings that relate between programs (tags can also contain their explanatory text)
Differences between installation and session
| Installation | Session | |
|---|---|---|
| Information about the time of the program | No | Yes (mandatory: date, start time, end time) |
| Listing in the Session list | No | Yes |
| iframe | Yes | ← |
| Detailed information | Yes (optional) | ← |
| Unique URL | Yes | ← |
| Associated chat | No | Yes (optional) |
| Tag | Yes (optional) | ← |
Differences between anonymous users and registered users
| Anonymous users | Registered users | |
|---|---|---|
| Login | Not required | Required |
| Create a chat during an event | Yes | ← |
| Create a chat associated with a session in advance | No | Yes |
| Avatar | Choose from those provided | Can specify any image |
| Name | Linked to the selected avatar | Can specify any name |
Setup

Tested local environment
- Node v14.17.5
- npm 6.14.14
- yarn v1.22.17
GitHub settings
- Fork this repository.
- Create a clone of the repository on your local computer.
Vercel settings
- Log in or sign up with your GitHub account at https://vercel.com/. (When you sign up, you will be asked to allow access from Vercel.)
- Click the [New Project] button in the upper right corner.
- In [Import Git Repository], select the repository you just forked and import it.
- If you don't see the GitHub account you want, add the GitHub account you wish to install Vercel from the list of namespaces.
- If you see the GitHub account but not the repository you want, click Adjust GitHub App Permissions to grant permissions to Vercel.
- In the Build and Output Settings, enable OVERRIDE for BUILD COMMAND, and enter
CI='' npm run build. - Click the Deploy button to start the deployment, and wait for a few minutes until the deployment finishes.
- The screen will switch to another one when the deployment is finished, so click the Go to Dashboard button to return to the dashboard.
- Note: Every time the main GitHub branch is updated, it will be deployed automatically.
- The first time you deploy, the domain will be automatically set based on the project name (e.g.,
iamas-open-house-2021.vercel.appif PROJECT NAME isiamas-open-house-2021). Click on the View Domains button and set it if you want to change it (note: this button may not be displayed if the screen's width is too narrow). Keep the finalized origin of your public website (e.g.,https://iamas-open-house-2021.vercel.app) (note that since it is an origin, it does not contain a trailing slash). 
Agora settings
- Go to https://www.agora.io/ and register for an account.
- After registering an account, the first project you create will be for testing and demonstration purposes. Once the project is created, complete the necessary settings, including credit card registration.
- Click on Project Management on the left side of the screen and click on the Create button to create a new project. In this step, specify Secured mode as the Authentication Mechanism.
- Click on Action of the project you created in the Project Management screen, and copy the App ID in the App Configuration and the Primary certificate in the App certificate, and keep them in a safe place. 
- Mouse over the account name in the upper right corner of the screen, and select RESTful API from the list that appears. On the screen that appears, click Add a secret, and then click the Download button that appears in the Customer Secret field to download the key and secret information. 
Firebase settings
Things to do in the Firebase Console (Part 1)
- Go to https://firebase.google.com/ and sign in with your Google account.
- Click Go to console in the upper right corner of the screen.
- Click Add project and enter a project name to create it (configure Google Analytics if necessary).
- Select Build > Functions from the list on the left of the screen, and click Upgrade project. Make sure the Selected plan is set to Blaze and click the Purchase button to purchase the plan (set the Budget alert if necessary).
- Click on the cog to the right of Project Summary and select Project settings from the list that appears, and keep the Project ID in the screen that appears. 
- Click Build > Firestore Database from the list on the left of the screen, click the Create database button on the screen that appears, select Start in test mode, and click the Next button. Under Cloud Firestore Location, select a location close to where the application will be used and click the Enable button to enable it.
Things to do on your local computer
-
Create
firebase/.envby copyingfirebase/.env.samplefrom the cloned repository, and enter your Agora credentials and the origin of the website you want to publish.Variable name How to obtain AGORA_APP_ID App ID from Agora AGORA_APP_CERT Primary certificate from Agora AGORA_REST_USER_NAME The key in the key_and_secret.txt file you downloaded from Agora AGORA_REST_USER_SECRET The secret in the key_and_secret.txt file you downloaded from Agora SITE_ORIGIN The origin of the website you want to publish -
Replace
projects.defaultinfirebase/.firebasercwith the Firebase Project ID. -
Execute the following command in the directory of the cloned repository to set up Firebase.
yarn setup:firebase -
Run the following command to reflect the source code to Firebase.
yarn deploy:firebase
Google Apps Script settings
Things to do on Google Cloud Console
To update Firestore from a spreadsheet, refer to the Google Workspace Admin Help article "Create a Service Account" to create a service.
- Step 1: Create a project
- Follow the instructions up to the second item.
- Do not proceed to the third item. But instead, select the project you created in Firebase in the Manage Resources screen.
- Step 2: Turn on the APIs for the service account
- Follow the instructions up to the second item. (If the project displayed at the top of the screen is not the one you selected in "Step 1", select it from the list view.)
- In the third item, enable Admin SDK API and Google Cloud Firestore API.
- Step 3: Set up the OAuth consent screen
- Follow the instructions to the end.
- Step 4: Create the service account
- Follow the instructions up to the second item.
- In the third item, Service account name can be any name. In the next section, "Grant this service account access to project," add two roles: Basic (or Project) > Editor and Cloud Firestore > Cloud Firestore Editor.
- Regarding the seventh item, click the one whose e-mail address is
*@*.iam.gserviceaccount.comin the list displayed in the Service accounts screen and then click the KEYS button displayed at the top of the screen.
Things to do on Google Sheets
- Make a copy from the Template of Google Sheets.
- Navigate to Extensions > Apps Script and replace
{client_email},{private_key}, and{project_id}in_getCertData()defined at the end ofapi.gswith values in the private key JSON file you downloaded, respectively. - Click the Execution log button to enable the execution log, and execute
installation.gs,session.gs,registered.gs,tag.gs, andnotification.gsone after another. If they are executed without any problems, "Execution completed" will be displayed at the end of the log, confirming that you have proceeded to the end.- Note: These scripts can also be executed by clicking the Reflect this sheet button in the upper right corner of each sheet in the spreadsheet Installation, Session, User, Tag, and Notification.
- Visit the Firebase console and navigate to Build > Firestore Database > Data to confirm that the contents have been registered in the database.
Deploy
Things to do in the Firebase Console (Part 2)
- Navigate to Project Overview > Project settings > Your apps, click the
</>button, enter the nickname of your app, and keep a note of the contents offirebaseConfigfrom the code displayed in SDK setup and configuration.  - Keep a note of the URL listed in Build > Functions > Dashboard > Trigger column (note: if you can't see the Dashboard, reload the page). 
Things to do on Vercel
-
From Project Settings, open the Environment Variables tab and add the necessary environment variables.
NAME How to obtain VALUEs REACT_APP_FIREBASE_API_KEY apiKey from firebaseConfig REACT_APP_FIREBASE_AUTH_DOMAIN authDomain from firebaseConfig REACT_APP_FIREBASE_PROJECT_ID projectId from firebaseConfig REACT_APP_FIREBASE_STORAGE_BUCKET storageBucket from firebaseConfig REACT_APP_FIREBASE_MESSAGING_SENDER_ID messagingSenderId from firebaseConfig REACT_APP_FIREBASE_APP_ID appId from firebaseConfig REACT_APP_FIREBASE_FUNCTIONS_HOST The URL listed in the Trigger field REACT_APP_AGORA_APP_ID The App ID obtained from Agora REACT_APP_GA_TRACKING_ID The Google Analytics Tracking ID (optional) -
In the Deployments tab, display the list of deployments, click the
⁝button on the right side of the deployment you just performed, select Redeploy from the menu that appears, and deploy it again.
Customize
Customization by modifying the source code
- I want to change the event name
- Rewrite the content of the
<title>tag insrc/components/Head.js. - Rewrite the values corresponding to the key
welcome_notesinsrc/configs/i18n.js(enandja). - Rewrite the content of the
<StepContainer isShow={step === 0}>block insrc/components/Splash.js. - Rewrite the content of the
<Heading2>tag insrc/components/Typography.js.
- Rewrite the content of the
- I want to change the description of the screen displayed when people visit the site
- Rewrite the relevant parts of
src/configs/i18n.js(enandja).
- Rewrite the relevant parts of
- I want to change the content of the page displayed by clicking/tapping About this event in the upper left corner of the screen
- Rewrite
src/pages/About.js(enandja).
- Rewrite
- I want to change the date(s) of the Session schedule displayed by clicking/tapping Session list.
- Rewrite the content of the
<Wrapper>tag insrc/pages/Timetable.js. - Rewrite the date specified in
useState()in the same file to set the date to be selected in the initial state.
- Rewrite the content of the
Customization by modifying the spreadsheet
- Registered user
- ID 
- User name: the display name of the registered user (in alphabetical and Japanese notation)
- Thumbnail: the URL of the thumbnail image
- Password
- Tag
- ID 
- Tag Name: the name of the tag (in English and Japanese)
- Description: the description of the tag (in English and Japanese)
- Installation
- ID
- Title: the title of the installation (in English and Japanese)
- Representative user: the ID of the corresponding registered user
- Details: the description of the installation (in English and Japanese)
- Path: the path of the dedicated web page (
{origin}/installation/{path})  - iframe: the URL of the web page to be displayed in an iframe
- Thumbnail: the URL of the thumbnail image
- Tag 1 to 3: the IDs of the corresponding tags
- Public status: whether or not to show the installation in the Active installations section of the home screen (value:
TRUE= public,FALSE= not public).
- Session
- ID
- Title: the title of the session (in English and Japanese)
- Representative user: the ID of the corresponding registered user
- Details: the description of the session (in English and Japanese)
- Path: the path of the dedicated web page (
{origin}/session/{path})  - iframe: the URL of the web page to be displayed in an iframe
- Thumbnail: the URL of the thumbnail image
- Tag 1 to 3: the IDs of the corresponding tags
- Date: the date to be displayed in the Session Schedule of the session list (format:
yyyy/mm/dd) - Start time: the start time of the session (format:
yyyy/mm/dd HH:MM:SS) - End time: the end time of the session (format:
yyyy/mm/dd HH:MM:SS) - Public status: whether or not to display the session on the Session schedule page displayed by clicking the Session list buttons on the home screen and in the Active sessions section of the home screen (value:
TRUE= public,FALSE= not public) - Chat display status: whether to display the chat associated with the session or not (value:
TRUE= display,FALSE= not display) - Channel ID: the channel ID of the chat associated with the session
- Notification
- ID 
- Title: the title of the notification (in English and Japanese)
- Representative user: the ID of the corresponding registered user
- Details: the description of the notification (in English and Japanese)
- Deadline for showing: the deadline for showing the notification (format:
yyyy/mm/dd HH:MM:SS) - Publication status: whether to display the notification or not (value:
TRUE= display,FALSE= not display)
Notes on Sheets
- The column with  in each sheet is a key in the database, so it must be a unique string.
- You can add or update the values corresponding to the specified keys using the Reflect this sheet button, but you cannot delete them. Therefore, if you want to delete keys once they are created, you must delete them on the Firebase console.
Operation
How to log in as a registered user
- Check the spreadsheet and keep your ID and password.
- Visit the link for registered user entry (
{website origin}/login). - Enter your ID and PASS (password) to log in.
- Make sure that the name displayed is correct, and click/tap the Goto Home button to enter.
- To log out, visit the same URL and click/tap the Logout button.
Create a chat associated with a session
- Log in to the website as a registered user.
- Click the Session List button to display the list of sessions, and select the session to which you want to associate a chat.
- Click the button in the lower-left corner of the screen, confirm the message in the dialog box that appears, and click the OK button to create a channel.
- Keep a note of the channel ID (32-digit alphanumeric character) displayed in the dialog. Click the OK button.
- Open the spreadsheet and enter the channel ID in the Channel ID field of the session you want to associate the chat.
Note that if a chat is associated with a session, participants who visit the session will automatically join the chat.
License
MIT License

