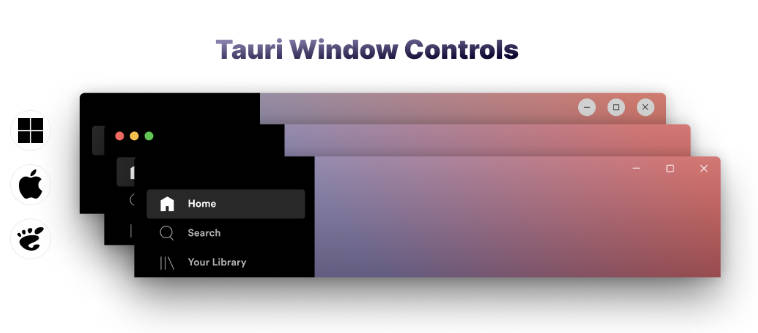
Portal Windows
Render and position windows as simply as you render and position tooltips in your React app.
Getting started
To use Portal Windows, you'll need to hook up your code in three places:
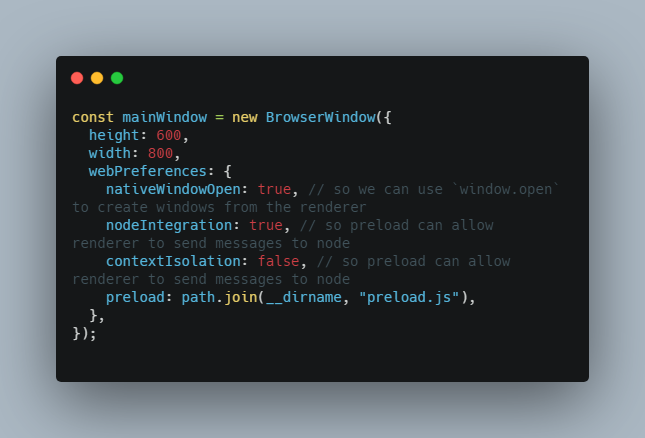
1. The root window
The constructor for your main/root window (found in node.ts in examples), needs its constructor changed and some listeners attached, in order for portal windows to work:
const mainWindow = new BrowserWindow({
  height: 600,
  width: 800,
  webPreferences: {
    nativeWindowOpen: true, // so we can use `window.open` to create windows from the renderer
    nodeIntegration: true, // so preload can allow renderer to send messages to node
    contextIsolation: false, // so preload can allow renderer to send messages to node
    preload: path.join(__dirname, "preload.js"),
  },
});

// Attach listeners for window movement, display change, mouse movement, and system info
attachWindowStoreListener(mainWindow, MAIN_FRAME_NAME, mainWindow)
attachDisplayChangeListener(mainWindow)
attachMouseMoveListener(mainWindow)
attachSystemInfoListener(mainWindow)

// This is where we store portal windows
const genericWindowHolder: { [key in WindowFrameName]?: GenericPortalWindow } = {}
mainWindow.webContents.on('new-window', (event, url, untypedFrameName, disposition, options, additionalFeatures) => {
  const frameName = untypedFrameName as WindowFrameName
  event.preventDefault()
  genericWindowHolder[frameName] = new GenericPortalWindow()
  event.newGuest = genericWindowHolder[frameName].init(options, frameName as WindowFrameName)
})
2. The preload script
The preload script just adds listeners for communicating between the node and renderer code. You can add it to your existing preload file (or make an new one) with these two lines:
import { preload } from '@portal-windows/node'

preload()
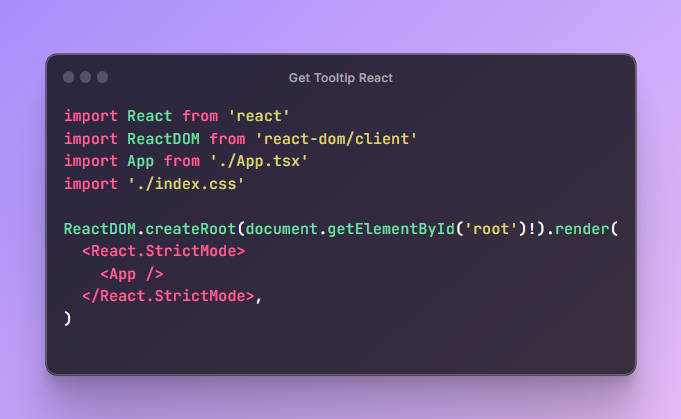
3. Initialize windowStore in the renderer, and use Portal Windows!
Now, you can use portal windows! Somewhere inside your main window, call windowActions.init, and you're ready to use portal windows. Here's a simple example (found in simpleApp.tsx in the examples folder). It creates a demo window positioned next to the main window, with the same size as the main window (resize and see!) and basic bounds correction:
import { WindowFrameName } from '@portal-windows/core'
import { NewReactPortalWindow, useWindowStore, windowActions, WindowPositionCalculationProps } from '@portal-windows/renderer'
import React, { useEffect, useState } from 'react'

const DEMO_FRAME_NAME = 'demo_window'
const MAIN_FRAME_NAME = 'main_window'

const App: React.FunctionComponent<{}> = () => {
  useEffect(() => {
    // This init function lets the main window keep track of the positions of its child windows
    windowActions.init(MAIN_FRAME_NAME as WindowFrameName)

    // This (optional) command just shows you how you can manually set window bounds
    // (note how the main window gets spawned with a different size in `node.ts`)
    windowActions.setWindowInfo(MAIN_FRAME_NAME, { bounds: { width: 250, height: 350 }})
  }, [])

  return <div>
    <h1>Demo!</h1>
    <DemoWindowButton />
  </div>
}
export default App

const demoWindowPosition: WindowPositionCalculationProps = {
  // Here, "position" sets the x/y [0,0] coordinates to be relative to the main window
  position: {
    horizontal: { relativeTo: 'parentWindowPosition' },
    vertical: { relativeTo: 'parentWindowPosition' },
  },

  // And here, we set the position of the demo window to be on the left of the main window, with a 5px gap
  // (we're subtracting the width of the demo window from its x position, otherwise it'd be rendered on top
  // of the main window, as their coordinates would be the same)
  offsets: {
    horizontal: [
      { value: -1, units: 'portalWindowSizeMultiple' },
      { value: -5, units: 'px' },
    ],
    vertical: [],
  },

  // If the demo window is outside the bounds of the screen the main window is in, the boundsCorrectionStrategies
  // are triggered in order. Here, there's only one correction strategy, which flips the demo window from the left
  // side to the right side of the main window.
  boundsCorrectionStrategies: [
    {
      strategyType: 'replaceOffsetsOrPosition',
      replaceOffsetsWith: {
        horizontal: [
          { value: 1, units: 'portalWindowSizeMultiple' },
          { value: 5, units: 'px' },
        ],
      }
    }
  ],
}


// Since we know the amount of windows we're rendering here, we can create the window on app load to save time
// (rather than creating the window when the button is clicked, which will result in a short delay)
const DemoWindow = NewReactPortalWindow({ frameName: DEMO_FRAME_NAME, parentFrameName: MAIN_FRAME_NAME })
const DemoWindowButton = () => {
  if (!DemoWindow) {
    // This means there was a failure to create the portal window,
    // most likely due to missing desktop code
    return null
  }

  // We can use windowStore to get information about windows, displays, and mouse positions.
  // We don't need to use it for positioning logic here, but we'll be replicating the
  // main window's size in this demo (shown below).
  const [parentBounds] = useWindowStore(s => [s.windowInfo[MAIN_FRAME_NAME]?.bounds])

  const [showWindow, setShowWindow] = useState(false)
  const toggleWindowState = () => setShowWindow(!showWindow)

  return <>
    <button style={{height: 40, marginBottom: 8}} onClick={toggleWindowState}>{showWindow ? 'Hide' : 'Show'} Window</button>

    {/*
      By passing in autoRepositionWindow, we update the demo window's position as it's being rendered
      (as opposed to only on the first show)
    */}
    {showWindow && <DemoWindow.component autoRepositionWindow autoResizeWindowToContents {...demoWindowPosition}>
      {/*
        This div, being the first element inside the window component, will be used to calculate the size of the window.
        By setting its width and height to its parent's bounds, and enabling `autoResizeWindowToContents` on the window component,
        we have the demo window grow/shrink to replicate the main window's size.
      */}
      <div style={{backgroundColor: 'white', width: parentBounds?.width, height: parentBounds?.height}}>
        <h1>Demo window</h1>
      </div>
     </DemoWindow.component>}
  </>
}
Check out the examples folder for more details, and a more complex example!
Contributing
First set up yarn berry and import workspace-tools
yarn set version berry
yarn plugin import workspace-tools
And using yarn workspaces, so if you're using VS code, you'll need to run the following command to get auto-complete to work: (see here for other editors):
yarn dlx @yarnpkg/sdks vscode