ReactWindow


React components that simplify the management of window and body event listeners.
Instead of manually adding (and removing) listeners using useEffect, ReactWindow allows you to attach them in a more intuitive way:
// for window listeners
<ReactWindow
  onClick={() => {
    console.log("Hello world!");
  }}
/>
Demo and Changelog
The library is inspired by svelte and is available with the following features:
- Simplifies management of window (and body) event listeners.
- Attaches a single event per listener type (if you have multiple instances of
ReactWindowwithonClickin your app, only a singleclickevent will be attached). - Supports conditional rendering.
- Supports
captureandpassivelistener options. - Tiny – around 0.5 kB minified and gzipped.
- Fully typed.
Usage
Get it from npm:
$ npm install --save @stanko/react-window
Import and use it in your React app:
ReactWindow base example
import ReactWindow from "@stanko/react-window";

function Example() {
  return (
    <ReactWindow
      onClick={() => {
        console.log("Hello world!");
      }}
      onScroll={() => {
        console.log(`Wheeeeee! ${window.scrollY}px`);
      }}
    />
  );
}
ReactBody base example
ReactBody works same as ReactWindow but attaches listeners to document.body instead of window.
import { ReactBody } from "@stanko/react-window";

function Example() {
  return (
    <ReactBody
      onClick={() => {
        console.log("Hello!");
      }}
    />
  );
}
Conditional rendering
import { useState } from "react";
import ReactWindow from "@stanko/react-window";

function Example() {
  const [listenForScroll, setListenForScroll] = useState(true);

  return (
    <div>
      <button
        onClick={() => {
          setListenForScroll(!listenForScroll);
        }}
      >
        {listenForScroll ? "Disable" : "Enable"} scroll listener
      </button>

      {listenForScroll && (
        <ReactWindow
          onScrollPassive={() => {
            console.log(`Wheeeeee! ${window.scrollY}px`);
          }}
        />
      )}
    </div>
  );
}
Listener options
React Window supports capture and options listener options. These options can be set using the [onEventName]Capture and [onEventName]Passive variations.
For example, to set capture option for onClick, you would use onClickCapture.
And to set passive option for onScroll, you would use onScrollPassive.
Gotchas
There are a couple of gotchas to keep in mind when working with React Window:
Events are only added on mount
Events are only added on mount and removed on unmount. This means that if you change your handler dynamically, nothing will happen.
In other words, avoid the following pattern:
<ReactWindow
  onClick={
    someCondition ? () => {
      console.log("handling the event in one way");
    } : () => {
      console.log("handling the event in a different way");
    }
  }
/>
This behavior is intentional, as it improves performance and eliminates the need for unnecessary rerenders.
Double click
React Window uses onDblClick to match the native event name, which differs from the built-in React version that uses onDoubleClick.
Supported events
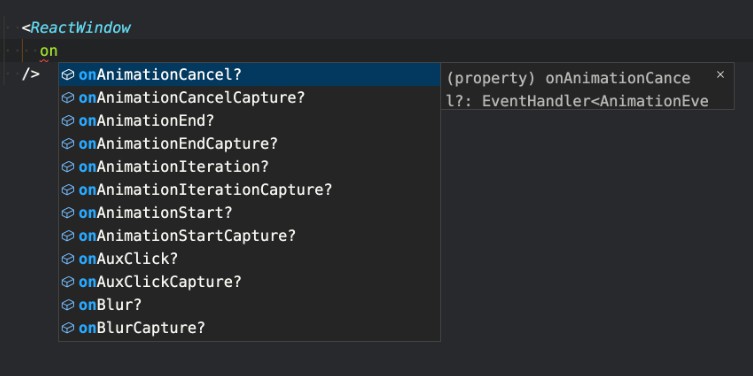
React Window has full TypeScript support and your IDE should provide you with an autocomplete.

Here’s a list of all supported events for reference:
Misc
| Event | Capture variant |
|---|---|
| onLoad | onLoadCapture |
| onSelect | onSelectCapture |
| onError | onErrorCapture |
Scroll / Wheel
| Event | Capture variant | Passive variant |
|---|---|---|
| onScroll | onScrollCapture | onScrollPassive |
| onWheel | onWheelCapture | onWheelPassive |
Focus / Blur
| Event | Capture variant |
|---|---|
| onFocus | onFocusCapture |
| onBlur | onBlurCapture |
Keyboard
| Event | Capture variant |
|---|---|
| onKeyDown | onKeyDownCapture |
| onKeyUp | onKeyUpCapture |
Mouse
| Event | Capture variant |
|---|---|
| onAuxClick | onAuxClickCapture |
| onClick | onClickCapture |
| onDblClick | onDblClickCapture |
| onContextMenu | onContextMenuCapture |
| onDrag | onDragCapture |
| onDragEnd | onDragEndCapture |
| onDragEnter | onDragEnterCapture |
| onDragExit | onDragExitCapture |
| onDragLeave | onDragLeaveCapture |
| onDragOver | onDragOverCapture |
| onDragStart | onDragStartCapture |
| onDrop | onDropCapture |
| onMouseDown | onMouseDownCapture |
| onMouseMove | onMouseMoveCapture |
| onMouseOut | onMouseOutCapture |
| onMouseOver | onMouseOverCapture |
| onMouseUp | onMouseUpCapture |
| onMouseEnter | |
| onMouseLeave |
Touch
| Event | Capture variant | Passive variant |
|---|---|---|
| onTouchCancel | onTouchCancelCapture | |
| onTouchEnd | onTouchEndCapture | |
| onTouchMove | onTouchMoveCapture | onTouchMovePassive |
| onTouchStart | onTouchStartCapture | onTouchStartPassive |
Pointer
| Event | Capture variant |
|---|---|
| onPointerDown | onPointerDownCapture |
| onPointerMove | onPointerMoveCapture |
| onPointerUp | onPointerUpCapture |
| onPointerCancel | onPointerCancelCapture |
| onPointerEnter | onPointerEnterCapture |
| onPointerLeave | onPointerLeaveCapture |
| onPointerOver | onPointerOverCapture |
| onPointerOut | onPointerOutCapture |
| onGotPointerCapture | onGotPointerCaptureCapture |
| onLostPointerCapture | onLostPointerCaptureCapture |
Animation
| Event | Capture variant |
|---|---|
| onAnimationStart | onAnimationStartCapture |
| onAnimationEnd | onAnimationEndCapture |
| onAnimationIteration | onAnimationIterationCapture |
| onAnimationCancel | onAnimationCancelCapture |
Transition
| Event | Capture variant |
|---|---|
| onTransitionStart | onTransitionStartCapture |
| onTransitionEnd | onTransitionEndCapture |
| onTransitionRun | onTransitionRunCapture |
| onTransitionCancel | onTransitionCancelCapture |
Development
Install dependencies and run npm start. It will spin up a development server on http://localhost:8000