Typescript Next.js Chakra-UI Framer-Motion Starter Kit
Start with a powerful template ⚡️

Table of contents
- Getting started
- Paths & Files
- Useful dependencies (
Important) - Components
- Internationalization
- Theme
- Framer Motion
- SEO
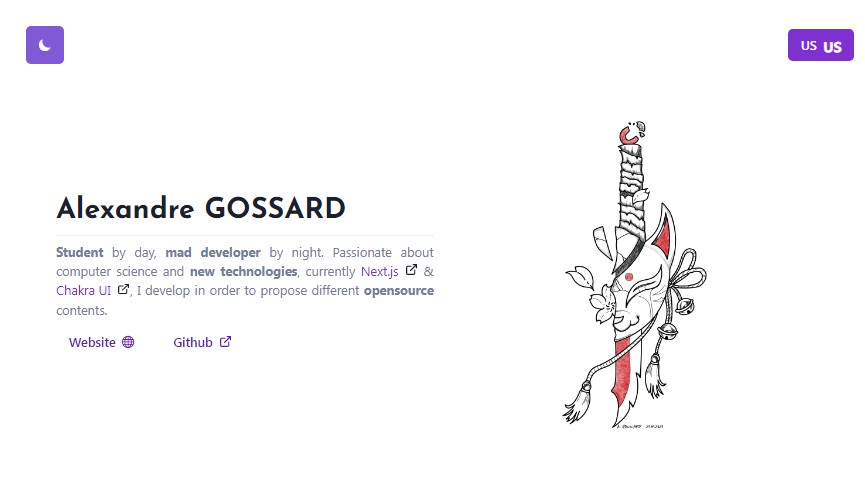
See a DEMO here.
Getting started
First, you need to open a Terminal and clone this repo by using :
git clone https://github.com/hakkaofdev/ts-next-chakra-motion-kit
Enter to the folder :
cd ./ts-next-chakra-motion-kit
And install dependencies :
npm install
Finally, run in dev :
npm run dev
Paths & Files
This is the main structure of the template.
Structure
.
├── data
├── .env
├── .eslintrc.json
├── next-env.d.ts
├── next-sitemap.js
├── package.json
├── .prettierrc.json
├── tsconfig.json
├── internationalization
│  ├── i18n.ts
│  └── locales
├── pages
│  ├── 404.tsx
│  ├── _app.tsx
│  ├── _document.tsx
│  └── index.tsx
├── public
│  └── assets
├── src
│  ├── components
│  ├── constants.ts
│  ├── providers
│  ├── theme
│  ├── types
│  └── utils
- You can upload your constants like URL’s in the
constants.tsin.src/. - Dependencies can be found in
package.json. - Your types in
./src/types. - The theme system of Chakra-UI in
./src/theme/. - Components in
./src/components/. - Pages in
./pages/ - Locales for your langs in
./internationalization/locales/. - Default
envvariables in.env.
Customs Paths
For imports you can use this list :
- @/components/*
- @/types/*
- @/utils/*
- @/data/*
- @/providers/*
- @/internationalization/*
- @/theme
Each imports refer to the specific folder.
Useful Dependencies
By default, I installed a list of useful dependencies.
react-useinv17.3.2for useful hooks.react-intersection-observerinv8.33.1for advanced animations. You can find an example of use here.prettierinv2.5.1for formatting code.eslintinv8.7.0for errors.react-country-flaginv3.0.2for flags. Example here.@react-icons/all-filesinv4.1.0for icons. React-IconsFontsto fontsource.org.
Components
<ThemeButton />in.src/components/theme-button/index.tsx.<LanguagesButton />in.src/components/languages-button/index.tsx.<PageLayout />in.src/components/page-layout/index.tsx.
Internationalization
Default config
She can be found in ./internationalization/i18n.ts
const resources = {
  us: {
    translation: en_US,
  },
  fr: {
    translation: fr_FR,
  },
};

export const availableLanguages = Object.keys(resources);

i18n.use(initReactI18next).init({
  fallbackLng: 'us',
  lng: 'us',
  resources,
});
Add a new lang
Add it in ressources like others.
Create un folder with prefix in ./internationalization/locales/ like others.
And customize the constant in your .ts file.
export const en_US = {
  home: {
    title: 'Home',
  },
};
How to use it
import { Text } from '@chakra-ui/react';
import { useTranslation } from 'react-i18next';

const Example = () => {
  const { t } = useTranslation();

  return <Text align='center'>{t('home.title')}</Text>;
};
Theme
You can find a complete documentation here.
Framer Motion
Framer Motion was directly installed when @chakra-ui/react is added as dependency.
Use Framer Motion with Chakra-UI
First, you have to declare your variants :
import { Variants } from 'framer-motion';

const variants: Variants = {
  hidden: {
    opacity: 0,
    x: 0,
    y: -40,
    transition: { duration: 0.4, type: 'easeOut' },
  },
  enter: {
    opacity: 1,
    x: 0,
    y: 0,
    transition: { duration: 0.4, type: 'easeOut' },
  },
  exit: {
    opacity: 0,
    x: -0,
    y: 40,
    transition: { duration: 0.4, type: 'easeOut' },
  },
};
Declare your custom container, a MotionContainer !
import { Container, ContainerProps } from '@chakra-ui/react';
import { motion } from 'framer-motion';

const MotionContainer = motion<ContainerProps>(Container);
And use it as a component :
<MotionContainer
  display='flex'
  maxW='container.lg'
  minH={{ base: 'auto', md: '100vh' }}
  px={{ base: 4, lg: 8 }}
  initial='hidden'
  animate='enter'
  exit='exit'
  variants={variants}
  centerContent
>
  {children}
</MotionContainer>
You can find my article with an another example here.
SEO
The Search Engine Optimization (SEO) is important on any websites.
For this template, I used next-seo and next-sitemap.
Use the SEO
For that you’ve a PageLayout component with SEO.
The default config for SEO is that:
<NextSeo
  title={title + ' | ' + process.env.siteName}
  description={description}
  twitter={{
    cardType: 'summary_large_image',
    handle: '@hakkaofdev',
  }}
  openGraph={{
    url: 'https://www.hakkaofdev.fr',
    title: title + ' | ' + process.env.siteName,
    description: description,
    locale: 'en_US',
    images: [
      {
        url: 'https://www.hakkaofdev.fr/assets/images/social.png',
        width: 1200,
        height: 630,
        alt: 'Alexandre Gossard',
        type: 'image/png',
      },
    ],
  }}
  additionalLinkTags={[
    {
      rel: 'icon',
      href: 'https://www.hakkaofdev.fr/favicon.ico',
    },
  ]}
/>
Just use it like this:
import PageLayout from '@/components/page-layout';

return (
  <PageLayout title='This is a template' description='Created by @HakkaOfDev'>
    {children}
  </PageLayout>
);
Sitemap
Default site-map.
module.exports = {
  siteUrl: process.env.baseURL,
  changefreq: 'daily',
  priority: 0.7,
  sitemapSize: 5000,
  generateRobotsTxt: true,
};
You have to npm run postbuild to generate it.
Don’t hesistate to contact me if you want advices or if you have any questions or post an issues.