![]()
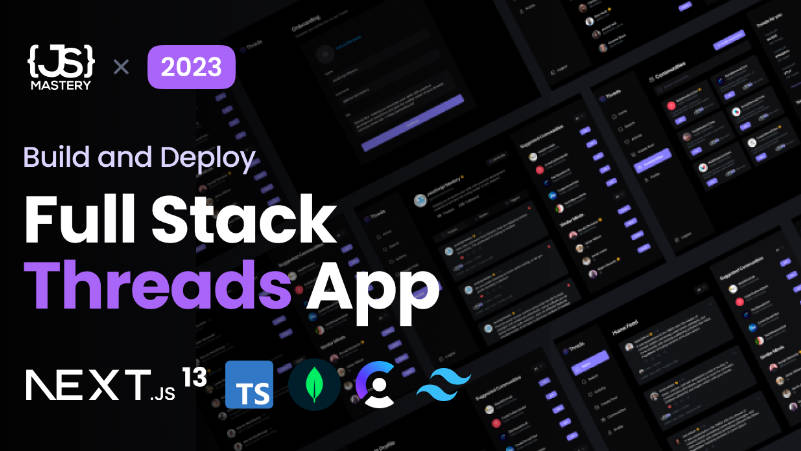
NextJS Threads
Threads web application, a social media platform that allows users to share their thoughts, with their friends and family. Threads is a full-stack web application built with TypeScript using Next.js 13 with Server Side Rendering. It uses MongoDB as a database, and Clerk as an authentication provider. It also uses UploadThing to upload images to the cloud. The application is styled with Tailwind CSS and Shadcn components.
View Demo
? Introduction
Threads web application, a social media platform that allows users to share their thoughts, with their friends and family. Threads is a full-stack web application built with TypeScript using Next.js 13 with Server Side Rendering. It uses MongoDB as a database, and Clerk as an authentication provider. It also uses UploadThing to upload images to the cloud. The application is styled with Tailwind CSS and Shadcn components.
Folder Structure
Threads code folder structure is as follows:
nextjs13-threads/
├── app/
├   ├── favicon.ico
├   ├── globals.css
├   ├── (auth)/
├   ├   ├── onboarding/
├   ├   ├   └── page.tsx
├   ├   ├── sign-in/[[...sign-in]]/
├   ├   ├   └── page.tsx
├   ├   ├── sign-up/[[...sign-up]]/
├   ├   ├   └── page.tsx
├   ├   └── layout.tsx
├   ├── (root)/
├   ├   ├── layout.tsx
├   ├   ├── page.tsx
├   ├   ├── activity/
├   ├   ├   └── page.tsx
├   ├   ├── communities/
├   ├   ├   ├── [id]/
├   ├   ├   ├   └── page.tsx
├   ├   ├   └── page.tsx
├   ├   ├── create-thread/
├   ├   ├   └── page.tsx
├   ├   ├── edit-thread/[id]/
├   ├   ├   └── page.tsx
├   ├   ├── explore/
├   ├   ├   └── page.tsx
├   ├   ├── profile/
├   ├   ├   ├── [id]/
├   ├   ├   ├   └── page.tsx
├   ├   ├   └── edit/
├   ├   ├       └── page.tsx
├   ├   ├── search/
├   ├   ├   └── page.tsx
├   ├   └── thread/
├   ├       ├── [id]/
├   ├       ├   └── page.tsx
├   ├       └── reactions/[id]/
├   ├           └── page.tsx
├   └── api/
├       ├── uploadthing/
├       ├   └── page.tsx
├       └── webhook/clerk/
├              └── route.tsx
├── components/
├   ├── atoms/
├   ├   ├── CommunityCard.tsx
├   ├   ├── ThreadCard.tsx
├   ├   └── UserCard.tsx
├   ├── cards/
├   ├   ├── EditThread.tsx
├   ├   ├── FollowUser.tsx
├   ├   └── ReactThread.tsx
├   ├── forms/
├   ├   ├── AccountProfile.tsx
├   ├   ├── Comment.tsx
├   ├   ├── DeleteThread.tsx
├   ├   └── PostThread.tsx
├   ├── shared/
├   ├   ├── Bottombar.tsx
├   ├   ├── Topbar.tsx
├   ├   ├── LeftSidebar.tsx
├   ├   ├── RightSidebar.tsx
├   ├   ├── Pagination.tsx
├   ├   ├── Searchbar.tsx
├   ├   ├── ProfileHeader.tsx
├   ├   └── ThreadsTab.tsx
├   └── ui/ (generated by shadcn/ui)
├       ├── button.tsx
├       ├── form.tsx
├       ├── input.tsx
├       ├── label.tsx
├       ├── tabs.tsx
├       └── textarea.tsx
├── constants/
├   └── index.js
├── lib/
├   ├── mongoose.ts
├   ├── uploadthing.ts
├   ├── utils.ts
├   ├── actions/
├   ├   ├── community.actions.ts
├   ├   ├── thread.actions.ts
├   ├   └── user.actions.ts
├   ├── models/
├   ├   ├── community.model.ts
├   ├   ├── thread.model.ts
├   ├   └── user.model.ts
├   └── validations/
├       ├── thread.ts
├       └── user.ts
├── public/
├   ├── next.svg
├   ├── vercel.svg
├   └── assets/
├       └── [[...]].svg
├── components.json
├── middleware.ts
├── next.config.ts
├── package.json
├── postcss.config.js
├── tailwind.config.js
├── tailwind.config.js (meaningless)
└── tsconfig.ts
Now let’s dive into each folder and see what it contains.
app
(auth)/ – (root)/ – (api)/
In the app directory, nested folders are normally mapped to URL paths. However, you can mark a folder as a Route Group to prevent the folder from being included in the route’s URL path.
This allows you to organize your route segments and project files into logical groups without affecting the URL path structure.
For example,

components
atoms/ – cards/ – forms/ – shared/ – ui/
The components directory contains all the components used in the application. The components are grouped into atoms, cards, forms, shared and ui.
the ui folder generated by shadcn/ui package and contains all the required shadcn components that used in the application.
constants
index.js
This is a JavaScript code contains all the constants used in the application, specifically the Sidebar Navigation (sidebarLinks), Profile Tabs (profileTabs) and Community Tabs (communityTabs) constants.
lib
actions/ – models/ – validations/ – mongoose.ts – uploadthing.ts – utils.ts
The lib folder holds crucial components for Threads App:\
- actions: Manage actions for Community, Thread, and User entities using Mongoose for database interaction.\
- models: Define mongoose schemas for Community, Thread, and User entities.\
- validations: Provide validation schemas with Zod for Thread and User data.\
- mongoose.ts: Establishes and manages MongoDB connections for the application.\
- uploadthing.ts: Offers a React utility for simplified file uploads to UploadThing.\
- utils.ts: Contains various reusable utility functions.
public
assets/ – next.svg – vercel.svg
The public directory contains the media used in the application. The assets folder contains all the images used in the application.
? Features
Threads web application comes with the following features:
- CRUD Threads
- CRUD Communities
- CRU Profiles
- Like Threads
- Multi-level Comment Threads
- Follow Profiles
- Search Profiles and Communities
- Activity Feed (Likes, Comments, Follows)
- Explore Feed (Threads of Followed Profiles)
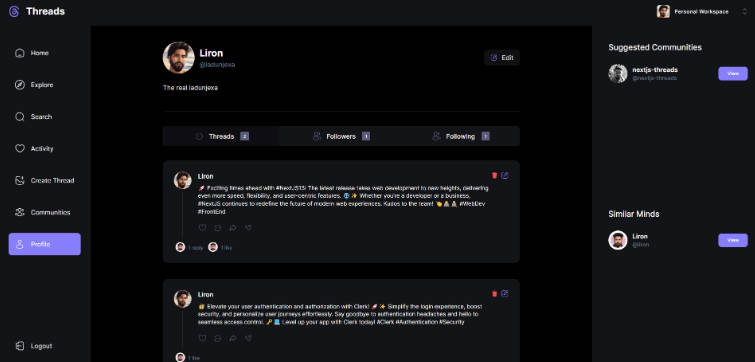
- Profile Tabs (Threads, Followers, Following)
- Community Tabs (Threads, Members, Requests)
- Suggested Communities and Profiles
- Thread Likes Page (Profiles that liked a Thread)
and much more…
In terms of technical features, Threads web application comes with the following features:
- TypeScripted Codebase with Next.js
- Authentication with Clerk
- User Management with Clerk
- Organization Management with Clerk
- File Upload with UploadThing
- Server Side Rendering with Next.js
- MongoDB Database
- Mongoose ODM
- Zod Validation
- Shadcn Components
- Tailwind CSS
- Svix Webhook Proxy
- Vercel Deployment
and much more..
? Environment Variables
Threads web application uses Clerk, UploadThing and MongoDB to handle authentication and user management, file upload and database. Therefore, you need to create accounts on Clerk, UploadThing and MongoDB and get your API keys and add them to the environment variables in the .env file.
To run this project, you will need to add the following environment variables to your .env file
NEXT_PUBLIC_CLERK_PUBLISHABLE_KEY=<CLERK_PUBLISHABLE_KEY>
CLERK_SECRET_KEY=<CLERK_SECRET_KEY>
NEXT_CLERK_WEBHOOK_SECRET=<CLERK_WEBHOOK_SECRET>

NEXT_PUBLIC_CLERK_SIGN_IN_URL=<CLERK_SIGN_IN_URL>
NEXT_PUBLIC_CLERK_SIGN_UP_URL=<CLERK_SIGN_UP_URL>
NEXT_PUBLIC_CLERK_AFTER_SIGN_IN_URL=<CLERK_AFTER_SIGN_IN_URL>
NEXT_PUBLIC_CLERK_AFTER_SIGN_UP_URL=<CLERK_AFTER_SIGN_UP_URL>

MONGODB_URL=<MONGODB_URL>
UPLOADTHING_SECRET=<UPLOADTHING_SECRET>
UPLOADTHING_APP_ID=<UPLOADTHING_APP_ID>
? Getting Started
⚙️ Installation and Run Locally
Step 0:
Note ‼️ the application uses Clerk for Authentication and User Management, therefore, you need to create Clerk account here and sets the CLERK_PUBLISHABLE_KEY and CLERK_SECRET_KEY environment variables in .env file. Also, the different URLs for the Clerk sign-in, sign-up, after sign-in and after sign-up pages.
Note ‼️ the application uses a MongoDB database, therefore, you need to create a database and connect it to the application, for this, change the MONGODB_URL environment variable in .env file located in server folder.
Note ‼️ the application uses a UploadThing Cloud, therefore, you need to create UploadThing account here and sets the UPLOADTHING_SECRET and UPLOADTHING_APP_ID environment variables in .env file.
After following all the instructions above, we’ll want to create a new webhook on Clerk. To do this, go to the Clerk Dashboard, click on the “Webhooks” tab, and then click “Add Endpoint”. For the Endpoint URL, enter http://<PASTE-YOUR-LINK-HERE>/api/webhook/clerk. For the evetnts, select the “organization”, “organizationDomain”, “organizationInvitation” and “organizationMembership”. Then click “Create” to create the webhook. get the signing secret and set it as CLERK_WEBHOOK_SECRET environment variable in .env file.
Step 1:
Download or clone this repo by using the link below:
https://github.com/ladunjexa/nextjs13-threads.git
Step 2:
Threads using NPM (Node Package Manager), therefore, make sure that Node.js is installed by execute the following command in consle
node -v
Step 3:
Go to root folder and execute the following command in console to get nodemon the required packages:
npm install
Step 4:
Go to root folder and execute the following command in console to start the application locally:
npm run dev
? Getting Started
This is a Next.js project bootstrapped with create-next-app.
First, run the development server:
npm run dev
# or
yarn dev
# or
pnpm dev
Open http://localhost:3000 with your browser to see the result.
You can start editing the page by modifying app/page.tsx. The page auto-updates as you edit the file.
This project uses next/font to automatically optimize and load Inter, a custom Google Font.
Learn More
To learn more about Next.js, take a look at the following resources:
- Next.js Documentation – learn about Next.js features and API.
- Learn Next.js – an interactive Next.js tutorial.
You can check out the Next.js GitHub repository – your feedback and contributions are welcome!
Deploy on Vercel
The easiest way to deploy your Next.js app is to use the Vercel Platform from the creators of Next.js.
Check out our Next.js deployment documentation for more details.
Additional Resources
For additional resources on working with Clerk, MongoDB and Shadcn, refer to the official documentation.
? Screenshots
Sign In

Sign Up

Onboarding

Home

Explore

Search

Activity

Create Thread

Communities

My Profile


Edit Profile

User Profile

Create Organization

Community Profile

Thread Page

Thread Likes Page

Contributions are always welcome!
See contributing.md for ways to get started.
Contributions are what make the open source community such an amazing place to learn, inspire, and create. Any contributions you make are greatly appreciated.
If you have a suggestion that would make this better, please fork the repo and create a pull request. You can also simply open an issue with the tag “enhancement”. Don’t forget to give the project a star! Thanks again!
- Fork the Project
- Create your Feature Branch (
git checkout -b feature/AmazingFeature) - Commit your Changes (
git commit -m 'Add some AmazingFeature') - Push to the Branch (
git push origin feature/AmazingFeature) - Open a Pull Request
⚠️ License
Threads web application is open source and distributed under the MIT License.
? Contact
If you want to contact me, you can reach me at @ladunjexa.