Floating Capsule Character Controller

Simple web based character controller build on react-three-fiber and react-three-rapier. It provides a playground demo where you can experience the following features:
- Seamless movement over small obstacles
- Enhanced control with floating force incorporating spring and damping forces
- Rigidbody character functionality for interaction with the game environment
- Customizable ground friction for tailored control
- Realistic simulation with applied mass on supporting surfaces
- Smooth integration with moving and rotating platforms
New Features
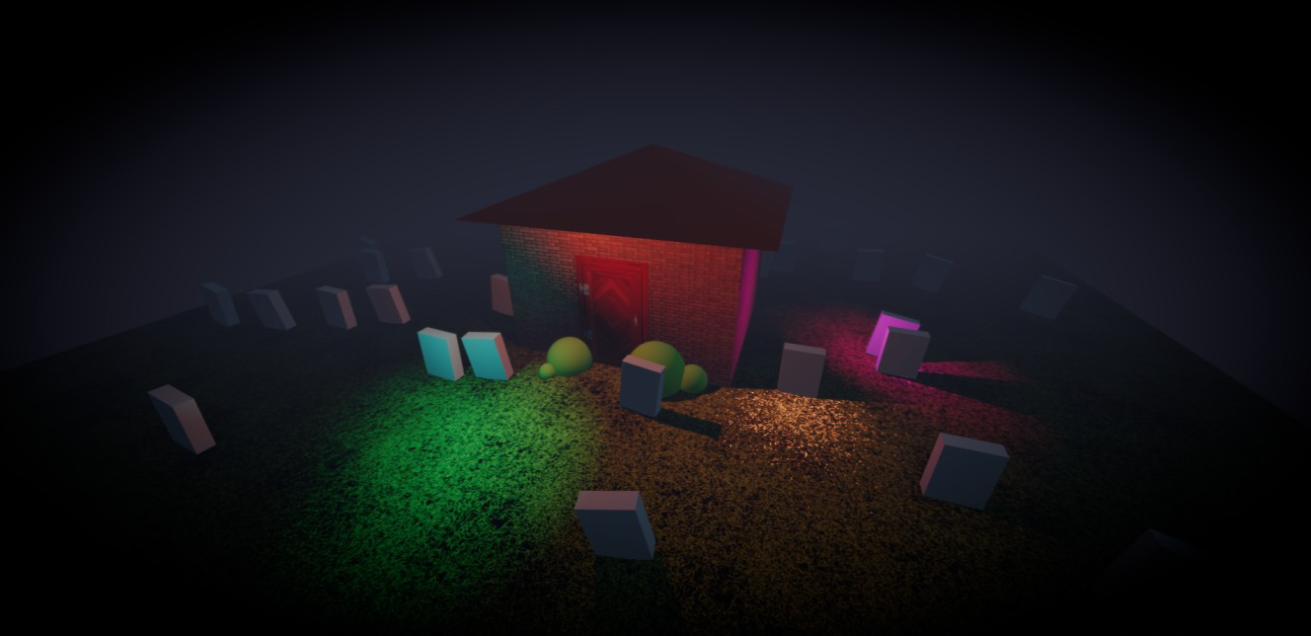
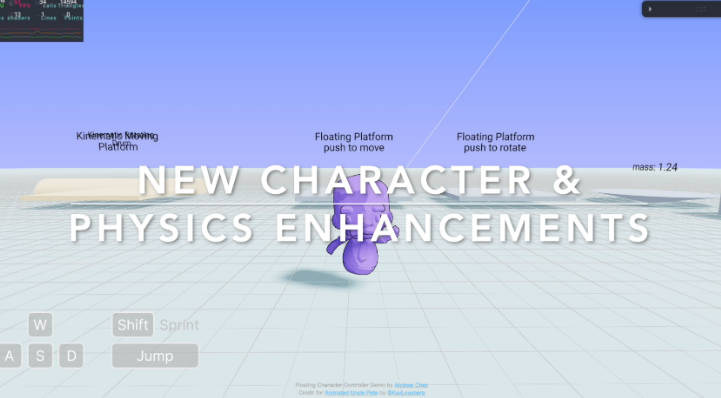
(2023-09-13) New Character & Physics Enhancements:
-
Incorporate 11 dynamic animations with new floating character, Uncle Pete
-
Implement action and reaction forces on frictionless floating platforms:
- Platforms now move opposite to the character’s moving direction (Having less impact on havier platforms)
- Character also applies drag force (friction) to the standing platform
- Character’s free fall height now impacts on platform reaction forces
- Add extra downward force upon character jumps for more realistic physics

Check out the featurelog.md for details on previous updates and features.
Project Link
Live Demo: Floating Capsule Character Controller
Setup
Download Node.js. Run this followed commands:
# Install dependencies (only the first time)
npm install

# Run the local server at localhost:8080
npm run dev

# Build for production in the dist/ directory
npm run build
How To Use
Basic Controls
To get started, set up your keyboard map using KeyboardControls. Then, replace <CharacterModel> with <YourModel> inside Experience.jsx:
/**
 * Keyboard control preset
 */
const keyboardMap = [
  { name: "forward", keys: ["ArrowUp", "KeyW"] },
  { name: "backward", keys: ["ArrowDown", "KeyS"] },
  { name: "leftward", keys: ["ArrowLeft", "KeyA"] },
  { name: "rightward", keys: ["ArrowRight", "KeyD"] },
  { name: "jump", keys: ["Space"] },
  { name: "run", keys: ["Shift"] },
  { name: "action1", keys: ["1"] },
  { name: "action2", keys: ["2"] },
  { name: "action3", keys: ["3"] },
  { name: "trigger", keys: ["KeyF"] },
];

return (
  <>
    ...
    <Physics debug={physics} timeStep="vary">
      {/* Keyboard preset */}
      <KeyboardControls map={keyboardMap}>
        {/* Character Control */}
        <CharacterController>
          {/* Replace your model here */}
          <CharacterModel />
        </CharacterController>
      </KeyboardControls>
      ...
    </Physics>
  </>
);
Modifiy Character Animations
If you want use your own character animations, customize the animationSet in CharacterModel.jsx with your animation names. Also, make sure to adjust the useGLTF src to your model:
// Change the character src to yours
  const { nodes, animations } = useGLTF("/Floating Character.glb");
  ...
// Rename your character animations here
  const animationSet = {
    idle: "Idle",
    walk: "Walk",
    run: "Run",
    jump: "Jump_Start",
    jumpIdle: "Jump_Idle",
    jumpLand: "Jump_Land",
    fall: "Climbing", // This is for falling from high sky
    wave: "Wave",
    dance: "Dance",
    cheer: "Cheer",
    attack: "Attack(1h)",
  };
(Advanced) Add and Personalize Additional Animations
For advanced animation setups, follow these steps:
- In
CharacterModel.jsx, expand theanimationSetwith additional animations:
// Rename your character animations here
const animationSet = {
  idle: "Idle",
  walk: "Walk",
  run: "Run",
  jump: "Jump_Start",
  jumpIdle: "Jump_Idle",
  jumpLand: "Jump_Land",
  fall: "Climbing",
  wave: "Wave",
  dance: "Dance",
  cheer: "Cheer",
  attack: "Attack(1h)",
  //additinalAnimation: "additinalAnimationName",
};
- In
useGame.jsx, create a trigger function for the new animation:
  return {
      /**
       * Character animations state manegement
       */
      // Initial animation
      curAnimation: null,
      animationSet: {},

      ...

      wave: () => {
        set((state) => {
          if (state.curAnimation === state.animationSet.idle) {
            return { curAnimation: state.animationSet.wave };
          }
          return {};
        });
      },

      /**
       * Additional animations
       */
      // triggerFunction: ()=>{
      //    set((state) => {
      //        return { curAnimation: state.animationSet.additionalAnimation };
      //    });
      // }
    };
- In
CharacterController.jsx, initialize the trigger function and call it when needed:
// Animation change functions
const idleAnimation = useGame((state) => state.idle);
const walkAnimation = useGame((state) => state.walk);
const runAnimation = useGame((state) => state.run);
const jumpAnimation = useGame((state) => state.jump);
const jumpIdleAnimation = useGame((state) => state.jumpIdle);
const jumpLandAnimation = useGame((state) => state.jumpLand);
const fallAnimation = useGame((state) => state.fall);
const waveAnimation = useGame((state) => state.wave);
const danceAnimation = useGame((state) => state.dance);
const cheerAnimation = useGame((state) => state.cheer);
const attackAnimation = useGame((state) => state.attack);
//const additionalAnimation = useGame((state) => state.triggerFunction);
Contributions
I appreciate your interest in this project! If you have any feedback, suggestions, or resources related to the controller, please feel free to share.
Thank you!