React18 with Deno
React is the most widely used JavaScript frontend framework. It popularized a declarative approach towards designing composable “views” that efficiently update and render data without the headache of managing state. Due to its popularity, it’s not surprising that it’s the most requested framework when it comes to building with Deno.
With this tutorial, you can get a React app running with Deno in less than 5 minutes. If you want to skip to the code, feel free to view source here.
Setting up React
The trickiest part about using React with Deno is knowing how to import it into your project. Since Deno doesn’t use a dependency manager and imports code via URL, there are several different approaches.
One common approach is using esm.sh, which serves NPM modules via a URL. Here’s an example of how we import react v18:
import * as React from "https://esm.sh/react@18";
We’ll be using esm.sh to import the modules that we’ll need for this app.
Learn more about CDNs that serve NPM modules.
Structuring the app
This is an example directory:
react18-with-deno/
├── src
│   ├── components
│   │   ├── Footer.tsx
│   │   └── NavBar.tsx
│   ├── pages
│   │   ├── GettingStartedPage.tsx
│   │   ├── HomePage.tsx
│   │   └── UserPage.tsx
│   ├── App.tsx
│   └── index.tsx
├── deno.json
├── deps.client.ts
├── deps.server.ts
├── main.ts
└── README.md
We’ve organized the app into three sections:
/src/: This is where all of our React components and layouts will live, as well as the main App and the logic that binds it to the DOM.
main.ts: All of our server-side logic, which includes transpiling TSX React components into regular ol’ JavaScript for the client and running the server.
deps.client.ts and deps.server.ts: Our dependencies, which are separated into client vs. server, since esbuild will hit a snag when attempting to transpile server-only code.
Let’s start with the React components.
React
React allows for reusable front-end components that are extensible, composable, with a one-layer data flow. This makes it easy to manage states.
We won’t get into the nitty gritty details of using React, since there are a ton of resources out there. This will just show you to get setup.
The key components to focus on here are App.tsx and index.tsx.
/src/App.tsx
This file contains the main React app, which is composed of components linked from /src/components/ and links to pages pulled from /src/pages/:
import { Navigate, React, Route, Routes } from "../deps.client.ts";
import { NavBar } from "./components/NavBar.tsx";
import { HomePage } from "./pages/HomePage.tsx";
import { GettingStartedPage } from "./pages/GettingStartedPage.tsx";
import { UserPage } from "./pages/UserPage.tsx";
import { Footer } from "./components/Footer.tsx";

export default function App(props) {
  return (
    <div>
      <NavBar />
      <Routes>
        <Route exact path="/" element={<HomePage />} />
        <Route exact path="/getting-started" element={<GettingStartedPage />} />
        <Route path="/users/:username" element={<UserPage />} />
        <Route path="*" element={<Navigate to="/" />} />
      </Routes>
      <Footer />
    </div>
  );
}
For routing, we’re using [ReactRouter](https://reactrouter.com/) v6, which enables client-side routing. React Router provides easy to use components such as <Routes> and <Route> that make it simple to create links and dynamic routes.
/src/index.tsx
While /src/App.tsx contains the React app, /src/index.tsx does the heavy lifting of binding that app to the DOM:
import { BrowserRouter, React, ReactDOM } from "../deps.client.ts";
import App from "./App.tsx";

// Bind react app to <div id="app" />
const root = ReactDOM.createRoot(document.getElementById("app"));
root.render(
  <BrowserRouter>
    <App />
  </BrowserRouter>,
);
We’re using the new React 18 API, createRoot, to bind App to the DOM. Then, we’re rendering it with root.render().
Finally, this /src/index.tsx file is also the entrypoint for esbuild, which will transpile the React app and all child components into JavaScript. More on that in our next section.
main.ts
Our entire server-side logic lives in this file, which performs two key actions:
The first is to transpile all frontend React TSX components into plain ol’ JavaScript using esbuild:
// Transpile jsx to js for React.
await esbuild.default.initialize({
  wasmURL: "https://esm.sh/esbuild-wasm/esbuild.wasm",
  worker: false,
});
const output = await esbuild.default.build({
  plugins: [denoPlugin()],
  entryPoints: ["./src/index.tsx"],
  write: false,
  bundle: true,
  format: "esm",
  absWorkingDir: Deno.cwd(),
});
// The raw transpiled output as a string.
const indexJs = new TextDecoder().decode(output.outputFiles[0].contents);
All of our React app written in TSX is now a single JavaScript string in indexJs.
Second, the server returns an HTML string that contains indexJs to the client and starts the server:
// Return transpiled script as HTML string.
app.use((ctx) => {
  ctx.response.body = `
    <!doctype html>
    <html>
      <head>
        <title>Deno x React</title>
      </head>
      <body>
        <div id="app" />
        <script>${indexJs}</script>
      </body>
    </html>
  `;
});

// Start server.
console.log("Listening on http://localhost:8000");
await app.listen({ port: 8000 });
We start the server with deno task serve:
$ deno task serve
Warning deno task is unstable and may drastically change in the future
Task serve deno run --allow-read --allow-net --allow-run --allow-write --no-check main.ts
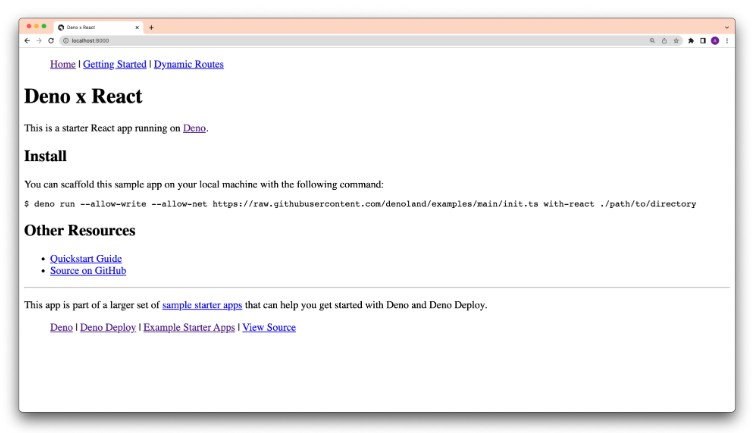
Listening on http://localhost:8000
And when we visit localhost:8000 in our browser, we see:

What’s next?
While this is an extremely simple starter React app that works with Deno, it shows that getting started with React and Deno is fairly straightforward.
If you are looking to build more complex front-end apps with React components, check out Aleph.js or Ultra. For a server-side rendered, edge optimized web framework, check out Fresh.
Want to see a specific framework tutorial with Deno? Let us know on Twitter or on our Discord.