Next.js API OG Image · 


Simple library with purpose of providing easy way to dynamically
generate open-graph images using Next.js API routes.
If you’re not familiar with dynamic open-graph images concept – please see vercel/og-image repository’s README for very detailed explaination.
you can treat this project as simpler and configurable version of mentioned earlier vercel repository
Features
- ? Super easy usage
- ? Suitable for serverless environment
-
 Elegant way for defining templates both in React and HTML
 - ? TypeScript compatible
Installing
npm i next-api-og-image -S
# or
yarn add next-api-og-image
Basic usage and explaination
HTML template
import { withOGImage } from 'next-api-og-image'

export default withOGImage({ template: { html: ({ myQueryParam }) => `<h1>${myQueryParam}</h1>` } })
React template
import { withOGImage } from 'next-api-og-image'

export default withOGImage({ template: { react: ({ myQueryParam }) => <h1>{myQueryParam}</h1> } })
Creating template
You’ve may noticed the html and react properties in configuration. Their responsibility is to provide HTML document to image creator (browser screenshot), filled with your values.
⚠️ NOTE
Template cannot be ambigious. You must either
definereactorhtml. Never both at once
Specification
The html and react properties are template providers functions. Each function’s first (and only) parameter is nothing else but HTTP request’s query params converted to object notation.
This allows you to create fully customized HTML templates by simply accessing these parameters. The preferred way to do that is object destructuring.
⚠️ NOTE
htmlandreacttemplate provider functions
can be defined as asynchronous
Example
HTML template
import { withOGImage } from 'next-api-og-image'

export default withOGImage({ template: { html: ({ myQueryParam }) => `<h1>${myQueryParam}</h1>` } })
React template
import { withOGImage } from 'next-api-og-image'

export default withOGImage({ template: { react: ({ myQueryParam }) => <h1>{myQueryParam}</h1> } })
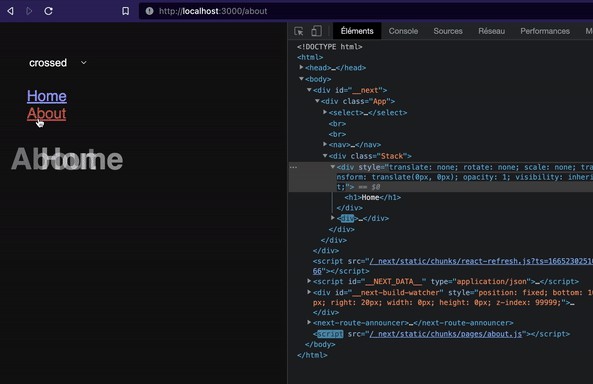
if you send GET HTTP request to api route with code presented above e.g. localhost:3000/api/foo?myQueryParam=hello – it will render heading with content equal to ‘hello’
Splitting files
Keeping all the templates inline within Next.js API route should not be problematic, but if you prefer keeping things in separate files you can follow the common pattern of creating files like my-template.html.js or my-template.js when you define template as react (naming convention is fully up to you) with code e.g.
export default function myTemplate({ myQueryParam }) {
  return `<h1>${myQueryParam}</h1>`
}
…or in TypeScript
import type { NextApiOgImageQuery } from 'next-api-og-image'

type QueryParams = 'myQueryParam'
export default function myTemplate({ myQueryParam }: NextApiOgImageQuery<QueryParams>) {
  return `<h1>${myQueryParam}</h1>`
}
then importing it and embedding in the withOGImage.
Loading custom local fonts
In order to load custom fonts from the project source, you need to create source file with your font in base64 format or simply bind the font file content to the variable in your Next.js API route
Configuration
Apart from html and react configuration property (in template) (whose are required), you can specify additional info about how next-api-og-image should behave.
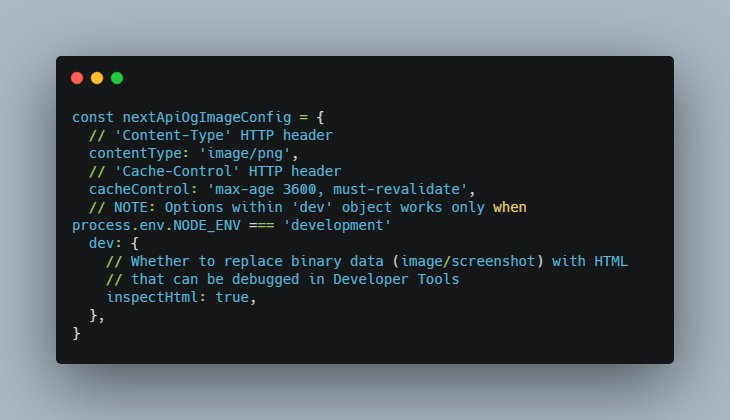
Example configuration with default values (apart from template.html or template.react prop):
const nextApiOgImageConfig = {
  // 'Content-Type' HTTP header
  contentType: 'image/png',
  // 'Cache-Control' HTTP header
  cacheControl: 'max-age 3600, must-revalidate',
  // NOTE: Options within 'dev' object works only when process.env.NODE_ENV === 'development'
  dev: {
    // Whether to replace binary data (image/screenshot) with HTML
    // that can be debugged in Developer Tools
    inspectHtml: true,
  },
}
Examples
You can find more examples here:
- JavaScript
- TypeScript
the example/ directory contains simple Next.js application implementing next-api-og-image . To fully explore examples implemented in it by yourself – simply do npm link && cd examples && npm i && npm run dev then navigate to http://localhost:3000/
License
This project is licensed under the MIT license.
All contributions are welcome.