Next 14 and Strapi Dashboard Example.

This project is based on this Next 14 Tutorial, but instead, we are using Strapi to power our Next JS Frontend.
Covering all the new features of Next 14
- App Router
- Server Actions
- Form Submission using Action
- Form Validation
- Full CRUD ( Create, Read, Update, Delete)
- Strapi Auth ( Login & Register)
- Pagination
- Search
Check out this project to use as reference for your next project idea built with Next 14 and Strapi.
If you find any bugs or improvements feel free to create an issue. Thank you all for your support and participation.
Hello Strapi
Strapi Community Edition is a free and open-source headless CMS enabling you to manage any content, anywhere.
- Self-hosted or Cloud: You can host and scale Strapi projects the way you want. You can save time by deploying to Strapi Cloud or deploy to the hosting platform you want**: AWS, Azure, Google Cloud, DigitalOcean.
- Modern Admin Pane: Elegant, entirely customizable and a fully extensible admin panel.
- Multi-database support: You can choose the database you prefer: PostgreSQL, MySQL, MariaDB, and SQLite.
- Customizable: You can quickly build your logic by fully customizing APIs, routes, or plugins to fit your needs perfectly.
- Blazing Fast and Robust: Built on top of Node.js and TypeScript, Strapi delivers reliable and solid performance.
- Front-end Agnostic: Use any front-end framework (React, Next.js, Vue, Angular, etc.), mobile apps or even IoT.
- Secure by default: Reusable policies, CORS, CSP, P3P, Xframe, XSS, and more.
- Powerful CLI: Scaffold projects and APIs on the fly.
Features
- Content Types Builder: Build the most flexible publishing experience for your content managers, by giving them the freedom to create any page on the go with fields, components and Dynamic Zones.
- Media Library: Upload your images, videos, audio or documents to the media library. Easily find the right asset, edit and reuse it.
- Internationalization: The Internationalization (i18n) plugin allows Strapi users to create, manage and distribute localized content in different languages, called “locales
- Role Based Access Control: Create an unlimited number of custom roles and permissions for admin and end users.
- GraphQL or REST: Consume the API using REST or GraphQL
You can unlock additional features such as SSO, Audit Logs, Review Workflows in Strapi Cloud or Strapi Enterprise.
Hello Next JS
Check out this page to see all the cool new features of Next while building a dashboard. We based this project on that tutorial. This way, you can see the the benefits of using a headless CMS like Strapi with Next JS.
How To Get Started With The Project
- Clone the repository locally:
- Run
setupcommand to setup frontend and backend dependencies:
yarn setup
- Next, navigate to your
/frontenddirectory and set up your.envfile. You can use the.env.examplefile as reference:
STRAPI_URL=http://localhost:1337
- Next, navigate to your
/backenddirectory and set up your.envfile. You can use the.env.examplefile as reference:
HOST=localhost
PORT=1337
APP_KEYS="toBeModified1,toBeModified2"
API_TOKEN_SALT=tobemodified
ADMIN_JWT_SECRET=tobemodified
JWT_SECRET=tobemodified
TRANSFER_TOKEN_SALT=tobemodified
- Next, navigate to your
/backendand start your project by running the following command:
  yarn build
  yarn develop
You will be prompted to create your first admin user.

Great. You now have your Strap project running. Let’s add some data.
Seeding The Data
We are going to use our DEITS feature which will alow to easily import data into your project.
You can learn more about it in our documentation here.
In the root of our project we have our seed-data.tar.gz file. We will use it to seed our data.
-
Open up your terminal and make sure you are still in you
rootof your project folder. -
Run the following command to seed your data:
yarn seed

This will import your data locally.
Log back into your admin panel to see the newly imported data.
Starting Both Projects
You can start each project individually, by running the following commands.
In your terminal, change directory to backend and run yarn develop, then in a new terminal window, change directory to frontend and run yarn dev.
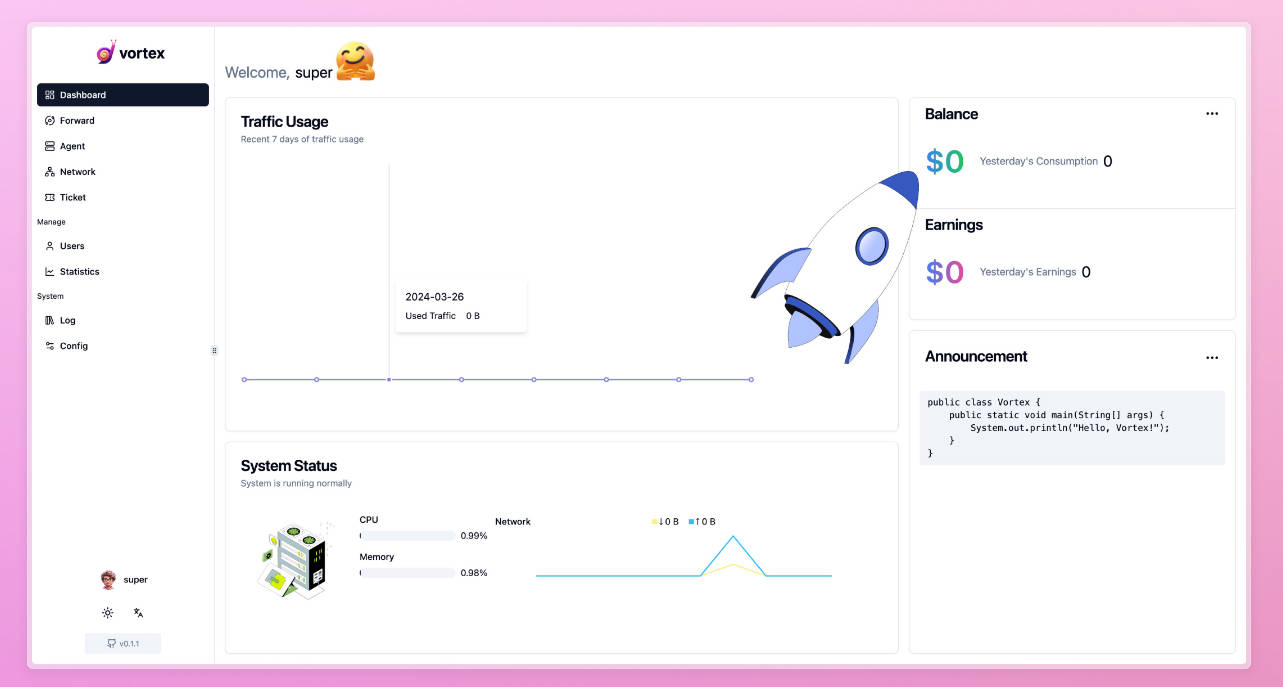
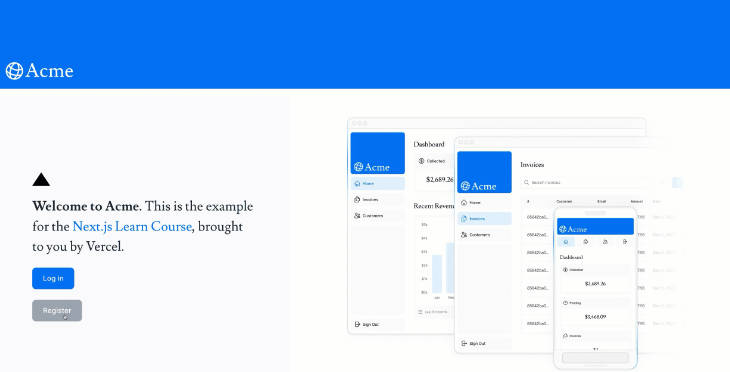
Navigate to http://localhost:3000 and should see the following screen.
You can find your Strapi app running on http://localhost:1337.
You can also run both projects using *concurrently to start both projects by running yarn dev in the root of your project.
You can checkout the scripts inside the package.json file in the root of your project.
{
  "scripts": {
    "frontend": "yarn dev --prefix ../frontend/",
    "backend": "yarn dev --prefix ../backend/",
    "clear": "cd frontend && rm -rf .next && rm -rf cache",
    "setup:frontend": "cd frontend && yarn",
    "setup:backend": "cd backend && yarn",
    "setup": "yarn install && yarn setup:frontend && yarn setup:backend",
    "dev": "yarn clear && concurrently \"cd frontend && yarn dev\" \"cd backend && yarn develop\"",
    "seed": "cd backend && yarn strapi import -f ../seed-data.tar.gz",
    "export": "cd backend && yarn strapi export --no-encrypt -f ../seed-data",
    "repo:upstream": "git fetch upstream && git merge upstream/main"
  },
  "dependencies": {
    "concurrently": "^8.2.2"
  }
}
Starting Both Projects
You can start each project individually by running the following commands.
In your terminal, change the directory to backend and run yarn develop, then, in a new terminal window, change the directory to frontend and run yarn dev.
Navigate to http://localhost:3000 and should see the following screen.
You can find your Strapi app running on http://localhost:1337.
You can also run both projects using *concurrently to start both projects by running yarn dev at the root of your project.
You can check out the scripts inside the package.json file at the root of your project.
{
  "scripts": {
    "frontend": "yarn dev --prefix ../frontend/",
    "backend": "yarn dev --prefix ../backend/",
    "clear": "cd frontend && rm -rf .next && rm -rf cache",
    "setup:frontend": "cd frontend && yarn",
    "setup:backend": "cd backend && yarn",
    "setup": "yarn install && yarn setup:frontend && yarn setup:backend",
    "dev": "yarn clear && concurrently \"cd frontend && yarn dev\" \"cd backend && yarn develop\"",
    "seed": "cd backend && yarn strapi import -f ../seed-data.tar.gz",
    "export": "cd backend && yarn strapi export --no-encrypt -f ../seed-data",
    "repo:upstream": "git fetch upstream && git merge upstream/main"
  },
  "dependencies": {
    "concurrently": "^8.2.2"
  }
}
Nice, we now have our project running. Thank you for the support, and enjoy. Show your support by giving us a star and sharing the repo.