WeatherNavigator App
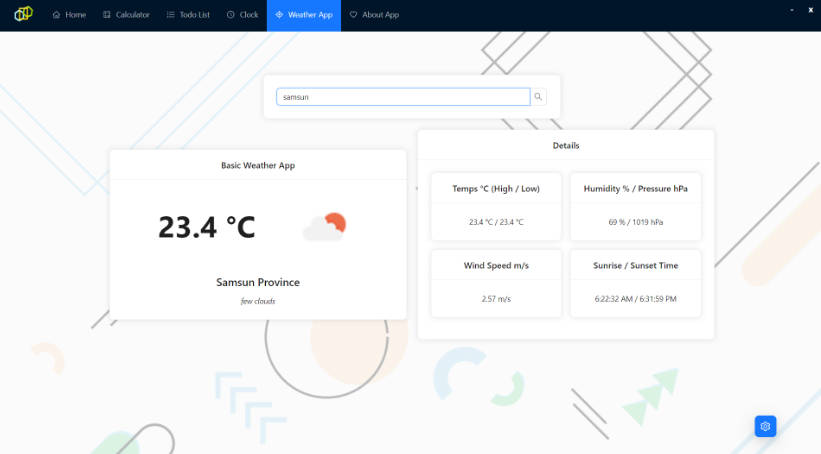
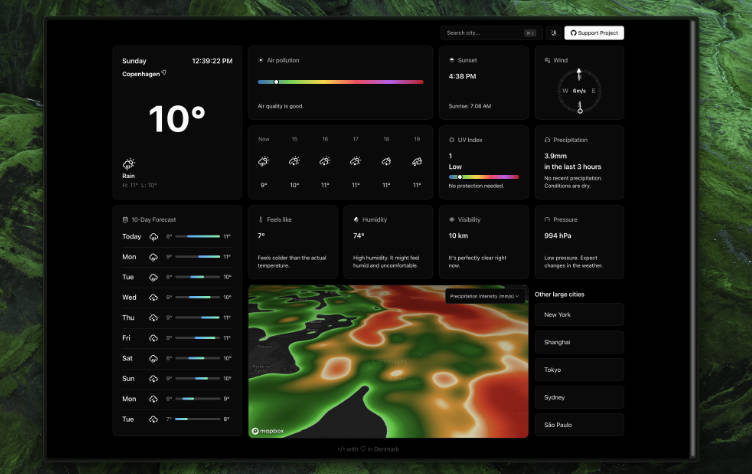
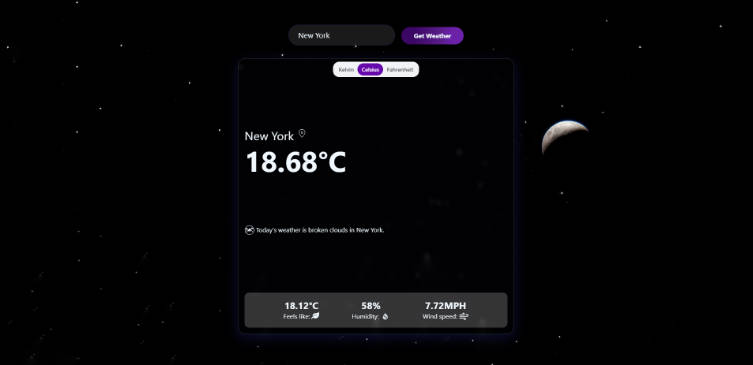
A weather application using OpenWeatherMap API and GeoDB API with places autocomplete, with React skills.
WeatherNavigator App Overview:
?️ Developing Languages, Tools, and Techniques Needed
Windows 10 Linux Ubuntu Visual Studio IDE 2022 NodeJS(node-v16.17.1-x64) JavaScript React JS App CSS3 HTML5
- Method pushing Vscode from Linux system to Github branch:
In Vscode Terminal:
git init .git config --global user.name <yourGitHubAccount>git config --global user.email <yourGitHubEmailAccount>git add .git statusgit commit -m "COMMIT MESSAGE"git remote add origin https://github.com/<yourGitHubAccount>git push -u origin master - Method replacing main branch with the new branch in Pull request:
Change New Branch in Github account
branchessection into Default Branch.
Build
Method to Run & Test the Project Locally Prerequisites & Setups Debugging&Troubleshooting Synchronous Developing Notes Testing Results
Contribution
Compatibility
Windows 10, WSL Vscode 1.68+, Linux Ubuntu 22.04.1 LTS.
Method to Run & Test the Project Locally
Download the project to local directory.
In local console, locate to the project direcctory.
Run npm install
Run npm i react-select
Run npm run start
Then test the App at http://localhost:3000/
C+CONTROL to exit from the App.
Prerequisites & Setups
Getting API Keys:
To find open APIs, go to GeoDB Cities
Sign up, and subscribe to the GeoDB Cities API Test -> Endpoints -> Cities
Then we have all code snippets and optional parameters to choose.
Go to OpenWeather:
Sign up. In My Account generated my unique API keys and services.
In Linux Ubuntu Terminal:
npx create-react-app react-weather-app
This will take a few minutes to install the React App packages, it is ready once terminal says:
we suggest that you begin by typing:
cd react-weather-app
npm start
Happy hacking!
Open the created folder in the local address with Vscode IDE.
Setups: Creating the application and installing packages:
In Vscode Terminal, install two essential prerequisite packages before starting:
Npm i react-accessible-accordion
Activate React app:
Npm run start
React app setups and activation work if we are redirected automatically by Node.JS to localhost:3000 and message in Powershell terminal returns:
Compiled successfully!
...
Webpack compiled successfully
Synchronous Developing Notes
Create a new folder under src named components, create a new folder under components named search, create a new file under search named search.js. In search.js: Start by constructing a testing component:
const Search = () => {
return (‘Hello’)}
export default Search;
Then import the component in App.js:
import Search from ‘./components/search/search’;
...
<Search />
Here, the localhost screen should print “Hello”. Add a container: In App.js, set up the container’s widths and center margins:
.container {
  max-width : 1080px;
  margin: 20px auto;
}
Setting up text fonts and background color: In index.css:
font-family: “Roboto”, Arial!important; ...
background-color: #d5d4d4
Now proceed to build our Search components. Back to search.js:
Import useState and AsyncPaginate to fetch data:
import {useState} from “react”;
import {AsyncPaginate} from “react-select-async-paginate”;
Async paginate needs essential parameters: A placeholder to prompt user input searching query:
Placeholder = “Search for a city”
To time out the data fetching:
debounceTimeout = {600}
Also a dynamic onChange to handle synchronous changes:
onChange = {handleOnChange}
To make the search parameters effective and visible, call it in App.js:
const handleOnSearchChange = (searchData) => { Console.log(searchData)}
...
<Search onSearchChange = {handleSearchChange} />
Refresh localhost, the searching placeholder with a query prompt should be visible.
Since we are loading properties through async paginate, we need to call loadOptions to fetch the certain APIs when retrieve the input values to implement the fetching method:
const loadOptions = (inputValue) => (
return fetch{...})
Copy and paste GET CITIES API from GeoDB website.
Create a new file under src named api.js:
export const geoApiOptions ={
API KEYS CONFIDENTIAL INFOS}
export const GEO_API_URL = ...
Then in search.js: Limit the input value as cities with requirement as mininmim 1 million population:
`{GEO_API_URL}/cities?minPopulation=1000000namePrefix=$inputValue)`
Import GEO_API_URL:
import {GEO_API_URL, geoApiOptions} from “../../api”;
Now format the document in Vscode and refresh the React App page: cities prefix data list fetched.pic.jpg case search tokyo.pic.jpg Now the initial prefix names of the global cities data successfully fetched and searchable.
Building Current Weather Components:
Fetch data for current weather: Create a new component folder named current-weather and their javascript and css files: Current-weather.js and current-weather.css. In current-weather.js:
import “/current-weather.css“
const CurrentWeather = () => {
return “hello”;
}export default CurrentWeather;
And import CurrentWeather in App.js:
import CurrentWeather from ‘./components/current-weather/current-weather’;
“Hello” should appear underneath the Search placeholder bar. Now replace “Hello” with a testing city case: i.e. Tokyo Sunny:
return (
<div className=”weather”>
<div className =”top”>
<p className = “city”>Tokyo</p>
<p className = “weather-description”> Sunny</p></div>
Import weather icons into public src:
<img alt=”weather” className = “weather-icon” src = “icons/01d.png”/>
Downloadable weather icons. Tokyo-sunny-test.pic.jpg Set up current weather box’s alignment in current-weather.js:
.weather{
Width: 300px;
Border-radius: 6px;
Box-shadow: 10px -2px  20px 2px rgb(0 0 0 /30%);
Color: #fff;
Background: #333;
margin: 20px auto 0 auto;
}
Now we have the current weather black box located at the center of white background: 30% black box.pic.jpg Some more alignment settings in current-weather.css:
.top{
    Display: flex;
    Justify-content: space-between;
    Align-items: center;
}
Add a little bit more padding:
padding: 0 20px 20px 20px;
Alignment setup for the city:
.city {
    font-weight: 600;
    font-size: 18px;
    line-height: 1;
    margin: 0;
    letter-spacing: 1px; }
Alignment setup for weather description:
.weather-description {
    font-weight: 400;
    font-size: 14px;
    line-height: 1;
    margin: 0;}
Add some more details of the weather temperature and “feels like” at bottom:
<p className=”temperature”>18 celsius degree </p>
<div className=”details”>
    <div className = “details”>
     <div className = “parameter-row”>
      <span className = “parameter-label”Details</span>
 <div className = “parameter-row”>
  <span className = “parameter-label”> Feels like</span>
   <span className = “parameter-value”> 22 celsius degree </span>
feels like details.pic.jpg with some more details properties:
wind...Humidity...Pressure...
more details.pic.jpg Now we just need to polish the alignment of each property detail in current-weather.css: For temperature:
.temperature{
   font-weight: 600;
   font-siZe: 70px;
   width: auto;
   letter-spacing: -5px;
   margin: 10px 0;
}
For details:
.details{
   width: 100%;
   padding-left: 20px;
}
For parameter row horizontal alignment:
.parameter-row{
   display: flex;
   justify-content: space-between;
}
For parameter label:
.parameter-label{
   text-align: left;
   font-weight: 400;
   font-size: 12px;
}
For parameter value:
.parameter-value{
  text-align: right;
  font-weight: 600;
  font-size: 12px;
}
properly aligned current weather.pic.jpg
Fetching and mapping data from weather API:
In open weather website, obtain the API keys for both current weather and forecast weather’s latitude and longitude data, store them into split value:
const [lat, lon] = searchData.value.split(“ “);
Fetch the current weather by pasting and properly formatting its API:
const currentWeatherFetch = fetch(`API-KEY`);
Fetch the forecast weather by pasting and properly formatting its API:
const forecastFetch = fetch(`API-KEY`);
NOTE: The fetching order matters.
Map the fetched data to JSON and await for its response:
Promise.all([currentWeatherFetch, forecastFetch])
   .then(async(response) => {
     const weatherResponse = await response[0].json();
     const forecastResponse = await response[0].json();})
Import useState from React JS and initialize it:
import {useState} from ‘react’;
const [currentWeather, setCurrentWeather] = useState(null);
const [forecast, setForecast] = useState(null);
Store the ordered fetched data’s JSON responses:
setCurrentWeather({weatherResponse});
setForecast({forecastResponse});
Also, we want its fetched current weather and forecast weather datas to be synchronously showing up in the console element while we search for a specific city. So extend it:
setCurrentWeather({city: searchData.label, ...weatherResponse});
setForecast({city: searchData.label,...forecastResponse});
Catch the potential errors:
.catch((err) => console.log(err));
And update the console logs:
console.log(currentWeather);
console.log(forecast);
Pass the current weather data and correctly display them when searching for a specific city:
In App.js:
{currentWeather && <CurrentWeather data = {currentWeather}/>}
In current-weather.js. Do some modifications for each property: For top, modify by passing the city, weather-description and icon data:
<p className =”city”>{data.city}</p>
<p className = “weather-description”> {data.weather[0].description}</p>
<img alt=”weather” className=”weather-icon” src={`icons/${data.weather[0].icon}.png`}/>
Now on localhost, search for different cities and their real-time weather status display correctly:
los angeles real-time weather.pic.jpg
berlin real-time weather.pic.jpg
san diego real-time weather.pic.jpg
tokyo real-time weather.pic.jpg
To get the temperature displayed as Celsius degree, append to WEATHER_API_KEY:
&units=metric
For bottom, pass data to temperature, details, feels like, wind speed, humidity and pressure:
...temperature {Math.round(data.main.temp)} °C
...Feels like {Math.round(data.main.feels_like)} °C
...Wind {data.wind.speed}m/s
...Humidity{data.main.humidity}%
...Pressure(data.main.pressure)hPa
Now the completed real-time weather statuses are all finished fetching: sydney real-time weather.pic.jpg dubai real-time weather.pic.jpg rome real-time weather.pic.jpg mumbai real-time weather.pic.jpg
Building weather forecast component:
Similar to current weather, start off by creating a new component folder named forecast, along with corresponding JS and CSS files forecast.js, forecast.css.
Test if Forecast is successfully exported in forecast.js:
const Forecast = () => {
return ‘Hello’; }
export default Forecast;
Import forecast in App.js:
import Forecast from “./components/forecast/forecast”;
“Hello” now displays on the placeholder at the forecast position. Use Accordionto properly implement forecasts:
const Forecast = ({ data }) => {
return ( <>
            <label className="title">Daily</label>
            <Accordion allowZeroExpanded>
                {data.list.splice(0, 7).map((item, idx) => (
                    <AccordionItem key={idx}>
                        <AccordionItemHeading>
                            <AccordionItemButton>
                                <div className="daily-item">
                                    <img alt="weather"
className="icon-small" src={`icons/${item.weather[0].icon}.png`} />
                                </div>
                            </AccordionItemButton>
                        </AccordionItemHeading>
                        <AccordionItemPanel></AccordionItemPanel>
                    </AccordionItem>
                ))}</Accordion>
Future 7 days of forecasts of weather small-icons displays: 7 days daily forecast small icons.pic.jpg Now start an array to map each date in a week to its corresponding weather that date:
const WEEK_DAYS = ['Monday', 'Tuesday', 'Wednesday', 'Thursday',
'Friday', 'Saturday', 'Sunday'];
const Forecast = ({ data }) => {
    const dayInAWeek = new Date().getDay();
    const forecastDays = WEEK_DAYS.slice(dayInAWeek,
WEEK_DAYS.length).concat(
        WEEK_DAYS.slice(0, dayInAWeek)
    );
    console.log(forecastDays);
Now add the map index as the label under small-icon images:
<label className =”day”>{forecastDays[idx]}</label>
So, if we search a specific city, its future a week of forecasts display along with icons on side: date and icons.pic.jpg Add forecasts descriptions:
<label className =”descriptions”>{item.weather[0].description}</label>
forecast with description.pic.jpg Add to display the minimum and the max temperatures across a day:
 <label className="min-max">
{Math.round(item.main.temp_min)}°C /{" "}
{Math.round(item.main.temp_max)}°C
</label>
forecast with min-max temperature.pic.jpg Now to make the forecasts properly aligned, first
import ‘./forecast.css’;
In forecast.css, add alignments on title, daily-item and icon-small:
 .title {
    font-size: 23px;
    font-weight: 700;}
.daily-item {
    background-color: #f5f5f5;
    border-radius: 15px;
    height: 40px;
    margin: 5px;
    display: flex;
    align-items: center;
    cursor: pointer;
    font-size: 14px;
    padding: 5px 20px;}
.icon-small {
    width: 40px;}
better aligned forecast.pic.jpg
Also add day, description, min-max, all forecast properties properly aligned now:
all forecast properties properly aligned.pic.jpg
Add grids in AccordionItemPanels:
<div className="daily-details-grid">
                       <div
className="daily-details-grid-item">
hPa</label>
    <label>Pressure:</label>
    <label>{item.main.pressure}
</div>
                      <div
className="daily-details-grid-item">
                                    <label>Humidity:</label>
<label>{item.main.humidity}%</label>
                                </div>
                                <div
className="daily-details-grid-item">
                        <label>Clouds:</label>
            <label>{item.clouds.all}%</label>
                                </div>
                  <div
                  className="daily-details-grid-item">
m/s</label>
    <label>Wind speed:</label>
    <label>{item.wind.speed}
</div>
                                <div
className="daily-details-grid-item">
                                    <label>Sea level:</label>
<label>{item.main.sea_level}</label>
                                </div>
                                <div
className="daily-details-grid-item">
                                    <label>Feels like:</label>
<label>{Math.round(item.main.feels_like)}°C</label>
                                </div>
                            </div>
                        </AccordionItemPanel>
Click on any grid when can obtain all forecast information: forecast grid all ino.pic.jpg Now we need to adjust the styles of all this information. So in forecast.css:
daily-details-grid {
    grid-row-gap: 0;
    grid-column-gap: 15px;
    row-gap: 0;
    column-gap: 15px;
    display: grid;
    flex: 1 1;
    grid-template-columns: auto auto;
    padding: 5px 15px;
}
.daily-details-grid-item {
    display: flex;
    height: 30px;
    justify-content: space-between;
    align-items: center;
}
.daily-details-grid-item label:first-child {
    color: #757575;
}
.daily-details-grid-item label :last-child {
    color: #212121;
}
Finishing up the last styles, then our application is built.
Testing Results
cities prefix data list fetched.pic.jpg case search tokyo.pic.jpg Tokyo-sunny-test.pic.jpg 30% black box.pic.jpg feels like details.pic.jpg more details.pic.jpg properly aligned current weather.pic.jpg los angeles real-time weather.pic.jpg berlin real-time weather.pic.jpg san diego real-time weather.pic.jpg tokyo real-time weather.pic.jpg sydney real-time weather.pic.jpg dubai real-time weather.pic.jpg rome real-time weather.pic.jpg mumbai real-time weather.pic.jpg 7 days daily forecast small icons.pic.jpg date and icons.pic.jpg forecast with description.pic.jpg forecast with min-max temperature.pic.jpg better aligned forecast.pic.jpg all forecast properties properly aligned.pic.jpg forecast grid all ino.pic.jpg
Debugging&Troubleshooting
- Noticeable Setup Error:
‘npm’ is not recognized as internal or external command, operable program or batch filewarning occurs when trying to run the npm command. DEBUGGING: Go to Node.JS. Installnode-v16.17.1-x64to Local Disk C: Then in Vscode Terminal, install:npm i-react-select-async-paginatIgnorehigh vulnarbilitieswarnings. Instead, do:npm i-react-select-async-paginat --forceto add more protections. - Possible Error When Activating React App:
Warning react-scripts: command not foundDEBUGGING: install react-script globally instead:npm install -g react-scripts - Stubborn Error
Access Deniedwhen removin @emotions fallbacks in node_modules inherited from npm package. DEBUGGING: Access denied Win 10 Solution. - Frequently Occurring Error: React App warning on localhost:
Compiled with problems:ERROR[eslint] Plugin “react” was conflicted between “package.json >> eslint-react-app >> base.js directory...DEBUGGING: Neglectful error. Ignore the error until it naturally disappears.
Author
Krystal Zhang https://github.com/KrystalZhang612
This file was generated by WeatherNavigatorApp-readme, on October 1, 2022


