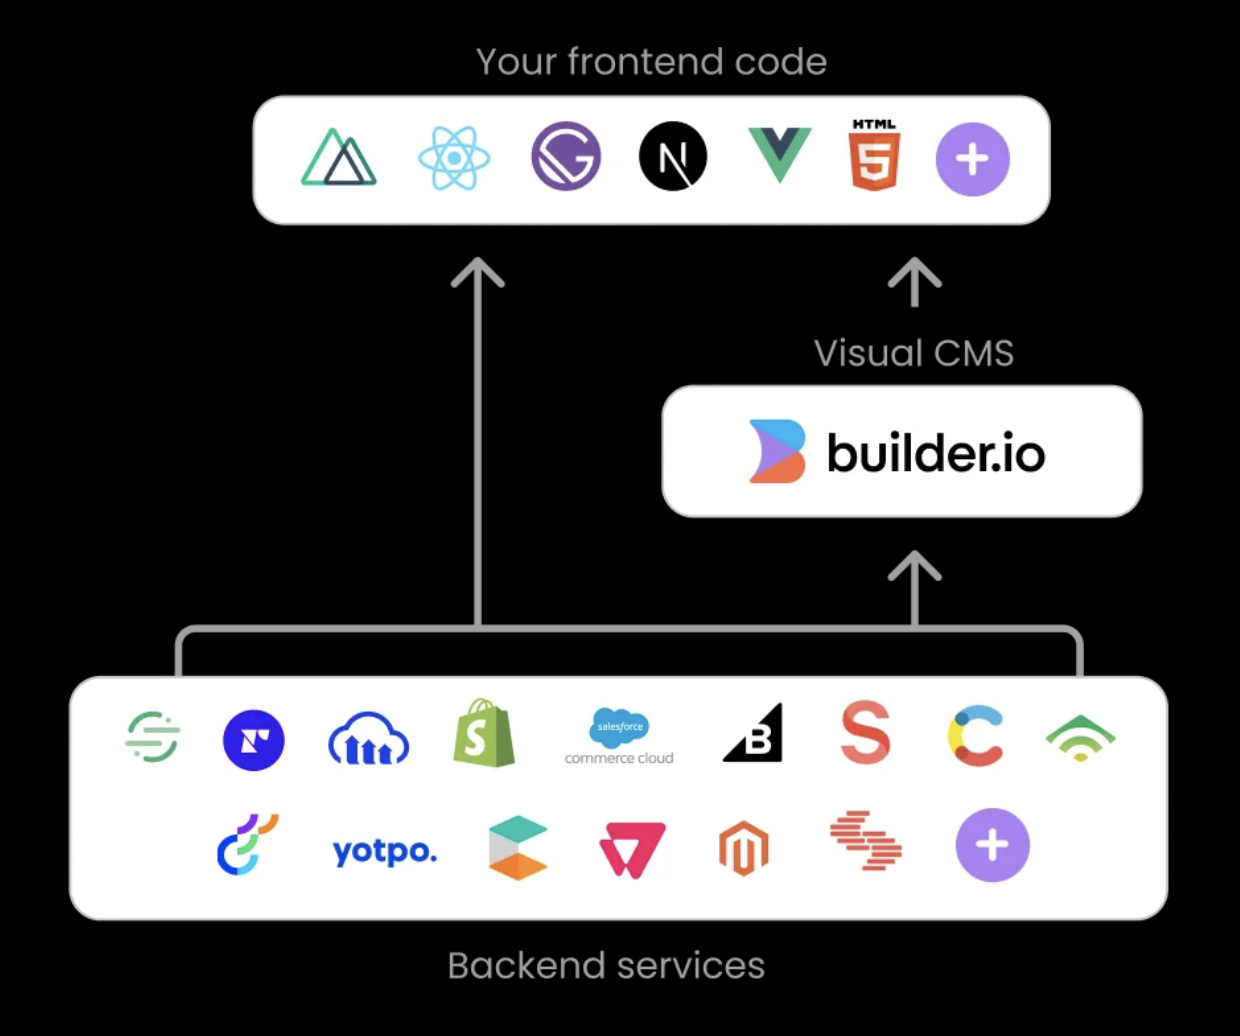
Next.js + Builder.io Edge Personalization Demo
This is a fork of Next.js Commerce with Builder.io integrated and using Edge Middleware to personalize pages with great performance.
Dynamic at the speed of static ⚡

How this works

In short, to personalize a page, we rewrite a basic path to a path + a hash of personalized attribtues.
For instance, if you have a pages/page.tsx, you can rename it to pages/page/[hash].tsx, and add it to be included into the rewriting middleware to add the personalized hash at the end.
You can now have your page return personalized content based on what is in the hash, and this is purely automatic via what personalization.* cookies are present
You can set them at any time to target off of, for instance:
Cookies.set('personalization.returnVisitor', 'true')
And now your /page will be rewritten to /page/returnVisitor=true when that cookie is present, and be handled accordingly
Then, you can visually create and edit pages, sections, and data on your site with Builder.io’s visual editor, dragging and dropping with your React components and publish unlimited variations to your site without any code or deploys needed:

Get Started
Run Locally
After you clone this repo, from the project root:
Run the dev server
yarn # run this command in root folder of the mono repo
yarn dev
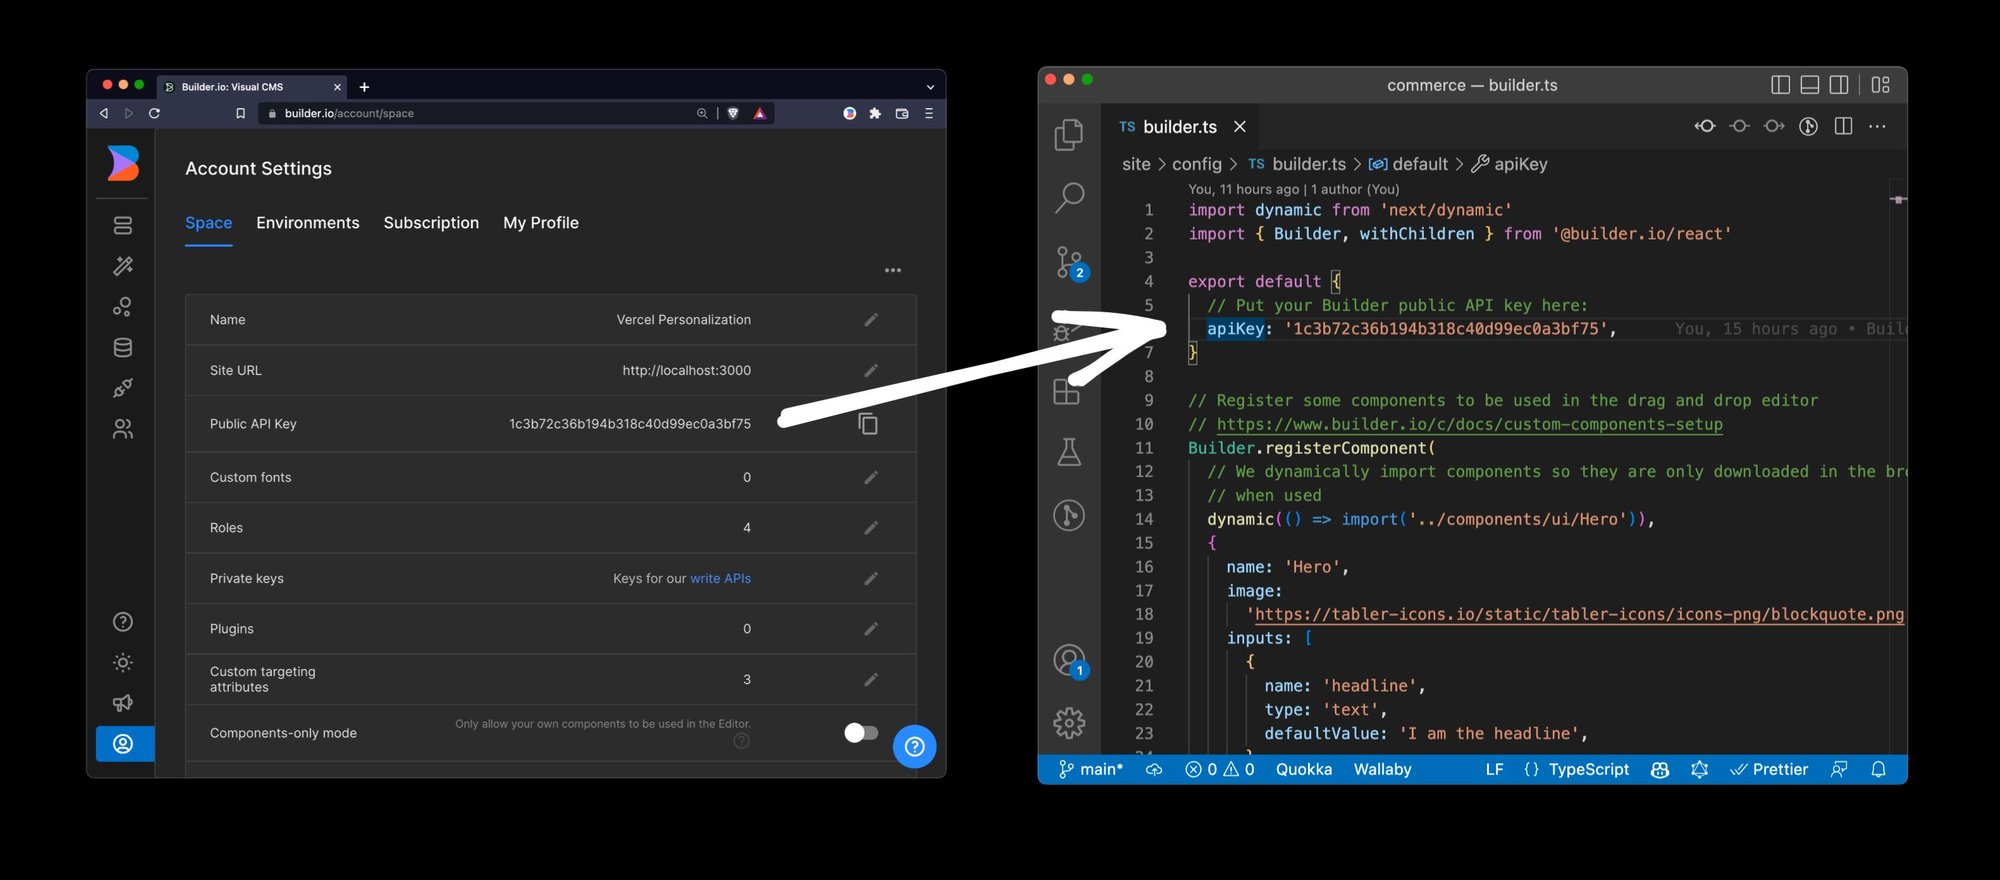
Connect Builder.io
To connect Builder.io, create a free account, from your account settings copy your Public API Key and paste it into site/config/builder.ts
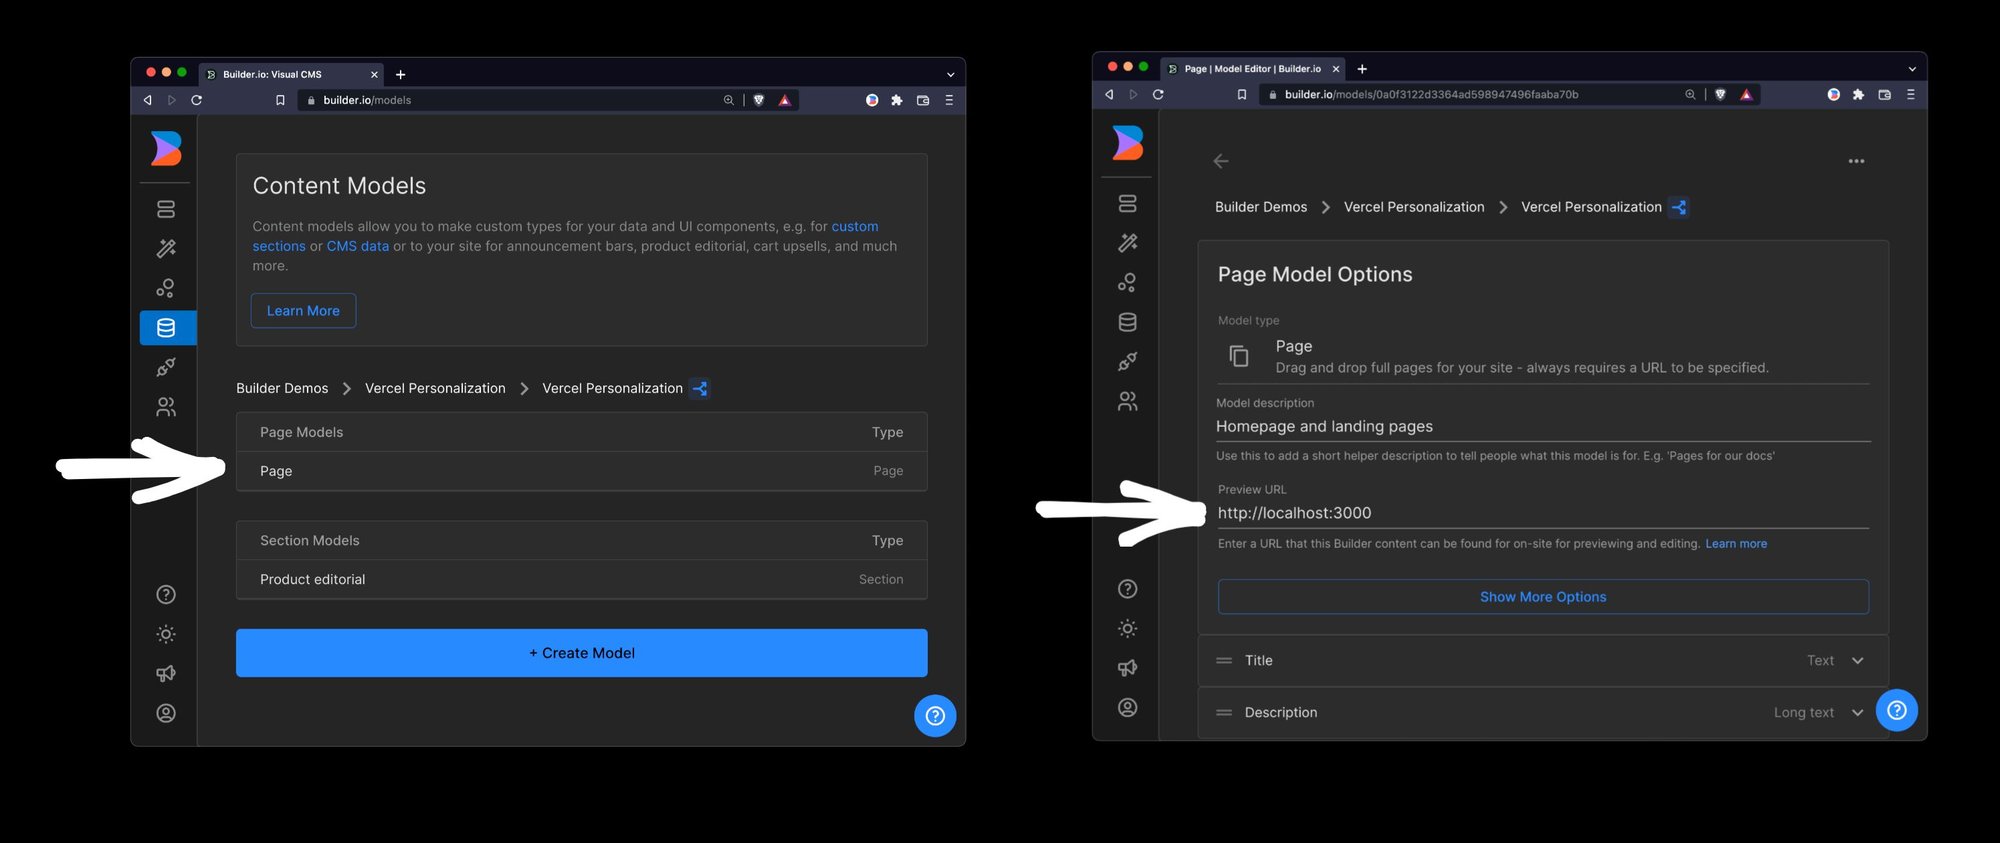
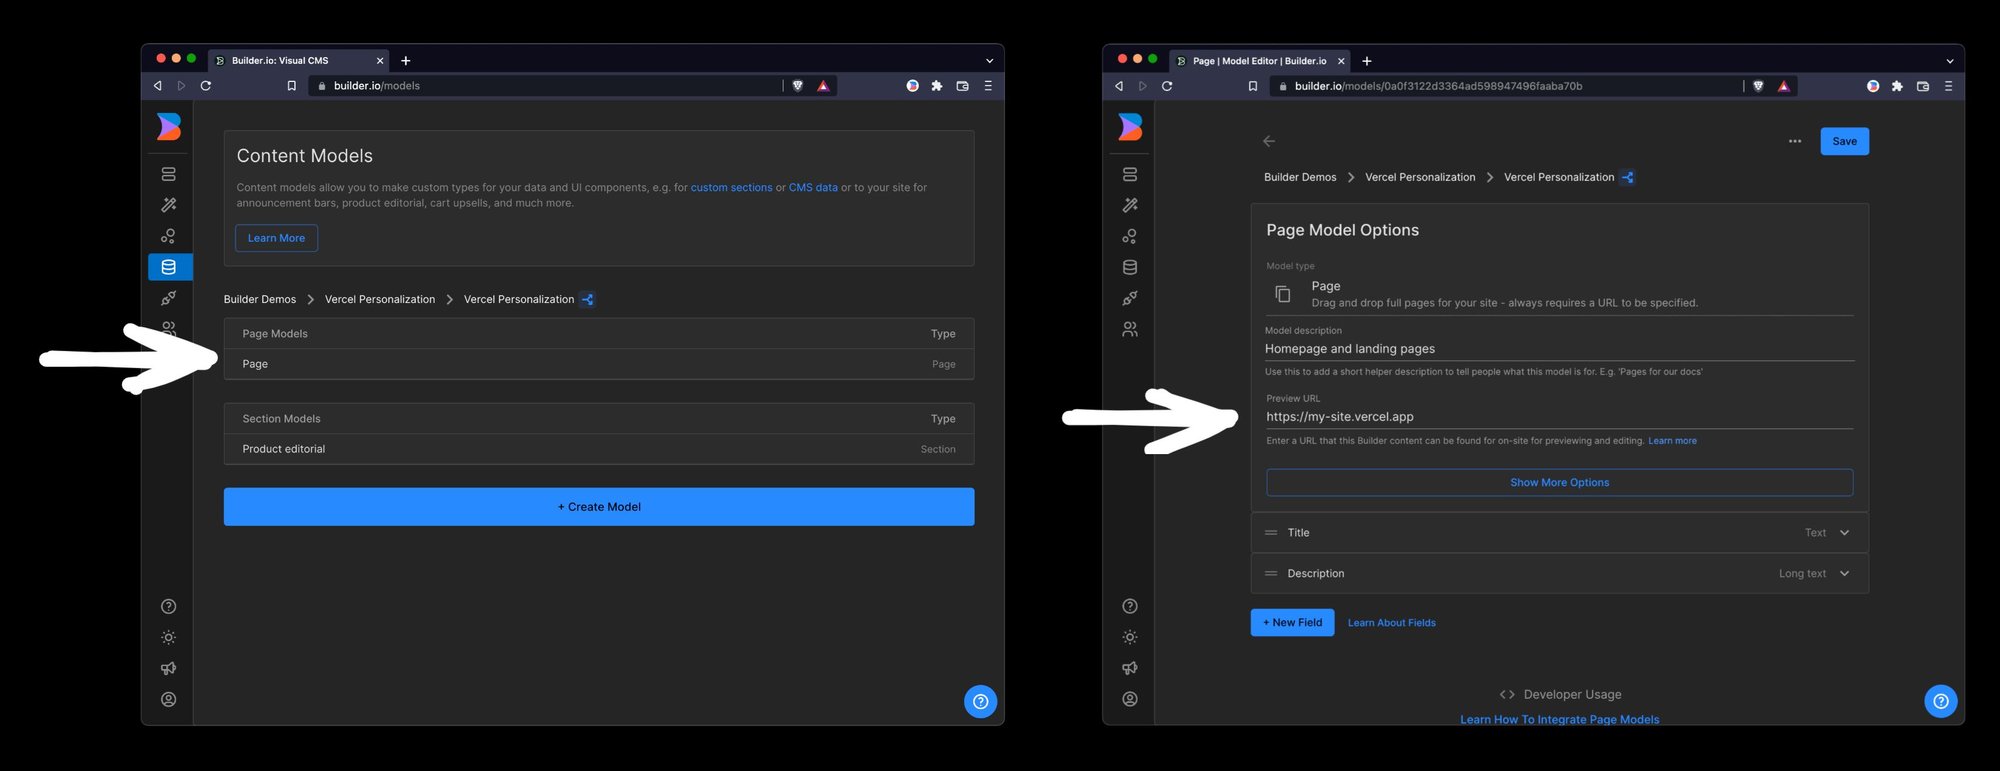
Set your Preview URL
Next, head to builder.io/models and choose the page model and enter http://localhost:3000 as the preview URL, and then hit save at the top right of the page.
Configure personalization attributes
Now, in Builder.io add some targeting attributes to begin personalizing your content on. Head to builder.io/account and click on the pencil next to Custom targeting attributes and add some attributes, for instance like you see here:
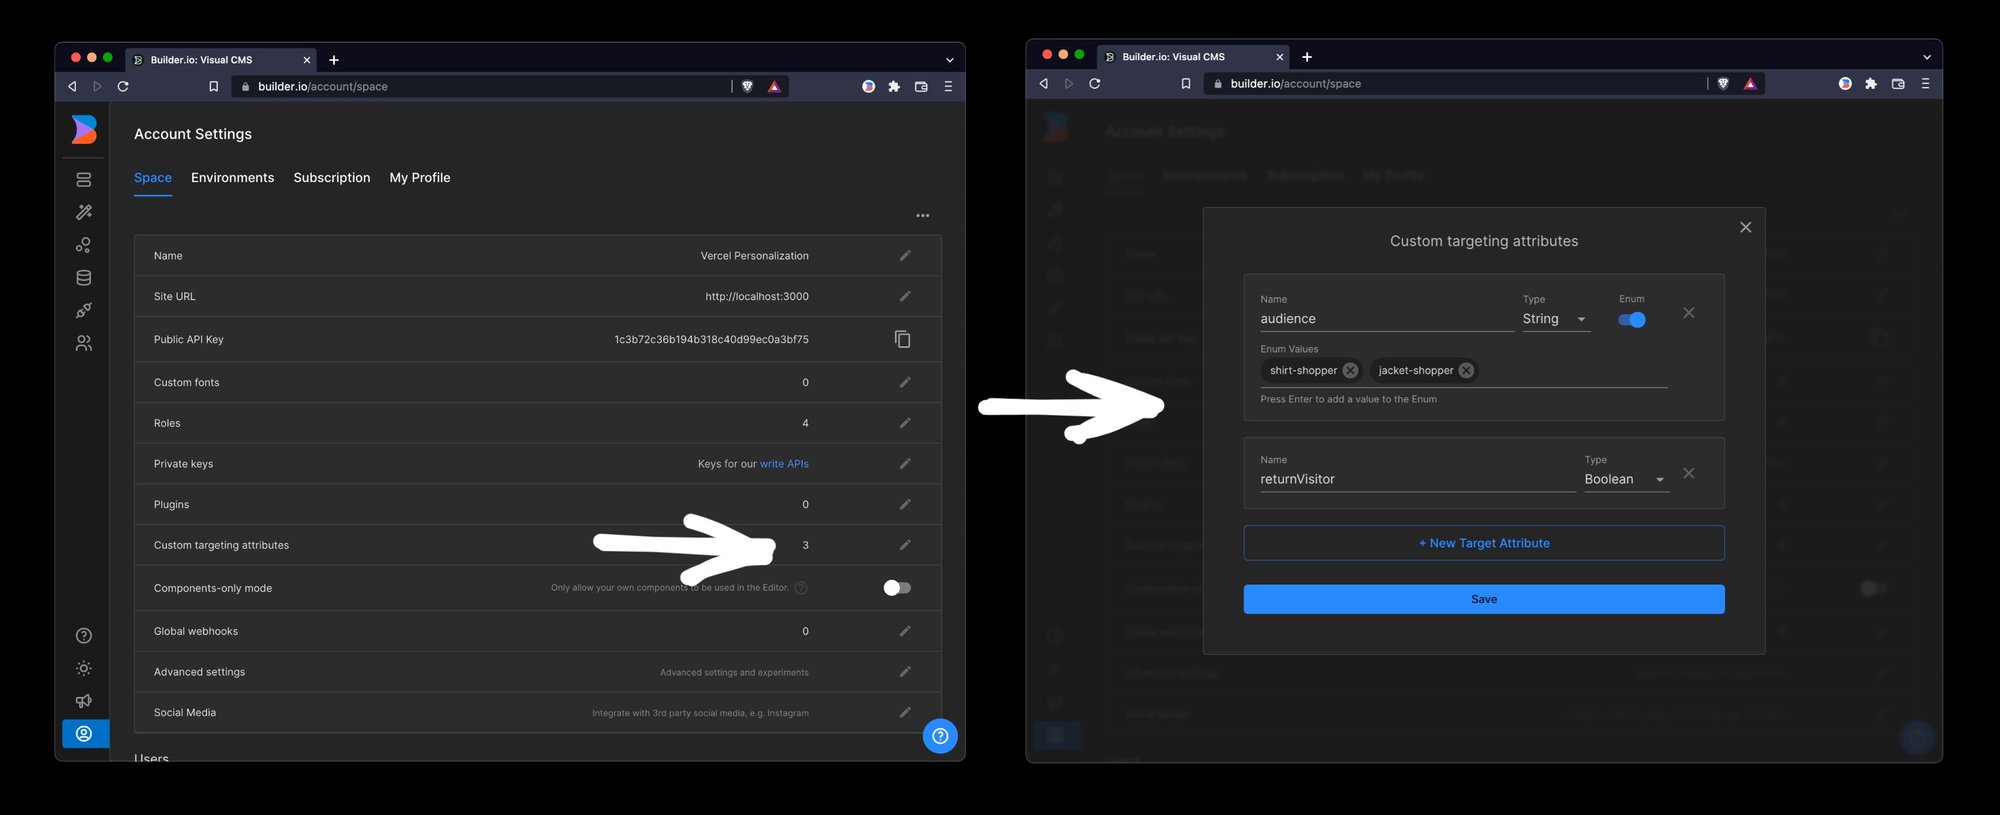
Above, we create an attribute called returnVisitor that is a boolean that we set here so it can be read by edge middleware, as well as an attribute called audience that is an enum of a couple made up segments like shirt-shipper and jacket-shopper that we set here via browsing history (could alternatively be set upon add to cart or other actions).
Note: generally audiences should come from a CDP, like
myCdp.getAudiences().then((audiences) => {
  // assuming audiences is an array of strings, like ['shirt-shipper', 'jacket-shopper']
  Cookies.set('personalization.audience', JSON.stringify(audiences))
})
Create a page
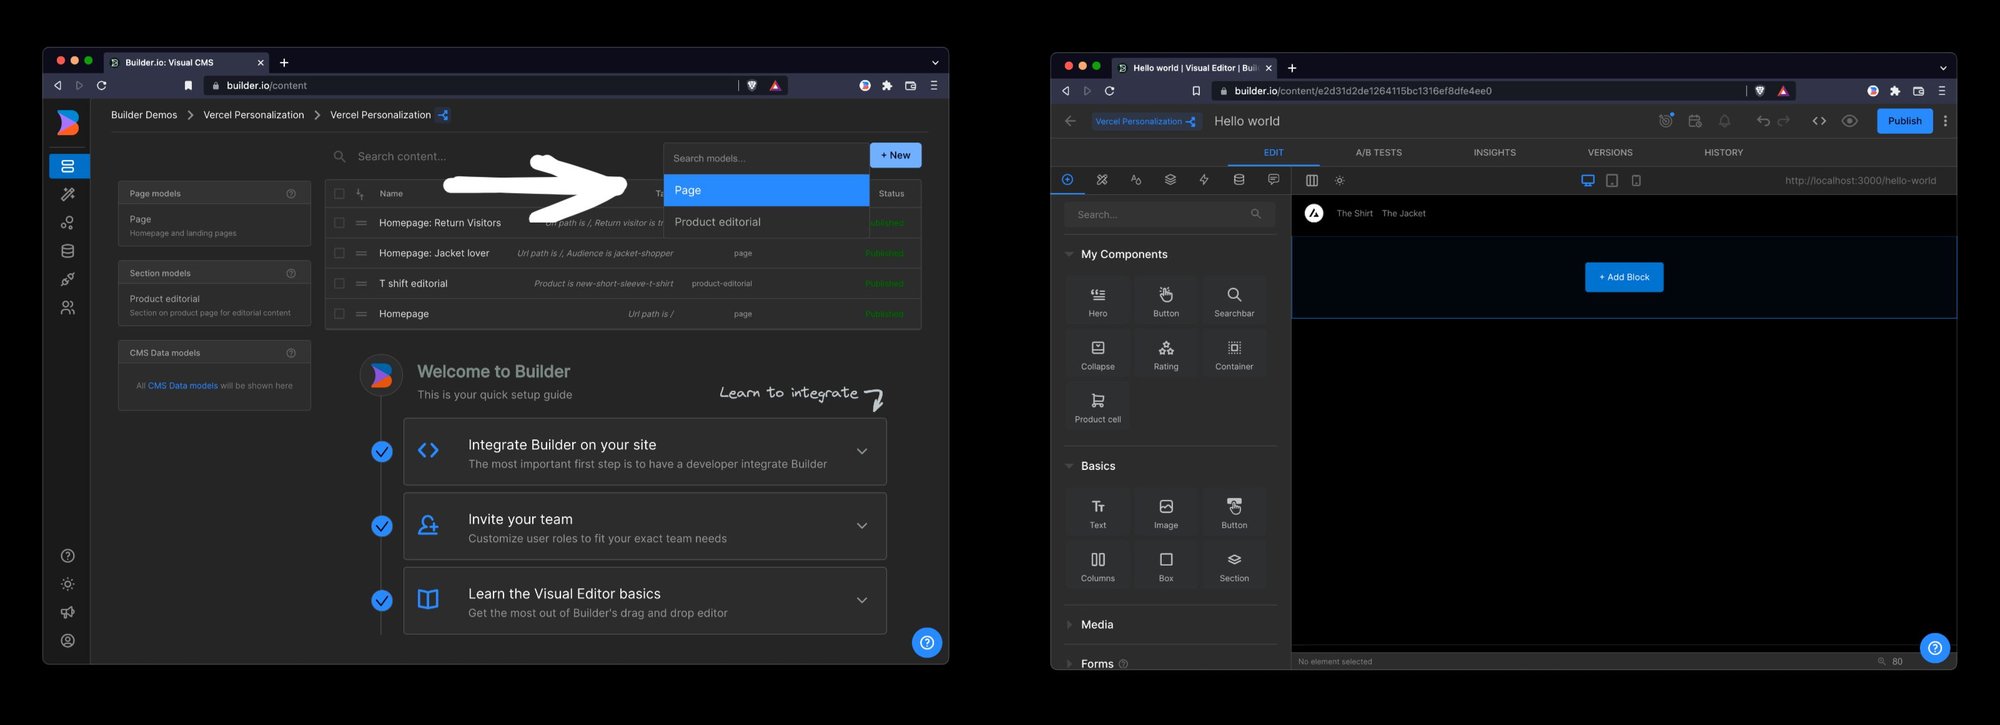
Now, go to builder.io/content and choose the + new button, choose page, and drag and drop to create a page on your Next.js site with your React components!
⚠️ If you are having trouble connecting: be sure you are running your dev server on
http://localhost:3000by runningyarn devfrom this project root like shown above
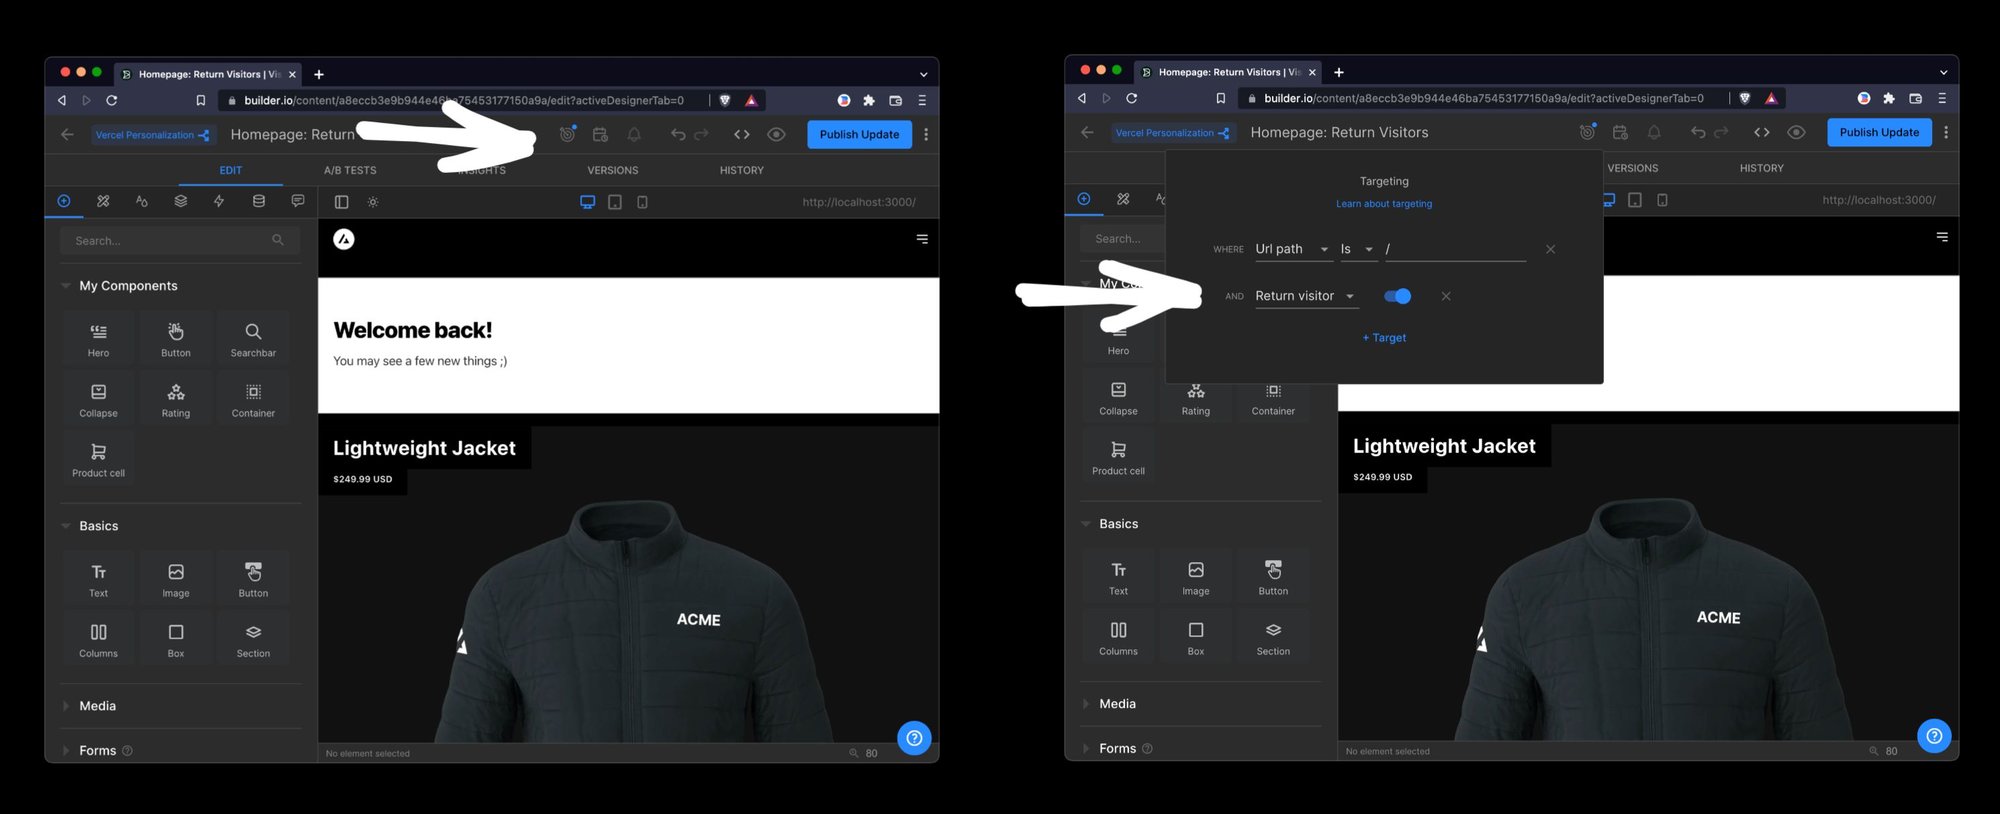
Target and publish your page
At the top of the editor, you can configure which audiences should see this page variant, and publish.
Deploy to Vercel
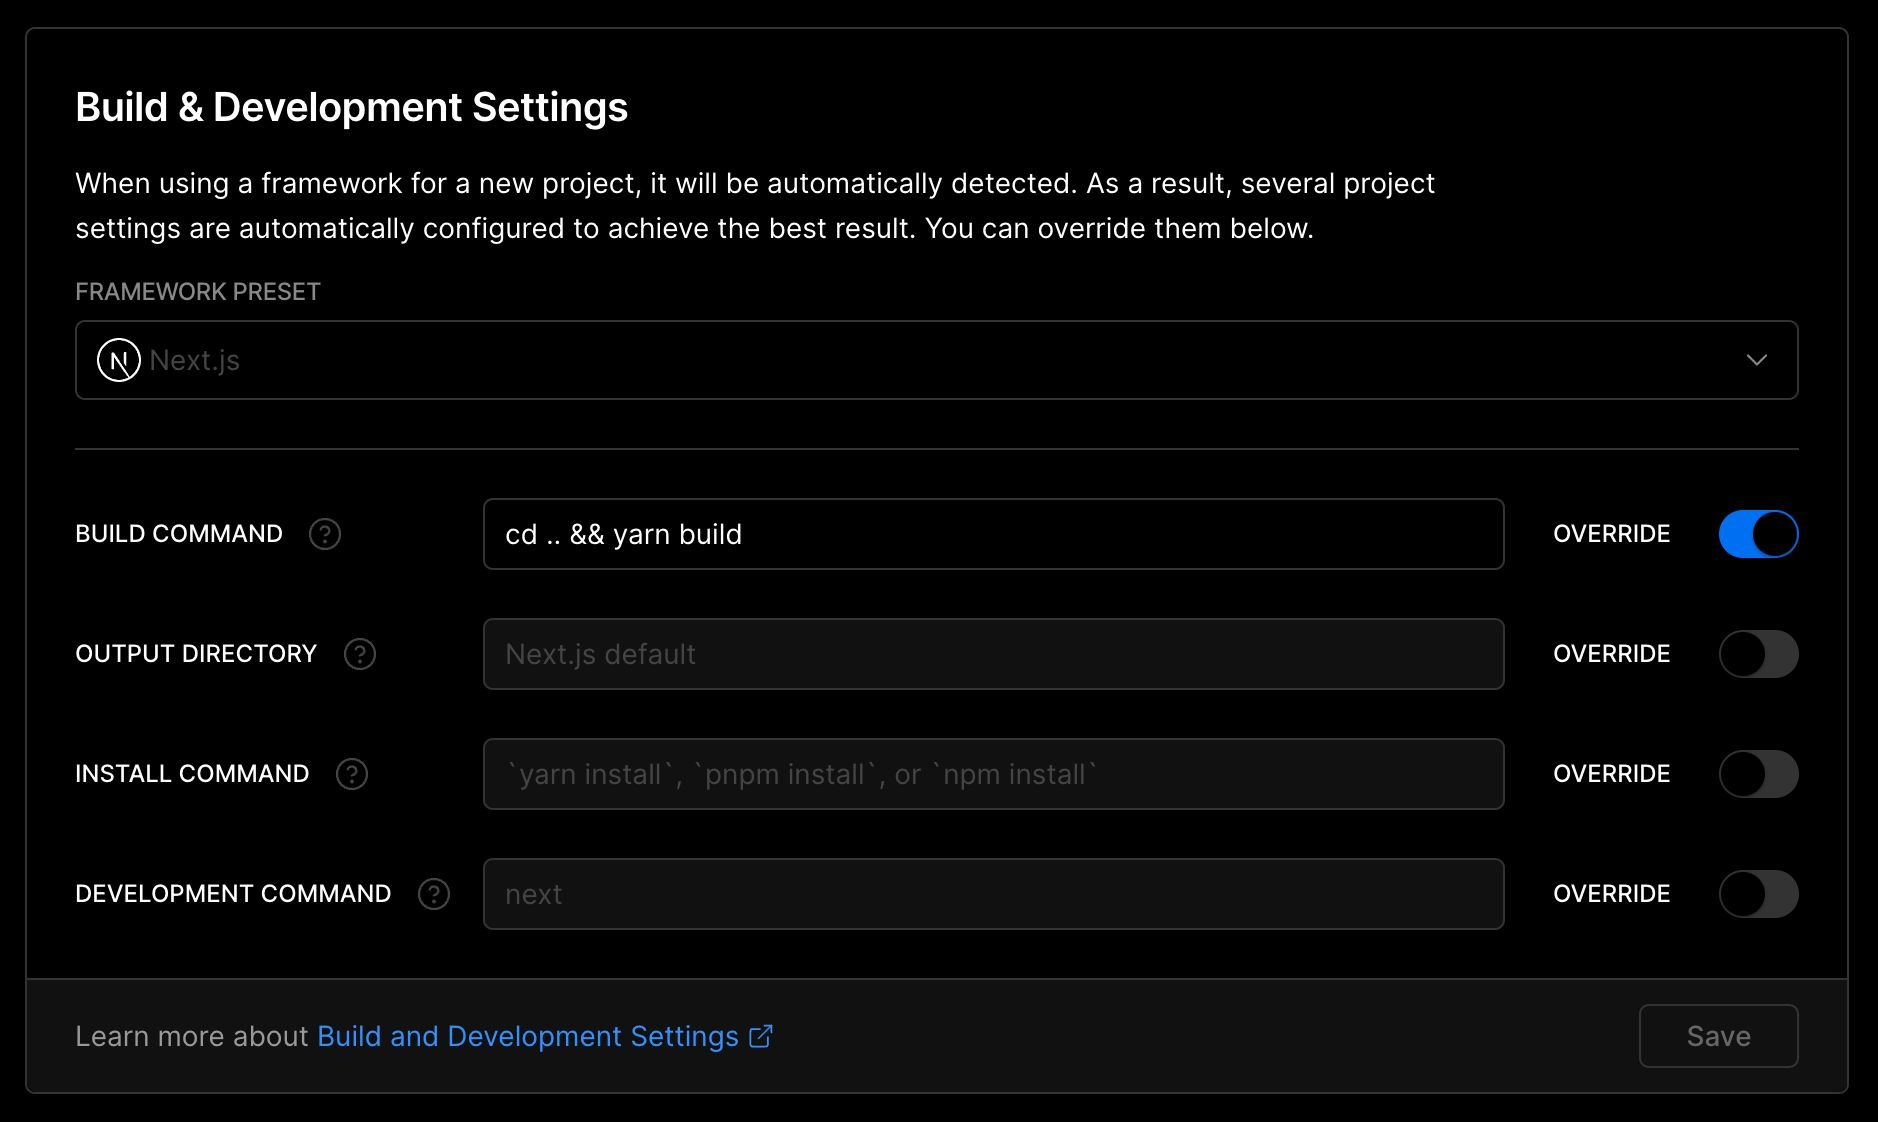
To get your site live, you can deploy it to Vercel. Be sure to use the following configuration:
- Framework preset: Next.js
- Build command:
cd .. && yarn build
Once you deploy to vercel, you can update your Preview URL to use the live URL so now others on your team can create content on your new site with Builder.io.
E.g. if your site is now live at https://my-site.vercel.app, you can go back to builder.io/models, choose the page model, and update your Preview URL to https://my-site.vercel.app and save.
Explore the code
Some key places to look in the codebase:
- site/config/builder.ts is where we configure Builder.io custom components and settings
- site/pages/[[…pages]].tsx is where we integrate page building, including fetching data from Builder.io and rendering it
- site/middleware.ts is where we create and configure the edge middleware for personalizing pages
Next Steps
Learn more about
- Developing with Builder.io
- Registering custom components with Builder.io
- Learn more about Next.js Middleware and Vercel Edge Functions
- Learn more about the Next.js personalization utils used in this example
Troubleshooting
Run into any issues? Chat with us in discord!