
snoopForms
The Open-Source Typeform Alternative Website | Join Discord community
⚠️ Note: This repository is still in an early stage of development. We love the open source community and want to show what we are working on early. We will update this readme with more information once it is safe to use. Until then, feel free to share your thoughts, contact us, and contribute if you’d like.
About snoopForms

Spin up forms in minutes. Pipe your data exactly where you need it. Maximize your results with juicy analytics.
Features
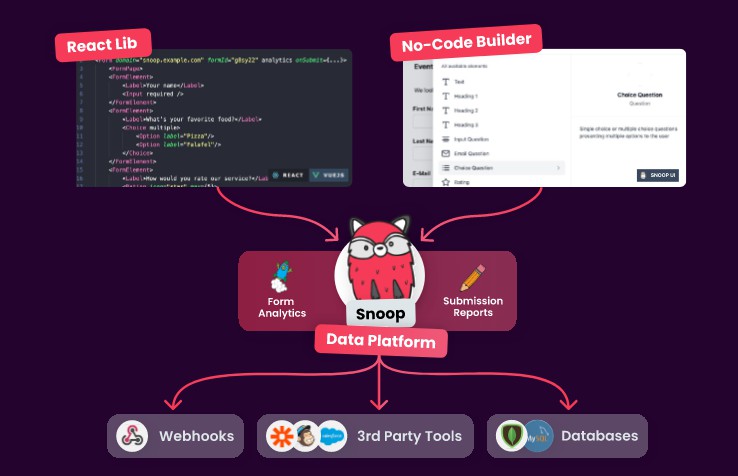
- Work with the React Lib or use our No Code Builder to build exactly the forms you need.
- Pipe your data where you need it. Don’t wait for your form provider to finally build the integration you desperately need.
- Since you can self-host Snoop Forms, it’s 100% compliant with privacy all regulations.
- How users interact with your form can be as important as their input. Don’t miss anything with our best-in-class analytics.
- We aim for the best possible developer experience. Use what you like, build on top what you need. Everything is possible.
Built With
Getting started
To get the project running locally on your machine you need to have the following development tools installed:
- Node.JS
- Yarn
- PostgreSQL
- Clone the project:
git clone https://github.com/snoopForms/snoopforms.git && cd snoopforms
- Install Node.JS packages:
yarn install
- Create a
.env.localfile based on.env.local.exampleand change it according to your setup. Make sure theDATABASE_URLvariable is set correctly according to your local database. You must also set the email variables to valid SMTP-credentials for the login to work.
cp .env.local.example .env.local && nano .env.local
- Let prisma set up the database for you:
npx prisma db push
- Start the development server:
yarn dev
You can now access the app on https://localhost:3000
Deployment
The easiest way to deploy snoopForms yourself on your own machine is using Docker. This requires Docker and docker-compose on your system to work.
Clone the repository:
git clone https://github.com/snoopForms/snoopforms.git && cd snoopforms
Create a .env.local file based on .env.local.example and change it according to your setup. You must set the email variables to valid SMTP-credentials for the login to work:
cp .env.local.example .env.local && nano .env.local
Start the docker-compose process to build and spin up the snoopForms container as well as the postgres database.
docker-compose up -d
You can now access the app on https://localhost:3000
Contributing
Contributions are what make the open source community such an amazing place to be learn, inspire, and create. Any contributions you make are greatly appreciated.
- Fork the project
- Create your feature branch (
git checkout -b feature/AmazingFeature) - Make your changes
- Commit your changes (
git commit -m 'Add some AmazingFeature') - Push to the branch (
git push origin feature/AmazingFeature) - Open a pull request
License
Distributed under the AGPLv3 License. See LICENSE for more information.