UTU Trust SDK React Example Dapp
This example shows you how to integrate with the UTU Trust SDK from within a React web dapp.
What is the UTU Trust Network?
The UTU Trust Network allows wallet users to:
-
Give and Receive Feedback (signal) on certain assets such as web page addresses, contract addresses, products services
-
Endorse comments to give them more weight by spending UTU coin.
There are a few components in this:
(i)   Connecting to your Wallet using "Wallet Connect"
(ii)  Connecting to the UTU backend
(iii) Give UTU feedback (signal) on an asset. Optionally Endorse the comment by spending UTU coin.
(iv)  Get UTU feedback (signal) on an asset
What is worthy of note is that Feedback for a certain asset can come from people in the social network of a certain user. The idea is one can trust comments from users in one’s network more than comments from total strangers.
Consider the example of integrating the UTU SDK into a chrome extension:
The extension could warn the user with feedback from the user’s network that the web domain they are on is a malicious domain which may try and empty and steal the crypto in their wallet if they click on a button.
Steps to get this example working
Step 1: Install Metamask
Go to:
https://metamask.io/download/
Download and install MetaMask into your Chrome Browser
Step 2: Clone this example
cd ~
mkdir workspace
cd workspace
clone https://gitlab.com/ututrust/api-sdk/utu-trust-sdk-react-example-dapp.git
cd utu-trust-sdk-react-example-dapp
Step 3: Go to Wallet Connect and sign up and get your project id
Go to
https://walletconnect.com/
Read docs – familiarise yourself on what wallet connect is about.
Then go to:
https://cloud.walletconnect.com/sign-in
Sign up with your email address. Create a project and get your Project ID.
A Project ID looks like:
7fcb9eef629acf7a853f1ca68b984e7d
Step 4: Add the Project ID to the code
Go to this file:
utu-trust-sdk-react-example-dapp2/src/index.tsx
Find projectId and replace it with the project id you created in Step 2
Step 5: Build and run
npm install
npm run start
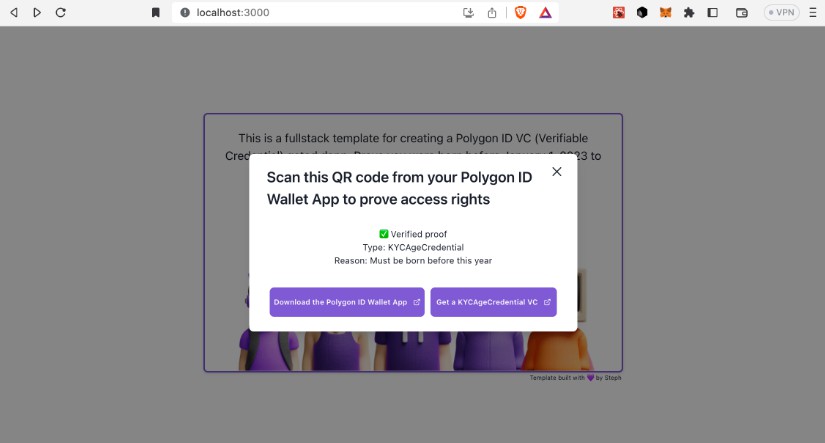
Access the example app on:
http://localhost:3000/
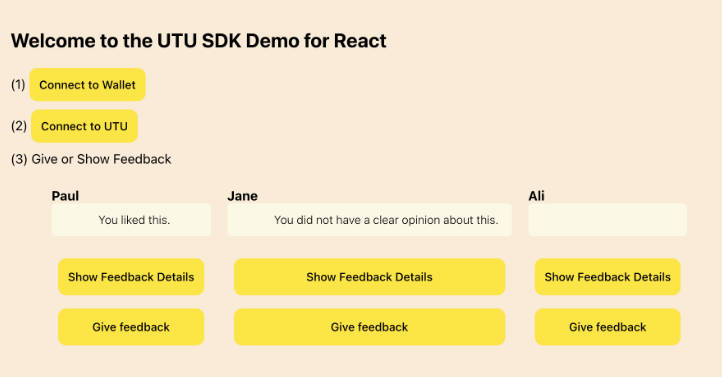
Step 6: Screenshot of Application
The app looks like:

Note that Step (3) is only shown once you have connected to UTU in step (2).
Step 7: End User Instructions
First of all:
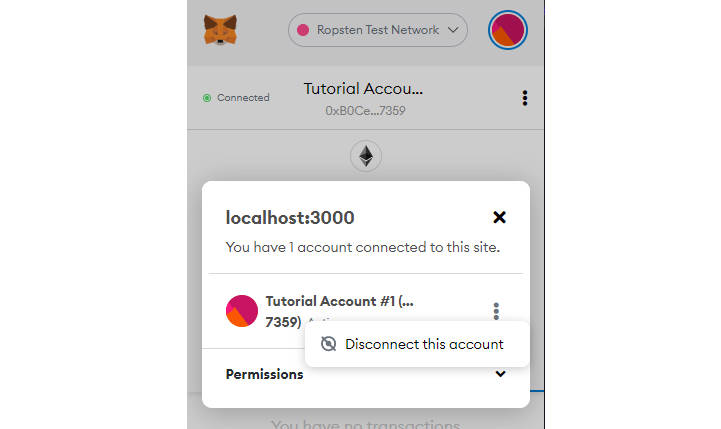
- Click the “Connect to Wallet” Button and connect to your MetaMask wallet
- Click the “Connect to UTU” Button. The MetaMask popup will show again to login to UTU.
Behind the scenes the connect to UTU returns a JWT token that is later used everytime the code calls the UTU Trush SDK backend APIs.
Then:
- Click the “Give Feedback” button of Paul and write a comment
- Click the “Show Feedback Details” button of Paul and see the comment.
Explanation of Tags and their attributes
In offers.js you will see code like:
<div className="offers">
  <ul>
    {
      offers.map((offer: any) =>
        <li className="offer" key={offer.id}>
          <div style={{ fontWeight: 'bold' }}>{offer.name}</div>
          <x-utu-root
            source-uuid={walletAddress}
            target-type="provider"
            target-uuids={getId(offer.id)}>
            <x-utu-recommendation
              target-uuid={getId(offer.id)}
              style={{ marginTop: "-20px" }} />
          </x-utu-root>
          <br />
          <x-utu-feedback-details-popup
            target-uuid={getId(offer.id)}
            source-uuid={walletAddress}
          />
          <x-utu-feedback-form-popup
            source-uuid={walletAddress}
            target-uuid={getId(offer.id)}
            transaction-id={5} />
        </li>
      )
    }
  </ul>
</div>
Note that the following tags:
x-utu-root
x-utu-feedback-details-popup
x-utu-feedback-form-popup
can optionally have the following attribute added in addition:
api-url={overrideApiUrl}
The staging base url is:
https://stage-api.ututrust.com
The production base url is:
https://api.ututrust.com
By default the urls are set to staging so you do not need to set them if you want staging.
To switch to production you have 2 options:
(i) Add the following code:

  // @ts-ignore
  window.xUtuConfig = {}
  // @ts-ignore
  xUtuConfig.production = true;

(ii) Add the api-url attribute to the above mention tags and point it to production
Explanation Tags
You can see above we have the following tags:
x-utu-root
x-utu-recommendation
x-utu-feedback-details-popup
x-utu-feedback-form-popup
Tags will now be discussed in turn:
x-utu-root
This tag is a wrapper tag for the x-utu-recommendation tags. It’s purpose is to reduce network calls to the backend. The idea is that x-utu-root can have multiple x-utu-recommendation child tags. Each x-utu-recommendation shows recommentation information for a given target asset.
x-utu-recommendation
This is a notification component that shows if the current asset you are interested in has any feedback / signal associated with it. The idea is that if this notification component shows that there is signal that the user can make the decision whether or not they click the button to show the feedback.
x-utu-feedback-details-popup
This shows feedback information of a certain target asset type. Note that the source-uuid is passed as an attribute to the tag. The source-uuid in this example is a user identifier – in this example it is a wallet address. The reason the source-uuid is passed is that feedback signal is shown for the others connected to the user via social networks such as telegram or twitter.
The target-uuid is the unique id of the asset the user wants to see feedback on.
x-utu-feedback-form-popup
This shows a popup form to allow the user to comment on a certain target asset type. Note that the source-uuid in this example is a user identifier. It is the wallet address of the user giving feedback on a certain target asset. The target asset is specified by the target-uuid. In this example the target-uuid is the unique id of the provider of a service. Imagine that the provider could be something like netflix.
Explanation Attributes
target-uuid
This is the universal unique identifier of the asset we want to comment on. It could be something like the id of a product, service or a domain. It is something which has a unique id which can be commented on.
source-uuid
This is the universal unique identifier of the user / entity that is making a comment. It can be something unique like a wallet address contract id. When showing feedback it is also the unique identifier of the user / entity that is wanting to see comments for a certain asset. The reason we pass this id when we want to see feedback is that we look for comments given by users / entites that are in that user’s / entity’s network. For example a user may be connected to other people in telegram, twitter and other social networks.
api-url
This points to the UTU environment (prod / test) where we want to give or get the feedback from.
transaction-id
This is a reference the user can use for any reason they see fit. It can be for example used to tag a group of assets.
target-uuids
This is used by the x-utu-root tag. The idea is that a single network call is made to see if we have recommendations for a bunch of target-uuid’s. Note recommendations are like notifications which tell you if you have any feedback / signal for a given target-id. If you do receive such a notification you can then use the x-utu-feedback-details-popup tag to get that feedback.
target-type
This is the kind of asset one is commenting on. For example if you are commenting on a certain web page you may wish the target-type to be a domain. Note you can add any value here.
Explanation of Wallet Connect Code
Wallet Connect is a library that allows you to connect to different crypto wallets including mobile wallets that scan qrcodes.
There are few steps to integrating with Wallet Connect:
-
Import Web3Modal from @web3modal/react. Web3Modal is a GUI component provided by Wallet Connect 2 to allow the user to connect to web browser wallets or remote mobile wallets via a qrCode.
-
Import functions from wagmi such as: configureChains, createConfig, WagmiConfig
-
Import functions from @web3modal/ethereum such as: EthereumClient, w3mConnectors, w3mProvider
-
Import functions from wagmi/chains such as: arbitrum, mainnet, polygon
-
Get a Wallet Connect projectId from https://cloud.walletconnect.com/sign-in
-
Configure chains:
const { publicClient } = configureChains(chains, [w3mProvider({ projectId })])
- Create wagmiConfig:
const wagmiConfig = createConfig({
  autoConnect: true,
  connectors: w3mConnectors({ projectId, chains }),
  publicClient
});
- Create an ethereumClient:
const ethereumClient = new EthereumClient(wagmiConfig, chains)
- Wrap your react App tag with WagmiConfig and add the Web3Modal tag:
root.render(
  <React.StrictMode>
    <WagmiConfig config={wagmiConfig}>
      <App />
    </WagmiConfig>
    <Web3Modal projectId={projectId} ethereumClient={ethereumClient} />
  </React.StrictMode>
);
Finally in App.tsx you can create a button for users to click to connect to their wallet:
<button type='button' style={{ cursor: 'pointer' }}
          className={`x-utu-btn x-utu-btn-light border-radius`}
          onClick={onConnectToWalletClick} >Connect to Wallet</button>
The implementation of the onConnectToWalletClick function looks like:
let onConnectToWalletClick = async () => { // This connects your wallet await open(); }
Note the open() function is imported from a Web3Modal hook:
const { open } = useWeb3Modal()
Explanation of SDK Code
There are 3 calls we need to make:
(i) Call addressSignatureVerification() - a function you need to import from the sdk
(ii) Call triggerUtuIdentityDataSDKEvent() - a function you need to code and create yourself
(iii) Call initEntity() - a function you need to code and create yourself
In the future triggerUtuIdentityDataSDKEvent() will be moved into the SDK and will be called by the implementation of addressSignatureVerification().
In the future initEntity() will be moved into the SDK and you can import the function and call it.
For the time being you need to code this yourself.
The 3 calls will now be explained in turn:
addressSignatureVerification()
You need to install the sdk in your package.json:
npm install @ututrust/web-components
Then you can import it:
// @ts-ignore
import { addressSignatureVerification, AuthData } from "@ututrust/web-components";
Remember the “// @ts-ignore” line. The SDK does not currentl have *.d.ts type description files. Hence the need to add: “// @ts-ignore”
The calling code looks like:
let authDataResponse = await addressSignatureVerification(
  overrideApiUrl
);
When using production you do not need to pass in the overrideApiUrl and the call can look like:
let authDataResponse = await addressSignatureVerification();
The purpose of addressSignatureVerification() is to login using your wallet address into the UTU backend. The UTU backend returns an authDataResponse that contains the JWT token.
triggerUtuIdentityDataSDKEvent()
This function is used to pass the jwtToken to all parts of the SDK.
const triggerUtuIdentityDataSDKEvent = (
    identityData: AuthData
  ): void => {
    const event = new CustomEvent("utuIdentityDataReady", {
      detail: identityData,
    });
    window.dispatchEvent(event);
  };
initEntity()
This function creates relationships in the neo4j database:
const initEntity = async (data: AuthData, offer: any) => {
    await fetch(overrideApiUrl + "/core-api-v2/entity", {
      method: "POST",
      headers: {
        "Content-Type": "application/json",
        authorization: `Bearer ${data.access_token}`,
      },
      body: JSON.stringify({
        name: offer.id,
        type: "provider",
        ids: {
          uuid: ethers.utils
            .id(offer.id)
            .slice(0, 40 + 2)
            .toLowerCase(),
        },
        // image:
        //  "https://i0.wp.com/utu.io/wp-content/uploads/job-manager-uploads/company_logo/2020/12/cropped-UTU-LG-FV.png?fit=192%2C192&ssl=1",
      }),
    })
      .then((res) => {
        return res;
      })
      .catch((err) => {
        console.log(err);
      });
  };
Currently you need to code this function yourself and pass it the jwt token within AuthData. However later this function will be moved into the SDK and you can just import and call it.
Further Optimisations
In the interests of keeping this example simple we did not store the JWT token in storage. Note the JWT token came back from the backend when the addressSignatureVerification(..) function was called. This JWT token is used in all calls to the backend. So that users do not need to login into UTU everytime the web page refreshes we could store the JWT token in web browser storage.
Other Resources Links
The SDK also has its own docs at:
https://gitlab.com/ututrust/api-sdk/utu-trust-sdk/-/blob/main/packages/utu-web-components/README.md?ref_type=heads